8 QSG f201 version 2.1
Firestar™ f201 laser & Flyer 3D System Quick Start Guide
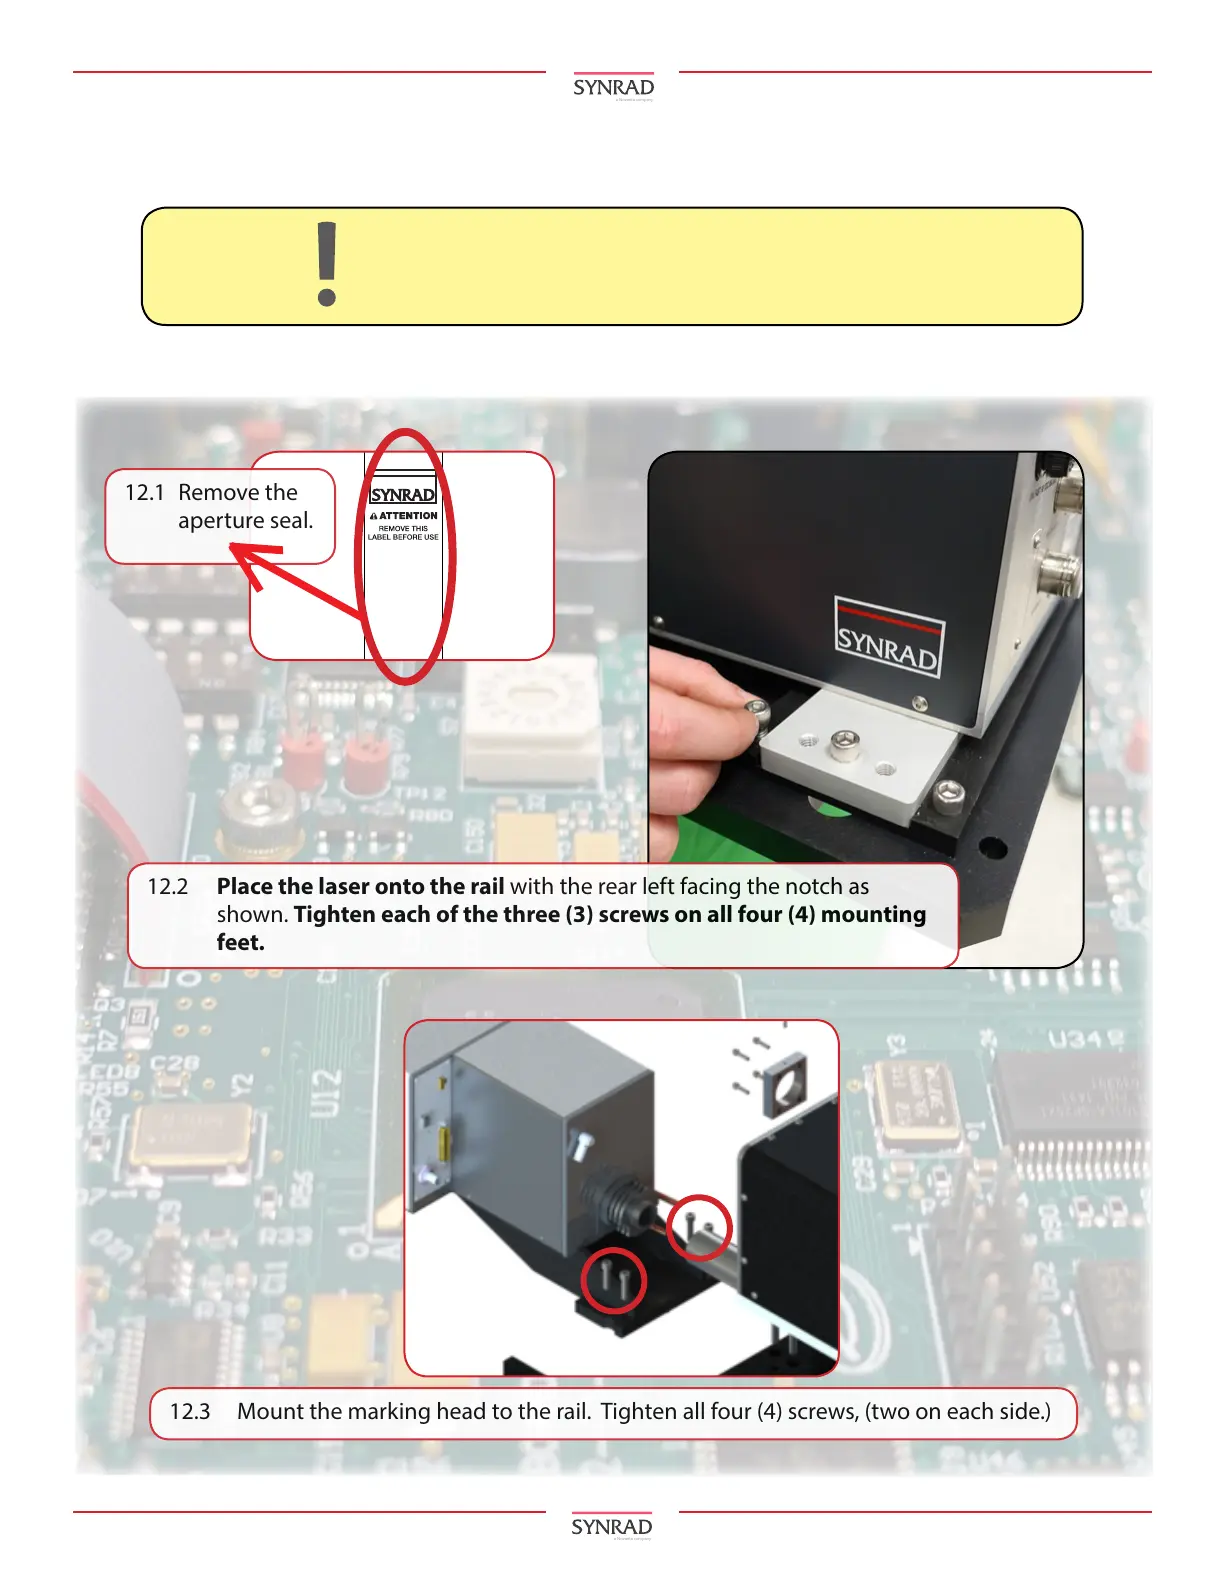
12. Before mounting the laser to the rail, ensure the aperture seal is removed.
AVOID EXPOSURE
Invisible laser radiation
is emitted from
this aperture.
8
9
6
5
4
INTERFACE
LASE
RDY
PWR
AB
7
SA Model Shown
Attention:
12.3 Mount the marking head to the rail. Tighten all four (4) screws, (two on each side.)
12.1 Remove the
aperture seal.
12.2 Place the laser onto the rail with the rear left facing the notch as
shown. Tighten each of the three (3) screws on all four (4) mounting
feet.
Remove the laser aperture self-adhesive lm before mounting to
the rail. Don’t tighten the Allen screws on the clamp until the laser is
mounted to the rail.
Mounting (the Laser and the Marking Head to the rail):
 Loading...

