Discovery DSC™ Getting Started Guide Page 42
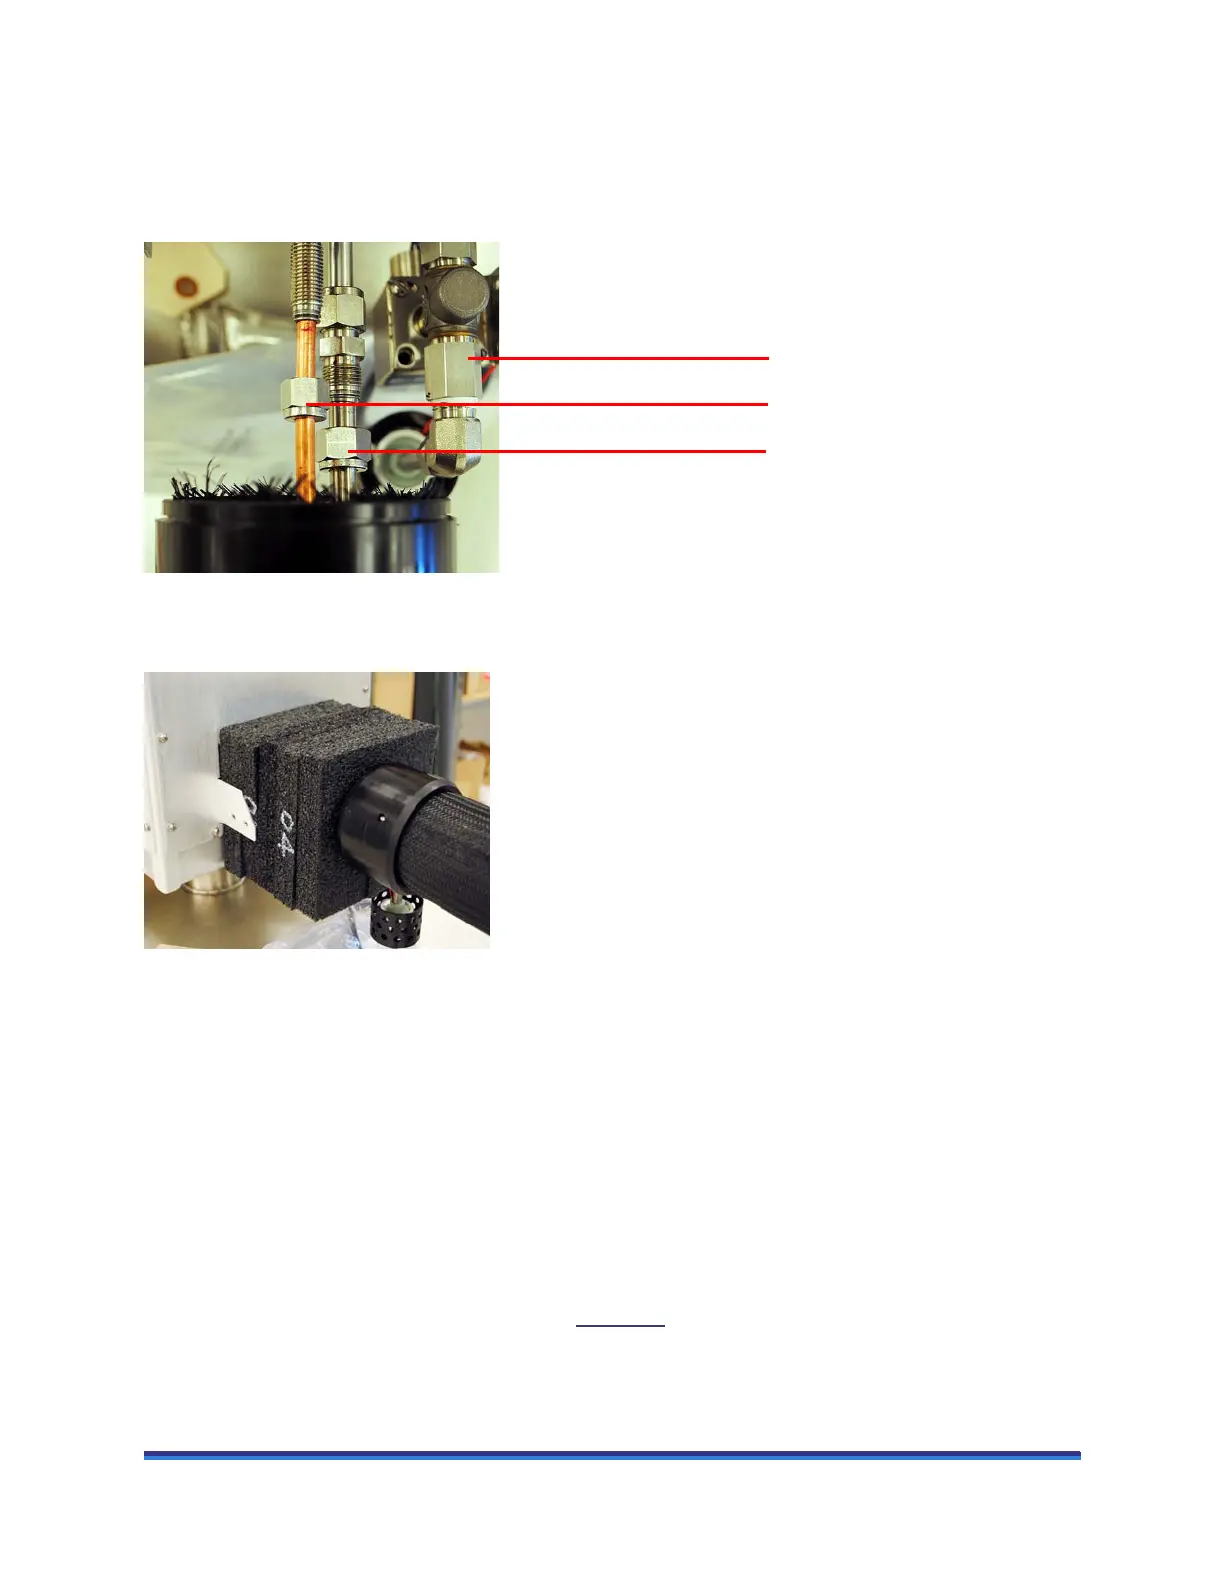
6 Connect the transfer line to the LN Pump:
a Using a 9/16-inch wrench, attach the smaller liquid supply line to the smaller fitting.
b Using an 11/16-inch wrench, attach the larger return line to the remaining fitting as shown in the
figure below.
Figure 24 Transfer line connected to LN Pump fittings.
7 Carefully replace the insulation block around the fittings.
Figure 25 Insulation placed around fittings.
8 Replace both of the head connection cover pieces and the vent cover, making sure to tighten the
thumbscrews finger tight.
Installing the LN Pump to the Tank
Ice and frost are created during normal use of the LN Pump. To prevent system failure, ensure inside of the
tank, pump, and level sensor are clean with no moisture prior to attaching the pump to the tank.
When attaching the pump to the tank, align supply and return lines centered to a handle before installation
of the clamp. Do not align the relief valves or the vent over the vacuum seal cap.
CAUTION: Incorrect alignment of the pump on the tank may cause damage to the vacuum seal cap.
To avoid risk of freezing the vacuum seal cap, Figure 26
shows the orientation of pump to tank.
Attach using 11/16-inch wrench
Attach using 9/16-inch wrench
Vent solenoid–DO NOT LOOSEN
OR TIGHTEN