-22-
14.3 Module Mode Selection
WARNING! Before performing any work on the module, make sure that the pump and module
electricity supply has been switched o and that it cannot be accidently switched on.
There is a mode selection rotary switch in the terminal box. It can be rotated by gently inserting a screwdriver
into the arrow mark on top and rotating the switch to desired value.
IMPORTANT: Cycle the pump power supply o for 20 seconds after a mode change.
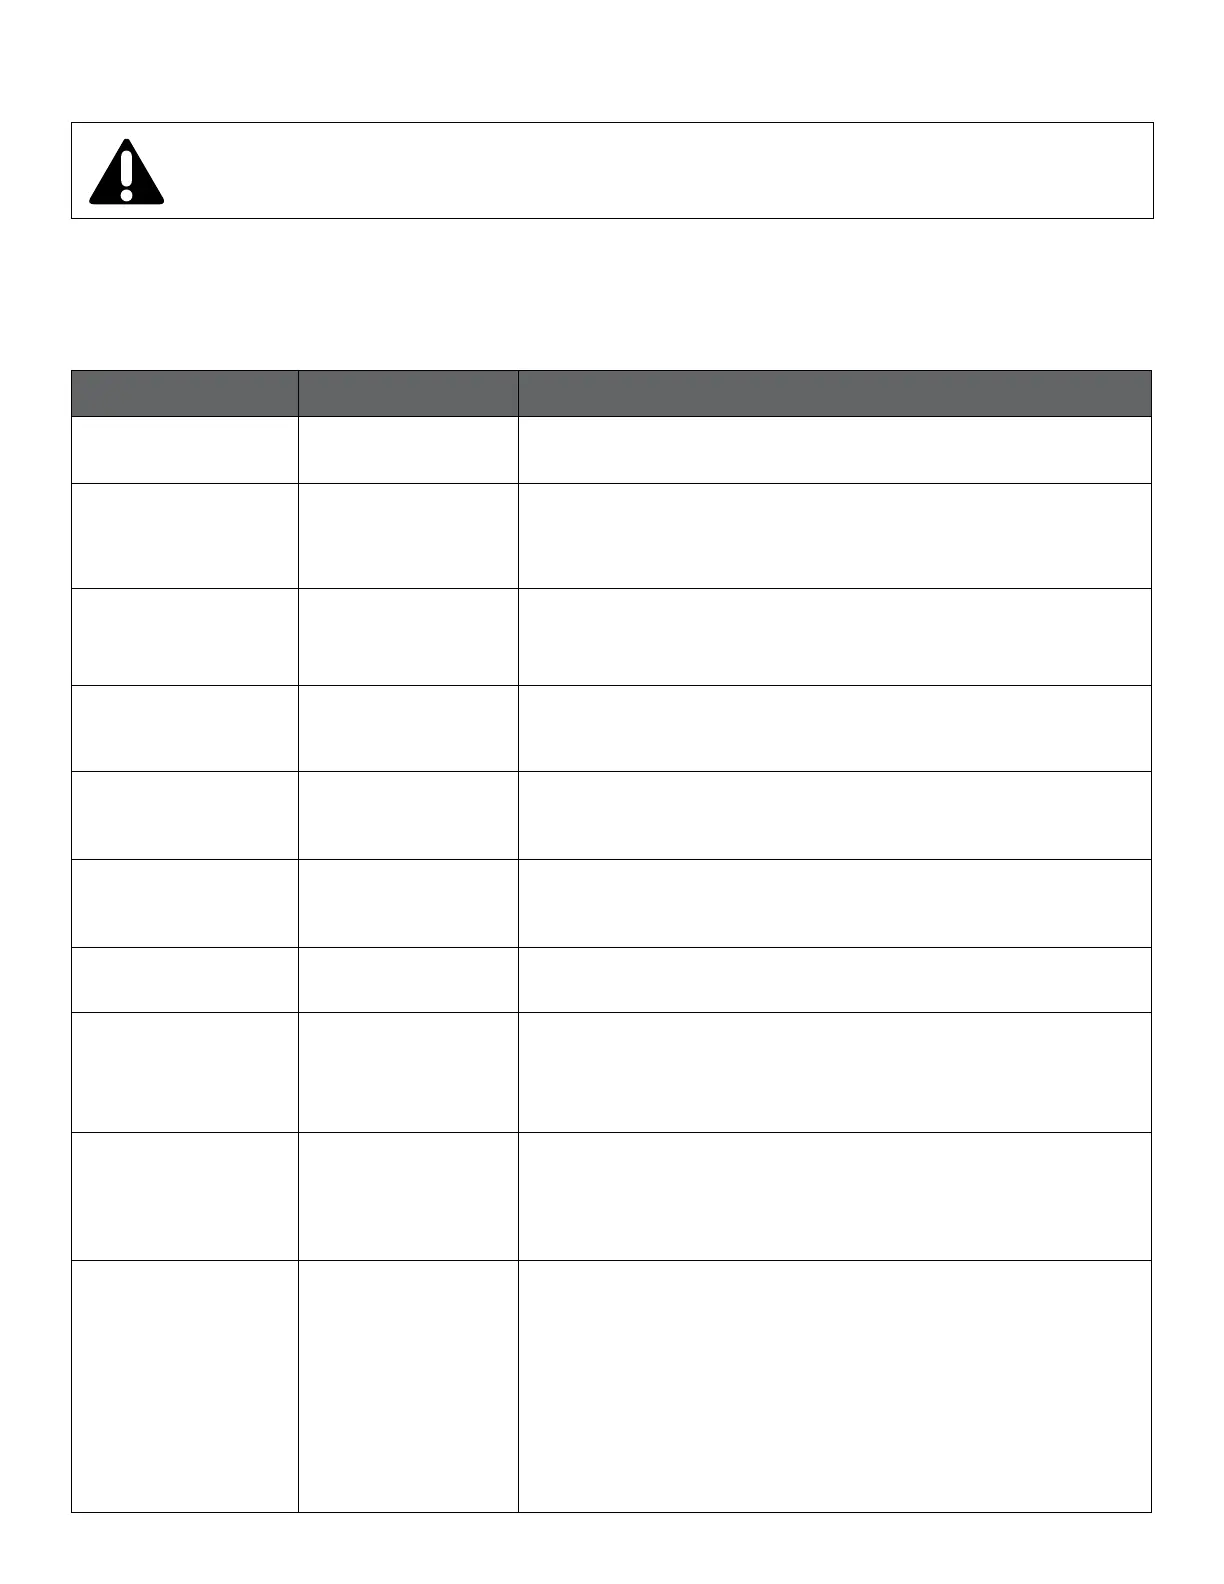
Mode Switch Position Function Description
0 Free conguration Terminal functions are congured over Ethernet interface.
1
Mode 1 Factory
Default
(2-10Vdc control)
SET1 = RUN input
SET2 = MAX input
SET3 = FB (10.5 V) output, used to supply RUN and MAX inputs
See Section 14.4 “Mode 1”
2
Mode 2
(0-10Vdc control)
SET1 = RUN input
SET2 = SPEED input
SET3 = FB (10.5 V) output, used to supply RUN and MAX inputs
See section 14.5 “Mode 2”
3
Mode 3
(PWM Solar)
SET1 = PWM-in (0 % = Pump OFF)
SET2 = PWM-out status
SET3 = FB (10.5 V) output, can be used to supply SET1 and SET2
4
Mode 4
(PWM Heating)
SET1 = PWM-in (100 % = Pump OFF)
SET2 = PWM-out status
SET3 = FB (10.5 V) output, can be used to supply SET1 and SET2
5 RESERVED Reserved for future or customer specic use.
6
Show relay
conguration
LED1 and LED2 will show relay conguration. See section “5 Relay output”.
7
Change relay
conguration
Relay conguration will be increased (0->1, 1->2, 2->0) when power is
turned on.
LED1 and LED2 will show current relay conguration.
See section “5 Relay output”.
8 Twin reset to factory
Same as Mode 9, with exception of:
module IP address is set to 192.168.0.246
Twin IP address is set to 192.168.0.245
9 Reset to factory
This mode will set communication interface to default values.
Main purpose is to restore default settings.
NOTE:
• Disconnect any SET1, SET1, SET2, SET3 will output test voltages of 10 V, 7 V
and 5 V respectively. RS-485 port is actively driven. Relay will cycle.
• It is recommended that all module wires are disconnected to prevent
possible harm to external controllers
 Loading...