19
Storage
In order to store your Taga 2.0 in a car trunk or at home, you can disassemble it
into 4-5 main parts (depending on the storage space). To disassemble and store
Taga, please follow the next steps:
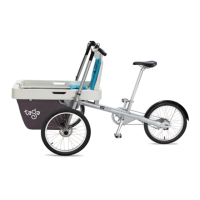
Step 1: Removing the Cargo Compartment
Push down the two handle levers on the sides of the Cargo Compartment, lift
up the front part and slide the rear part of the Cargo Compartment out of the
holder
FIG 35
Step 2: Folding the basket
Fold the basket into the Cargo Compartment and lift the Cargo Compartment by
its handle
FIG 36
. The Cargo Compartment can be stored at home or in your
car while you lock the bike itself.
Step 3: Removing the seat post and saddle
Open the quick release lever and pull out the seat post and saddle.
FIG 37
Step 4: Dismantling the steering posts
Open the quick release levers and pull out the steering posts.
FIG 38
Step 5: Dismantling the frame
Open the quick release levers that secure the front and rear frames together,
release the nuts and pull out the quick release screws. Pull the front part of the
rear frame up and off the front frame to disconnect the two
FIG 39
.
Remember to re-attach the screws and nuts to the rear frame so that they don’t
get misplaced.
Step 6: Arranging the storage space
Now you have 4 main parts
FIG 40
. Position these in such a way that they don’t
touch each other to avoid scratches.
Optional: Dismantling the wheels
To save more space, open the front wheels’ quick release levers and disconnect
the wheels from the front frame.
For re-assembling the wheels, go back to step 2 in the Chassis assembly section.
If you have a tight storage space, use foam pads and/or blankets to
separate the parts to avoid scratches or damage.
CAUTION