TB8100 Installation Guide Installation 15
© Tait Electronics Limited February 2007
1.8.2 Mounting the Subrack
Caution We recommend that you have another person help
you lift the subrack. If necessary, remove the mod-
ules from the subrack before lifting it (refer to
“Replacing Modules” in the Installation and Opera-
tion Manual).
1. Remove the front panel by undoing the fasteners with a quarter turn
anti-clockwise, as described in “Replacing Modules” in the
Installation and Operation Manual.
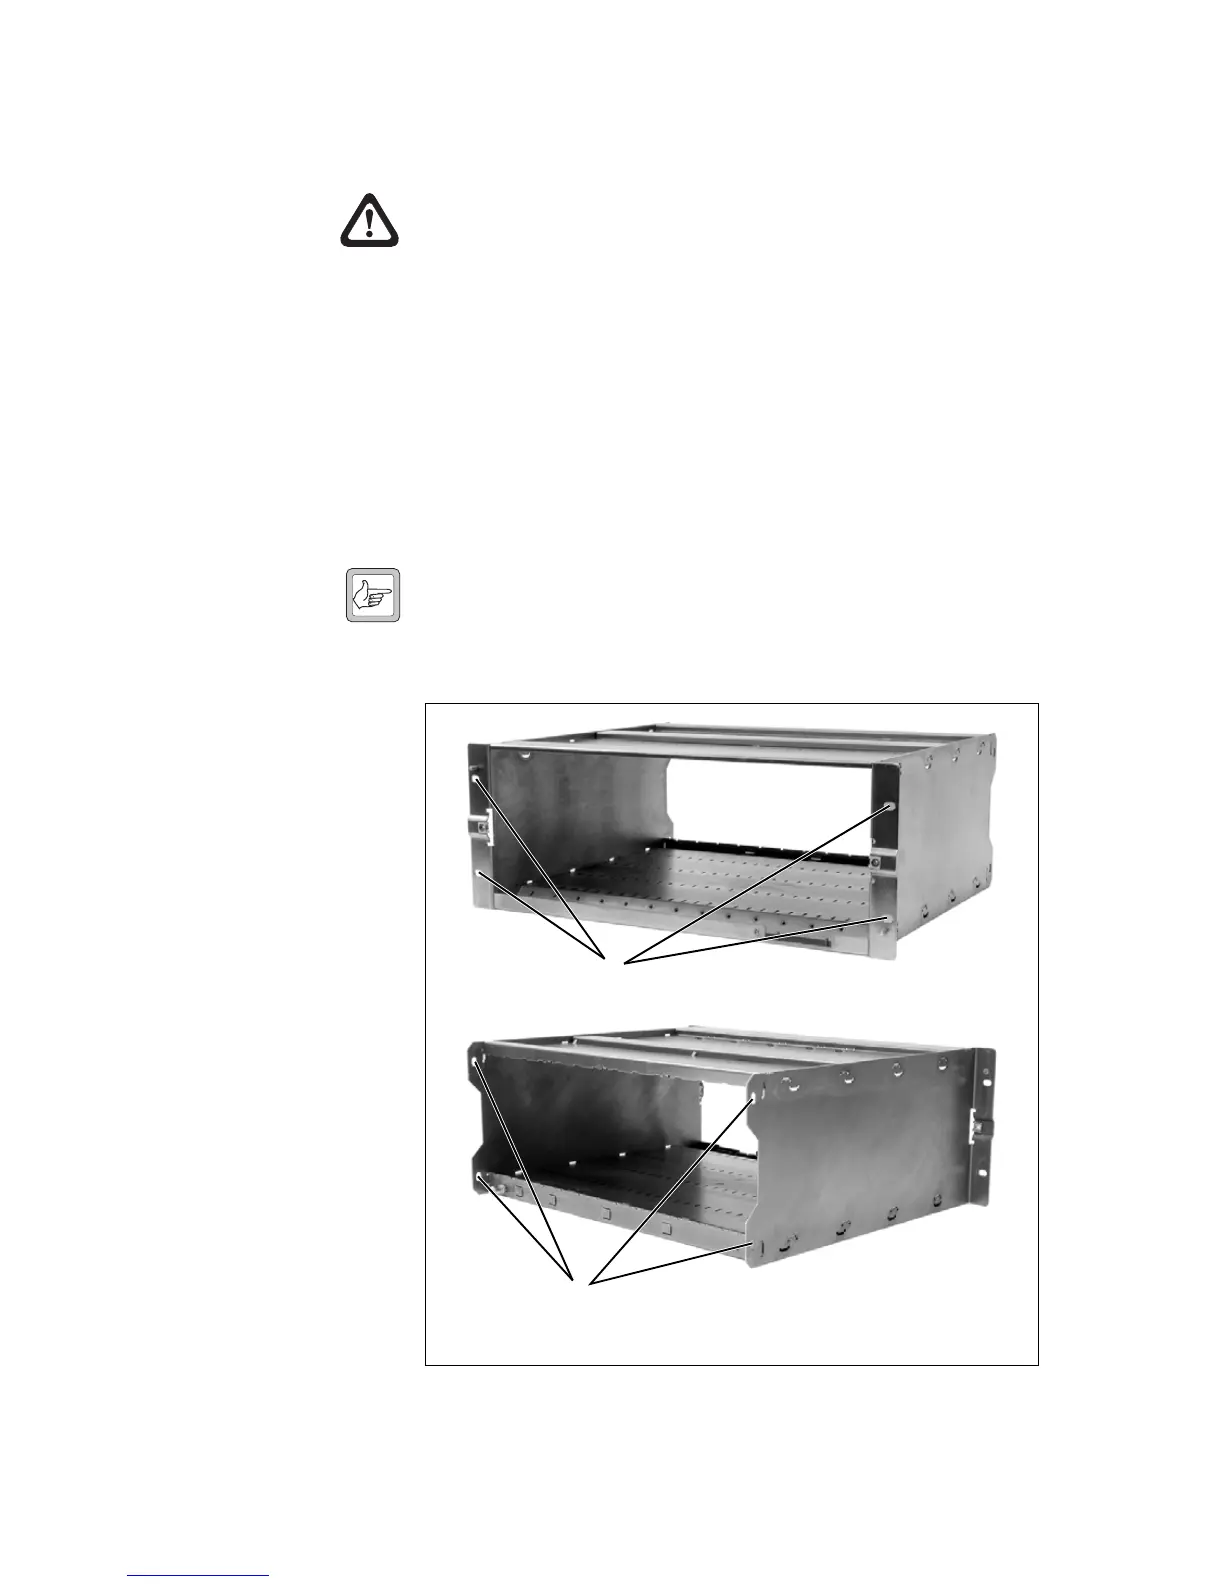
2. Fit the subrack into the cabinet or rack and secure it firmly with an
M6 (or 0.25in if you are using imperial fittings) screw, flat and spring
washer in each of the four main mounting holes
b, as shown in
Figure 1.5.
Note If you need extra mounting security, there are additional mount-
ing holes
c provided at the rear of the subrack for auxiliary sup-
port brackets.
Figure 1.5 Subrack mounting points
b
main mounting holes - front
c
auxiliary mounting holes - rear
front view
rear view
b
c

 Loading...


