Mounting
and
Connecting
moisture and cause failure .
• Do not place
the
Monitor
set
at
any
place with strong
magnetic
field,
or
else it
may
be interfered with and
damaged
by
electromagnetic
wave
.
~---
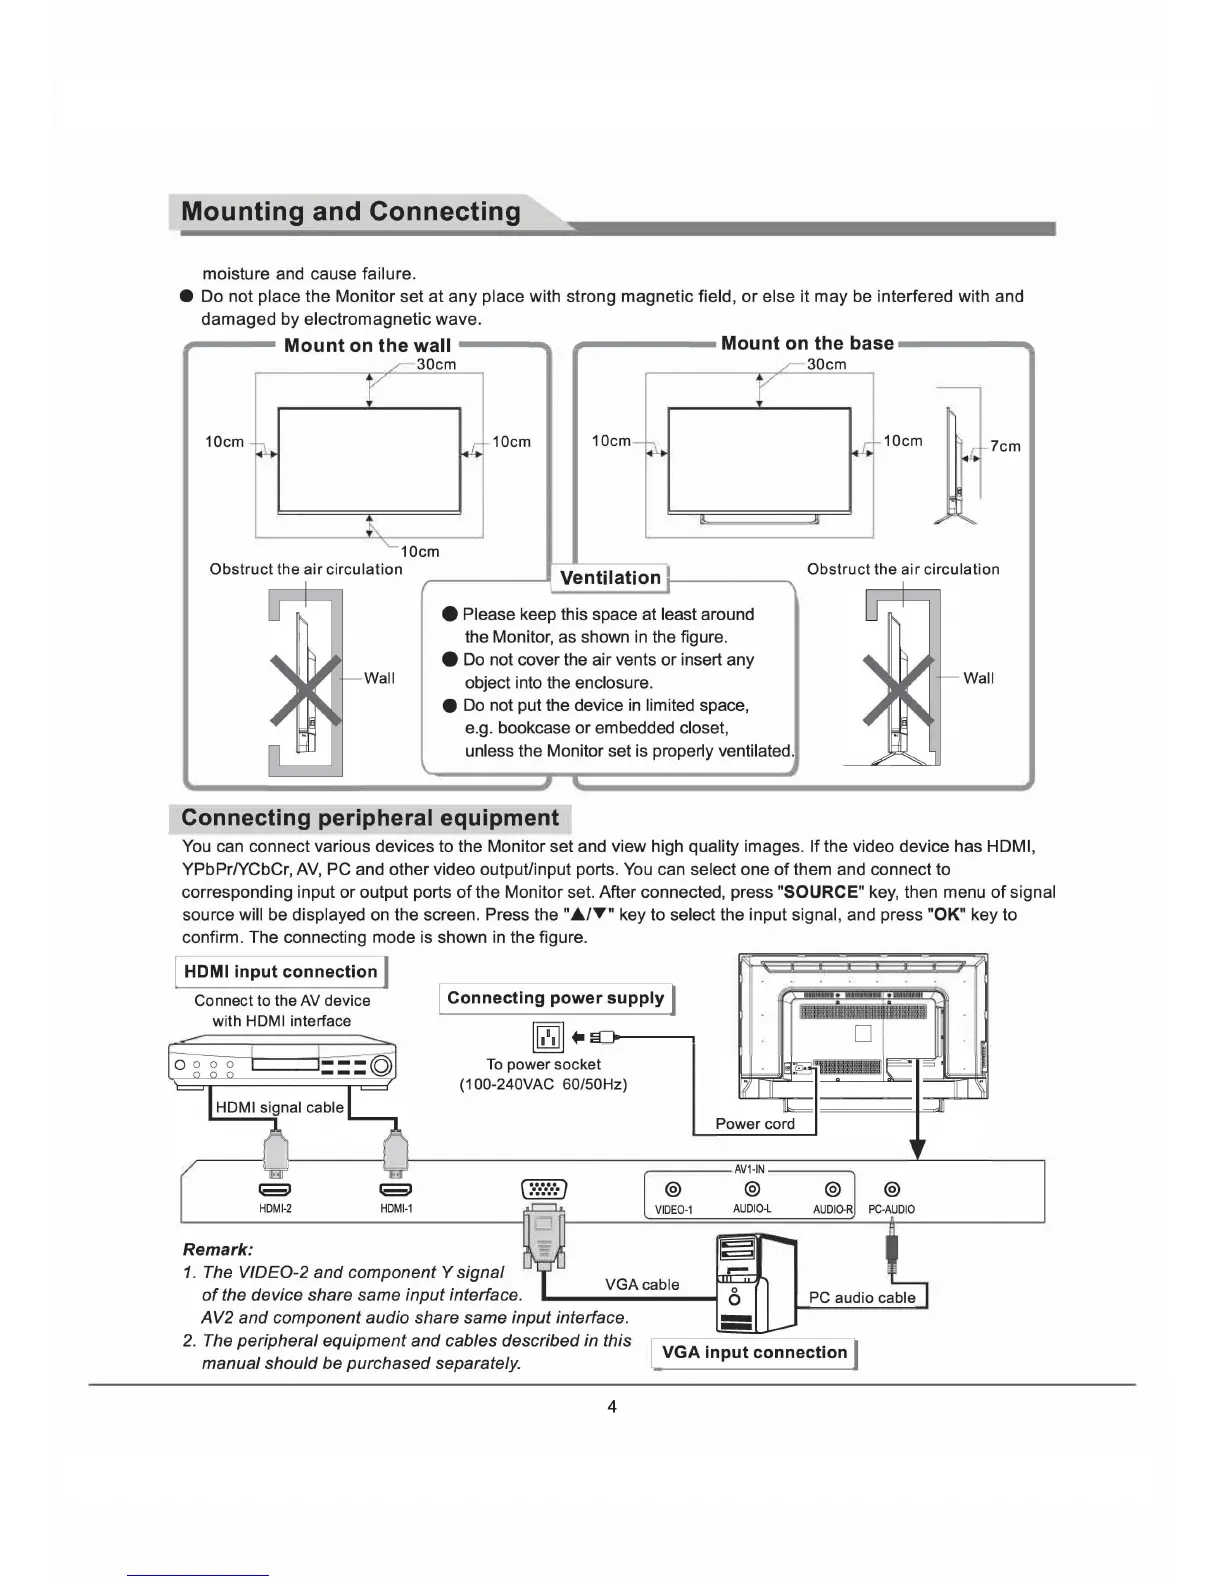
Mount on the wall Mount on the
base
-----"
~
30 30
~
.
cm cm
r r
10cm
:;1-
.
~
10cm
10cm
-
~
~
10cm
7cm
~
'-
10cm
Obstruct
the
air
circulation
r---------1-
v
~
e
~
n
~
t
~
iI
~
a
~
ti
~
o
~
n
j_--------l
Obstruct
the
air
circulation
Wall
• Please keep this space at least around
the Monitor, as shown in the figure.
• Do not cover the air vents
or
insert any
object into the enclosure.
• Do not put the device
in
limited space,
e.g. bookcase
or
embedded closet,
unless the Monitor set is properly ventilated.
Connecting
peripheral
equipment
Wall
You can connect various devices to the Monitor set and view high quality images. If the video device has HOMI,
YPbPrIYCbCr,
AV, PC and other video output/input ports. You can select one
of
them and connect to
corresponding input
or
output ports
of
the Monitor set. After connected, press "SOURCE" key, then menu
of
signal
source will be displayed on the screen. Press the
".,..,,"
key to select the input signal, and press "OK" key to
confirm. The connecting mode is shown in the figure.
I HOMI
input
connection
]
[
Connecting
power
SUPPlY
]
Connect to the AV device
. .
.
~
with HDMI interface
[G!ill
.. V
0
I-
j
, - I
1
0
g g g
===©
I
To
power socket
~
''11!!1111!111!!11111
1
IE
=
(100-240VAC
60/50Hz)
-
1
"[
11
-
-I
HOMI
~
,'
"ble
~
~
JlI
Power cord
"
r
~
AV1-IN
~ ~
(
..........
]
l @
@
@
~
J
@
.....
HDMI-2
HDMI-1
~
VIDEO-1
AUDIO-L
AUDIO-R
PC-AUDIO
Remark:
~
~
-
I
1. The VIDEO-2 and component Y signal
~
VGAcable
~
PCaudioca~
of
the device share same input interface.
0
AV2 and component audio share same input interface.
-
-
-
2.
The penpheral eqUIpment and cables descnbed
In
thIs L I
VGA
input
connection
manual should be purchased separately. _ _
4

 Loading...