17-317-3TX / TXH / TXB 180S - 400L (Rev. 4/23/07)TX / TXH / TXB 180S - 400L (Rev. 4/23/07)
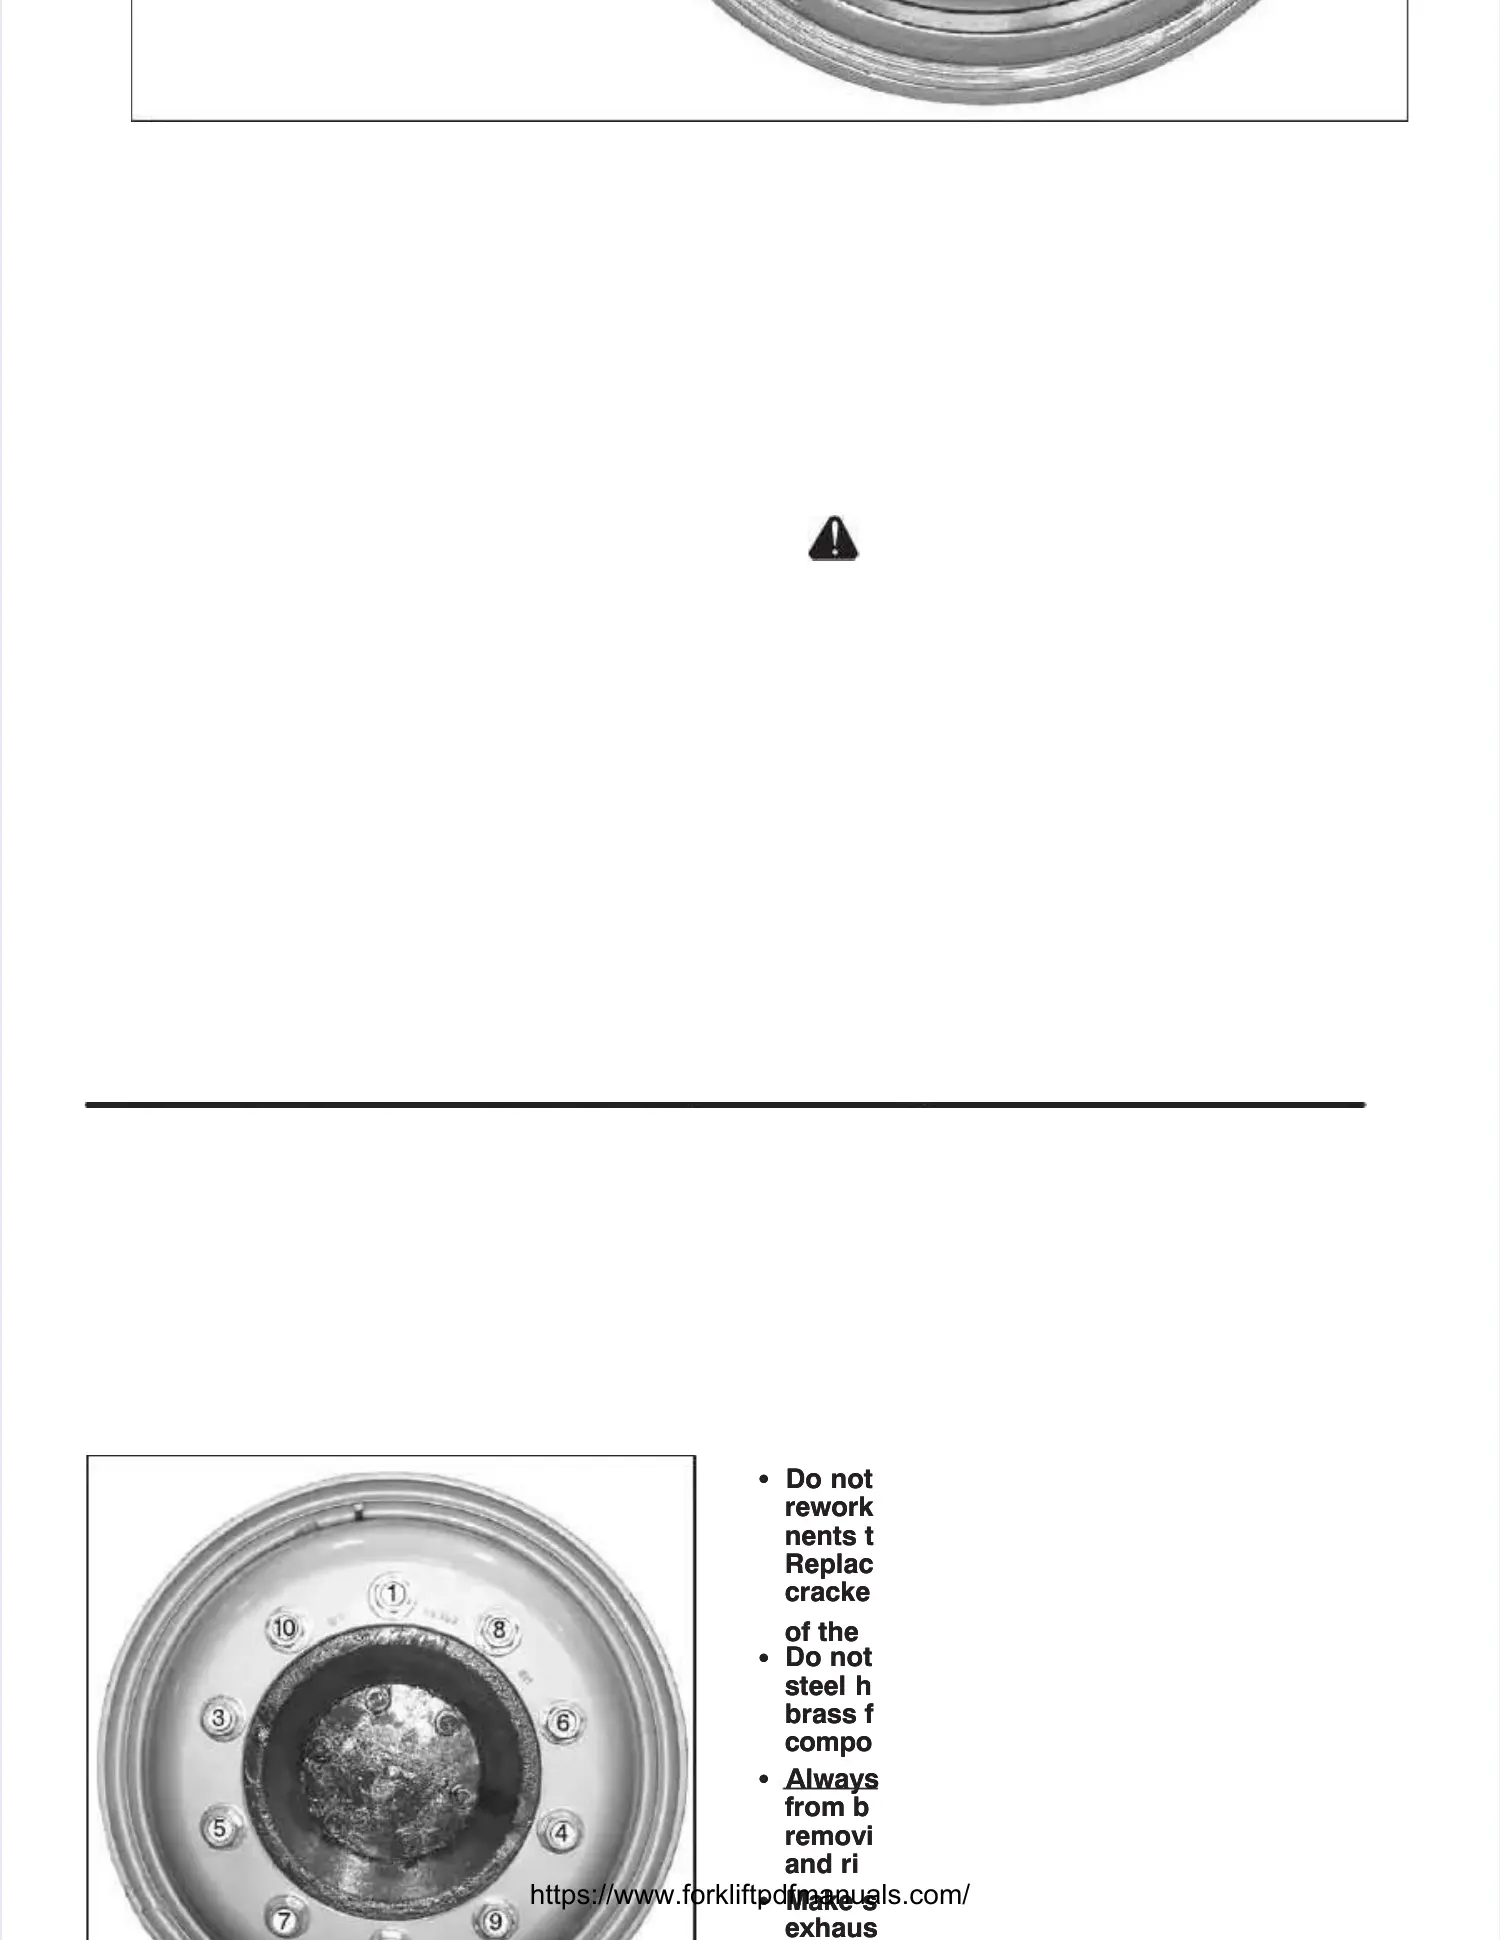
Illustration 17-2. Illustration 17-2. Drive Axle Drive Axle Wheel Nuts Wheel Nuts TTorquing Sequence orquing Sequence (TXH400L)(TXH400L)
2.2. Any rAny rim or rim or rim coim compomponent nent whiwhich is ch is bent bent out oout off
shape, pitted from corrosion, broken, orshape, pitted from corrosion, broken, or
cracked must cracked must not be used. not be used. It must It must be markedbe marked
or tagged as unserviceable and removed fromor tagged as unserviceable and removed from
the service the service area and area and discarded. discarded. When partWhen part
condition is in doubt, replace it.condition is in doubt, replace it.
3.3. EnsEnsure thure that all pat all partarts cors correcrectly mtly matcatch the tyh the typepe
of wheel of wheel being assembled. being assembled. Check with Check with thethe
manufacturer if there is any doubt.manufacturer if there is any doubt.
4.4. Rim bRim bases, ases, rim frim flangeslanges, rim , rim guttegutters, lrs, lock ock rings,rings,
and bead seat bands must be free of any dirt,and bead seat bands must be free of any dirt,
surface rust, scale or loose / flaked rubbersurface rust, scale or loose / flaked rubber
buildup prior to re-assemblybuildup prior to re-assembly. . All dirt All dirt and rustand rust
must be removed from the lock ring gutter.must be removed from the lock ring gutter.
Clean and repaint rims to stop the detrimentalClean and repaint rims to stop the detrimental
effects of corrosion.effects of corrosion.
5.5. Air inAir inflaflatiotion equin equipmepment shont should hauld have a filve a filter inter in
the air line cable of removing moisture fromthe air line cable of removing moisture from
the airthe air. . This will This will help in preventhelp in preventing corrosion.ing corrosion.
6.6. RimRims havs have a usefe a useful serul servicvice life te life that is dhat is depeepen-n-
dent on variables such as over / under inflationdent on variables such as over / under inflation
pressures, duty cycle, yard conditions, andpressures, duty cycle, yard conditions, and
overloading foverloading from rom example. example. Although actAlthough actualual
rim life will vary from one application to anoth-rim life will vary from one application to anoth-
er, replacement after 10,000 hours of serviceer, replacement after 10,000 hours of service
life is life is recommended. recommended. These rims These rims should beshould be
tagged as unserviceable and removed fromtagged as unserviceable and removed from
the service area and discarded.the service area and discarded.
Tire / Wheel JackingTire / Wheel Jacking
Never rely solely Never rely solely upon jacks oupon jacks or hoists tor hoists to
support the lift truck while removing tire /support the lift truck while removing tire /
wheel.wheel.
Before placing Before placing jack in positijack in position, block tiron, block tiree
and wheel on the other side of the truck.and wheel on the other side of the truck.
Always place Always place oak or ooak or other hardwood ther hardwood blockblock
cribbing under the load after the jack orcribbing under the load after the jack or
hoist has lifted hoist has lifted the load. the load. Make sure the Make sure the crib-crib-
bing is large enough to have sufficient con-bing is large enough to have sufficient con-
tact with the supported load to be stable.tact with the supported load to be stable.
Never get uNever get undernder, near or between , near or between heavyheavy
objects that are supported only by a jack orobjects that are supported only by a jack or
hoist.hoist.
Always use Always use hardwood bhardwood blocks under locks under jack.jack.
tool about 10tool about 10°°to keep to keep it firmly it firmly in place. in place. If itIf it
slips off, it can fly with enough force to kill.slips off, it can fly with enough force to kill.
Always stand to one side when you applyAlways stand to one side when you apply
hydraulic pressure.hydraulic pressure.
Never force or Never force or hammer rim hammer rim components,components,
especially rim components under pressure.especially rim components under pressure.
Never attempt to welNever attempt to weld on an infld on an inflated tire / rimated tire / rim
assembly.assembly.
Do not uDo not under any cirnder any circumstances, attempt cumstances, attempt toto
rework, weld, heat or braze any rim compo-rework, weld, heat or braze any rim compo-
nents that are cracked, broken, or damaged.nents that are cracked, broken, or damaged.
Replace with new parts, or parts that are notReplace with new parts, or parts that are not
cracked, broken, or damaged, and which arecracked, broken, or damaged, and which are
of the same size, type and make.of the same size, type and make.
Do not hammDo not hammer on rimer on rims or componens or components withts with
steel hammers. steel hammers. Use rubberUse rubber, lead, pl, lead, plastic, orastic, or
brass faced mallets, if it is necessary, to tapbrass faced mallets, if it is necessary, to tap
components together.components together.
Always exhaust all Always exhaust all air from air from a single tire a single tire andand
from both tires of a dual assembly prior tofrom both tires of a dual assembly prior to
removing any rim components such as nutsremoving any rim components such as nuts
and rim clamps.and rim clamps.
Make sure Make sure to remove to remove the valve cothe valve core tore to
exhaust all air exhaust all air from the tifrom the tire. re. Remove bothRemove both
 Loading...