27
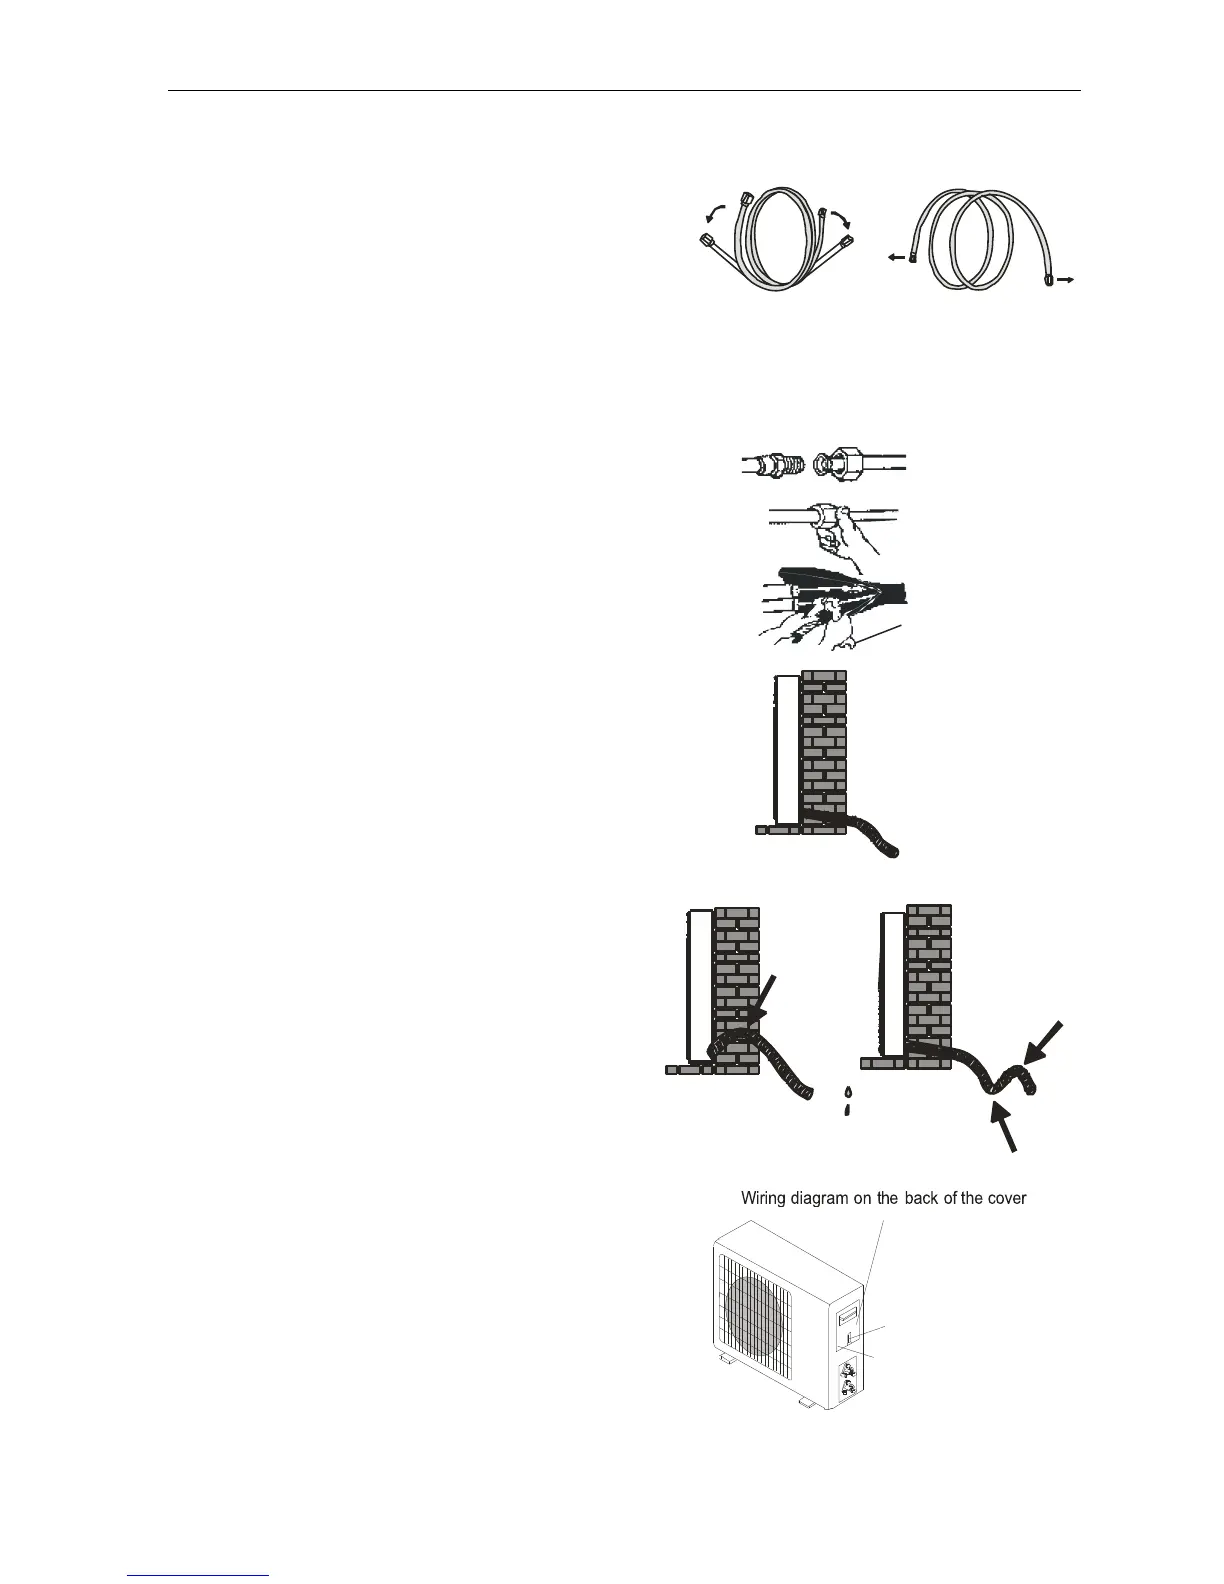
10.2.4 Connecting the pipes.
Do not remove the cap from the pipe until
connecting it, to avoid dampness or dirt
from entering.
If the pipe is bent or pulled too often, it will
become stiff. Do not bend the pipe more
than three times at one point.
When extending the rolled pipe, straighten
the pipe by unwinding it gently as shown in
the picture.
10.2.5 Connections to the indoor unit
1).Remove the indoor unit pipe cap (check that
there is no debris inside).
2).Insert the fare nut and create a flange at the
extreme end of the connection pipe.
3).Tighten the connections by using two wrenches
working in opposite directions.
10.2.6 Indoor unit condensed water drainage
The indoor unit condensed water drainage is
fundamental for the success of the installation.
1).Place the drain hose below the piping, taking
care not to create siphons.
2).The drain hose must slant downwards to aid
drainage.
3).Do not bend the drain hose or leave it protruding
or twisted and do not put the end of it in water.
If an extension is connected to the drain hose,
ensure that it is lagged when it passes into the
indoor unit.
Insert the pipe connection into the relative slot.
Press to join the pipe connection to the base.
10.2.7 Outdoor electronic connections
1. Take the cover away.
2. Connect the cable wires to the terminal board
using the same numbering as in the indoor unit.
3. For the electrical connections, see the wiring
diagram on the back of the cover
4. Fasten the cables with a cable-clamp.
5. An efficient earth connection must be ensured.
6. Replace the covers.