EasyManuals Logo

Teac A-4010GSL User Manual

Teac A-4010GSL
72 pages
To Next Page IconTo Next Page
To Previous Page IconTo Previous Page
Page #8 background imageLoading...
Page #8 background image
3
PARTIAL
DISASSEMBLY
TAPE
TRANSPORT
REMOVAL
(WITH
FRONT
PANEL
INSTALLED)
-
Lay
the
unit
face
down
on
a
soft
mat.
-
With
rear
cover
removed,
loosen
and
remove
three
screws
at
rear
sides
of
chassis.
ae
-
Carefully
slide
transport
from
wooden
case.
AMPLIFIER
REMOVAL
~
Remove
four
screws
from
amplifier
front
panel.
-
Slide
amplifier
forward,
remove
four
screws
from
amplifier
cover,
remove
cover.
-
Disconnect
the
cables
connecting
the
tape
transport
and
amplifier.
NOTE:
Edge
connectors
are
held
in
PC
board
by
two
retaining
nuts.
-
To
reinstall
the
amplifier,
reverse
the
procedure,
be
sure
to
reconnect
the
cables.
FACE
PLATE
REMOVAL
-
Place
the
unit
in
horizontal
position.
-
Pull
off the
pinch
roller
and
unscrew
capstan
dust
cap.
Remove
head
assembly
cover
after
re-
moving
mounting
screw
on
top
of
cover.
-
Remove
retaining
screw
on
left
tension
arm
and
lift
tension
arm
upward.
~
Loosen
and
remove
the
reel
height
ad-
justment
screw
in
each
reel
turntable.
~
Lift
off
the
reel
tables.
Remove
8
small
Phillips
screws
from
the
front
panel
(1
at
each
corner,
1
above
and
below
each
reel
motor).
Front
panel
may
now
be
removed.
~
Reverse
the
procedure
for
reassembly.
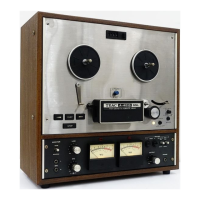
Fig.
3-1
Unit
Disassembly

Questions and Answers:

Question and Answer IconNeed help?

Do you have a question about the Teac A-4010GSL and is the answer not in the manual?

Teac A-4010GSL Specifications

General IconGeneral
BrandTeac
ModelA-4010GSL
CategoryStereo System
LanguageEnglish

Related product manuals