3. PARTS & CONNECTIONS
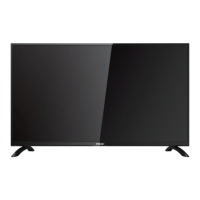
3.1 Front View
INPUT:
Display the input source menu.
MENU: Display/exit the OSD menu.
CH+/-: Scan through channels.
VOL+/-: Adjust the volume.
POWER: Turn on/standby the TV set.
8
Parts & Connections
USB Multimedia
Playback
Initial Setup &
Input Sources
Remote Control
On-Screen DisplayTV & Electronic
Programme Guide
Digital Video
Recording (DVR)
(OSD) Menu
Reference
LED Indicator
MENU
CH+
CH-
VOL+ VOL- POWER
INPUT
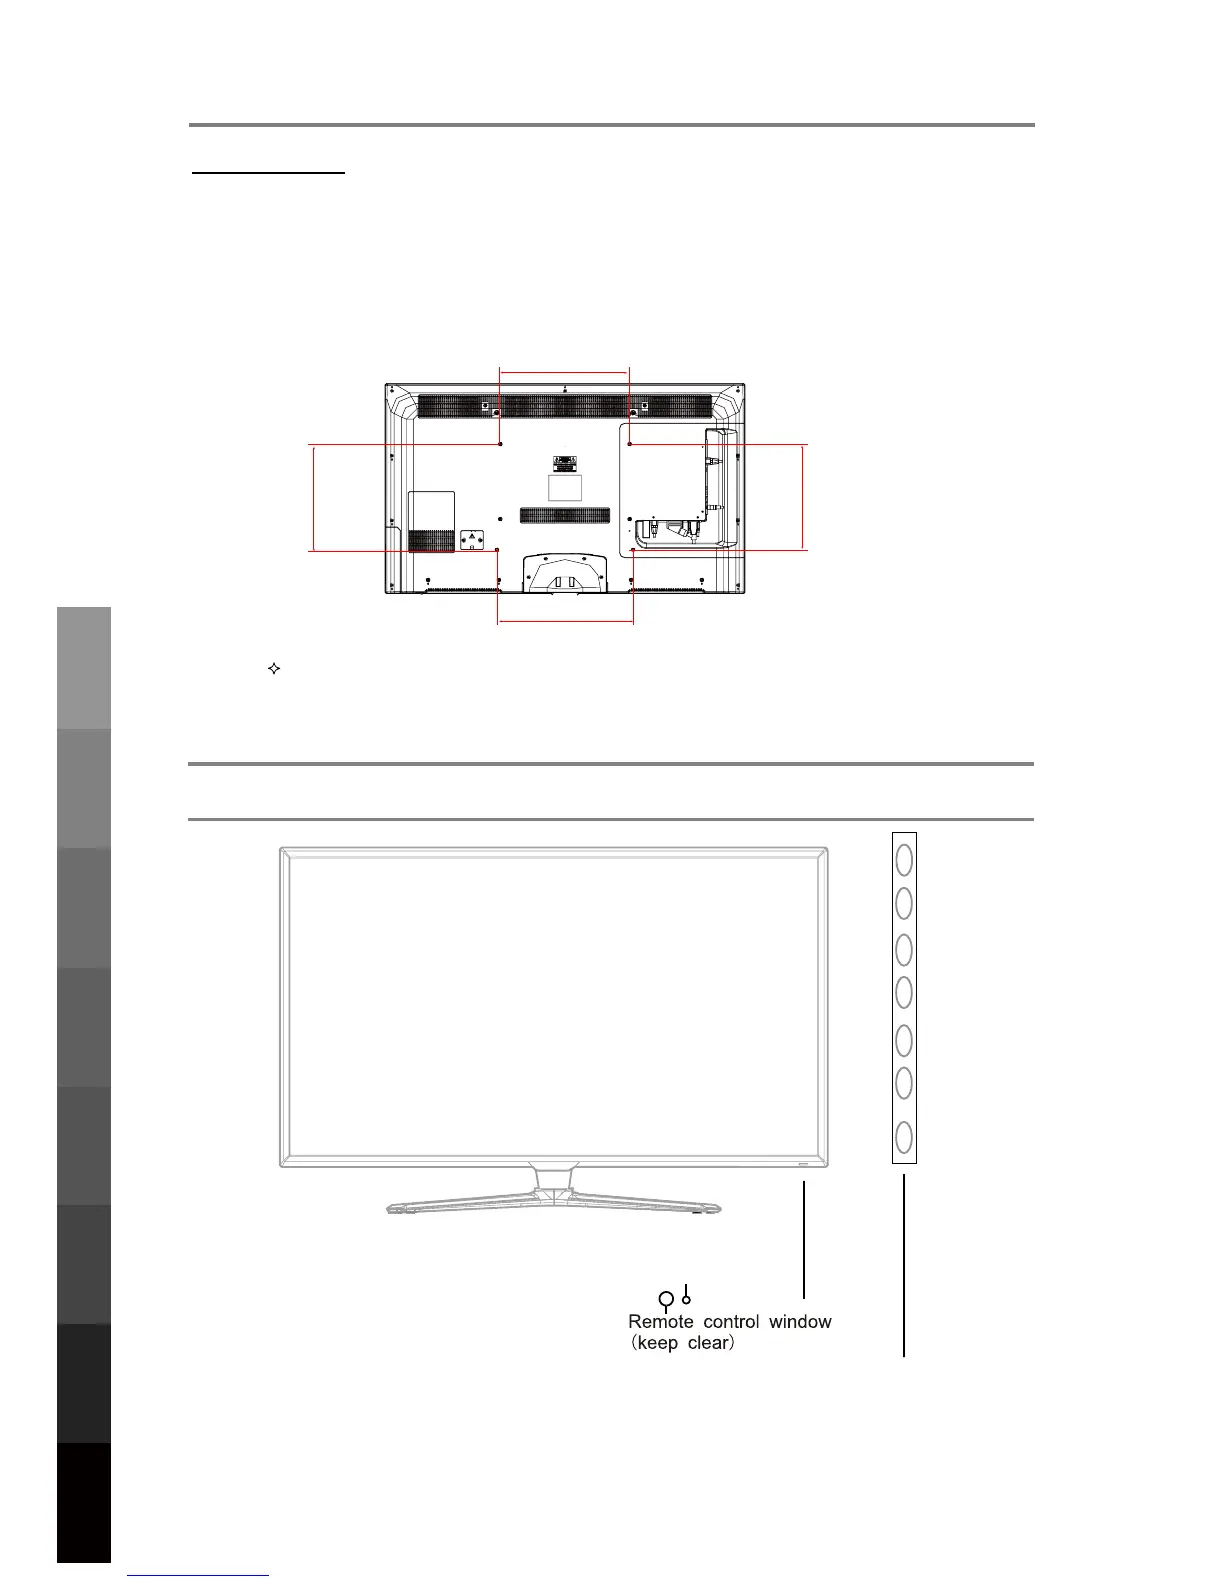
2. TV PLACEMENT SETUP
400mm
400mm
400mm
400mm
Thread hole size –M6 x 12mm depth (TV Mounting Screw Size) on the TV.
Wall Mounting
6. Fasten 4 eyebolts into the four screw holes on the TV’s rear panel according to the
diagram.
7. Fasten the wall mounting bracket using screws onto the wall.
8. Connect the eyebolts and the wall bracket securely with strong rope
9. Carefully check that all fastenings are secure before releasing the TV.