EasyManua.ls Logo

Technics SL-J2 User Manual

Technics SL-J2
30 pages
To Next Page IconTo Next Page
Page #1 background imageLoading...
Page #1 background image
ORDER
NO.
DAD84060093C8
Service
Manual
Quartz
Direct
Drive
Automatic
Turntable
System
(TaD)
is
the
standard
mark
for
the
‘‘P-mount’’
plug-in-connector
system.
Products
carrying
this
mark
are
inter-changeable
and
compatible
with each
other.
*The
colors
of
this
model
include
silver
and
black.
*
The
black
type
model
is
provided
with
(K)
in
the
Service
Manual.
Areas
SL-J2/(K)
(E],
(EK),
[XLI,
[EG)
,
[EB],
[EH],
[EF],
[Ei],
[EC],
[XA],
[XM]
*[E]
*
[EK]
*
[XL]
*
[EG]
*
(EB)
*
[EH]
*
[EF]
*
[Ei}
*
[EC]
*
[XA]
*
(XM
ce
is
available
in
Switzerland
and
Scandinavia.)
is
available
in
United
Kingdom.
is
available
in
Australia.
is
available
in
F.R.
Germany.
is
available
in
Belgium.
is
available
in
Hoiland.
is
available
in
France.
is
available
in
Italy.
is
available
in
Czechoslovakia.
is
available
in
Southeast
Asia,
Oceania,
Africa,
Middle
Near
East
and
Central
South
America.
is
available
in
Central
South
America.
_)
Please
use
this
manual
together
with
the
service
manual
for
Model
No.
SL-J2,
Order
No.
DAD84050089C1.
English
Specifications
@
General
Power
supply:
Power
consumption:
Dimensions:
(W
XH
X
D)
Weight:
@
Turntable
section
Type:
Features:
Drive
method:
Motor:
Specifications
are
subject
to
change
without
notice
for
further
improvement.
Weight
and
dimensions
shown
are
approximate.
~220
V,
50
Hz
12W
31.5
X
8.8
X
31.5
cm
(12-1/2”
X
3-1/2”
X
12-1/2")
(Maximum
height
when
dust
cover
is
open.)
39
cm
(15-23/64")
4.3
kg
(9.5lb.)
Quartz
direct
drive
Fully
automatic
turntable
Auto
start/Auto
lead-in
Auto
return
Auto
stop
Repeat
play
Direct
music
select
play
Forward
and
backward
skip
play
Forward
and
backward
search
play
Auto
size
select
Record
presence
detection
Direct
drive
Brushless
DC
motor
Drive
control
method:
Turntable
platter:
Turntable
speeds:
Wow
and
flutter:
“Measured
by
obtaining
signal
from
built-in
frequency
generator
of
motor
assembly.
Rumble:
Tonearm
section
Type:
Effective
length:
Tracking
error
angle:
Effective
mass:
Resonance
frequency:
Tonearm
drive
motor:
Phono
cable
capacitance:
Technics
Quartz-phase-locked
control
Aluminum
die-cast
Diameter
30
cm
(12”)
33-1/3
rpm
and
45
rpm
Auto
speed
select
(Manual
selection
possible)
0.012%
WRMS*
0.025%
WRMS
(JIS
C5521)
+0.035%
peak
(IEC
98A
Weighted)
—56
dB
(IEC
98A
Unweighted)
—78
dB
(IEC
98A
Weighted)
Linear
tracking
tonearm
4-pivot
gimbal
suspension
10.5
cm
(4-1/8)
Within
+0.1°
9
g
(including
cartridge)
12
Hz
DC
motor
150
pF
Matsushita
Electric
Trading
Co.,
Ltd.
P.O.
Box
288,
Central
Osaka
Japan
Question and Answer IconNeed help?

Do you have a question about the Technics SL-J2 and is the answer not in the manual?

Technics SL-J2 Specifications

General IconGeneral
BrandTechnics
ModelSL-J2
CategoryTurntable
LanguageEnglish

Summary

Specifications

General

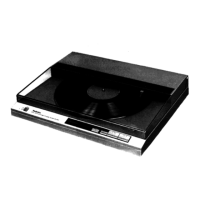
Covers basic operational parameters like power supply, consumption, dimensions, and weight.

Turntable section

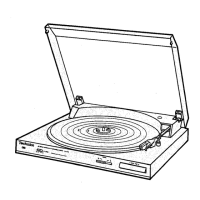
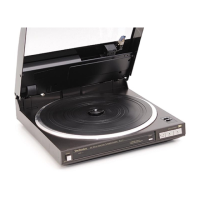
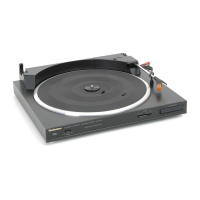
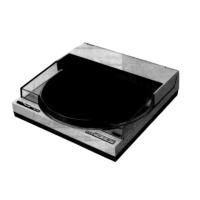
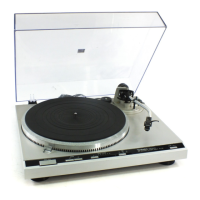
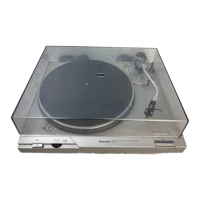
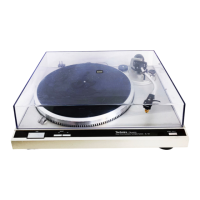
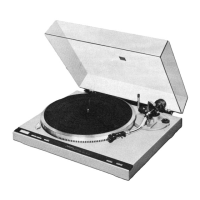
Details the turntable type, features, drive method, motor, and platter specifications.

Tonearm section

Describes the tonearm type, effective length, error angle, mass, resonance, and motor.

Cartridge section

Provides specifications for the pickup cartridge, including type, frequency response, output voltage, and impedance.

MEASUREMENTS AND ADJUSTMENT

Start position

Procedure to adjust the tonearm's starting position for accurate record playback.

Clock frequency

Steps for measuring and adjusting the clock frequency for stable operation.

Sensor gain

Guide for adjusting the sensor gain for optimal performance and detection.

Sensor resolution

Instructions on calibrating the sensor resolution for accurate tracking.

Stylus cue-down position

Procedure for setting the correct stylus cue-down position to prevent damage.

Tonearm offset angle

Steps to measure and adjust the tonearm's offset angle for minimal tracking error.

Servo gain and offset voltage

Detailed guide for adjusting servo gain and offset voltage for tonearm stability.

EXPLODED VIEW

Tonearm part

Visual breakdown of the tonearm assembly, showing individual components and their arrangement.

PRINTED CIRCUIT BOARD

Power source circuit

Diagram illustrating the power supply circuit, including transformers and regulators.

REPLACEMENT PARTS LIST

CABINET and CHASSIS PARTS

List of replacement parts for the unit's exterior casing and internal chassis structure.

TONEARM PARTS

Catalog of replacement components specific to the tonearm assembly.

ACCESSORIES

List of included accessories and their part numbers.

PACKING PARTS

Details on parts used for packaging and shipping the unit.

FUSES

Identification and part numbers for all fuses used in the device.

COMPONENT COMBINATION

Information on combined component assemblies and their part numbers.

CHANGES

REPLACEMENT PARTS LIST

Summary of modifications made to the replacement parts list for specific model versions.

REPLACEMENT PARTS LIST

INTEGRATED CIRCUITS

List of integrated circuits used, with part numbers and descriptions.

TRANSISTORS

Catalog of transistors used in the circuitry, including part numbers.

DIODES

List of diodes and their corresponding part numbers for replacement.

VARIABLE RESISTORS

Details on variable resistors (potentiometers) used for adjustments.

SAFETY PRECAUTION

INSULATION RESISTANCE TEST

Procedure for performing an insulation resistance test to ensure user safety before operation.

DISASSEMBLY INSTRUCTIONS

How to remove the cartridge

Step-by-step guide for safely removing the audio cartridge from the tonearm.

How to remove the turntable platter

Instructions for detaching the turntable platter from the motor spindle.

How to remove the bottom board

Procedure for removing the bottom panel to access internal components.

DISASSEMBLY INSTRUCTIONS

How to remove the main circuit board

Detailed steps for removing the primary circuit board from the unit.

How to remove the operation button

Guide for safely detaching the front panel and operation buttons.

How to remove the dust cover

Instructions on how to detach the protective dust cover from the unit.

TROUBLE SHOOTING

How to use the repair table

Guidance on utilizing a repair table for efficient diagnostics and servicing.

How to raise the unit

Steps for safely lifting and positioning the turntable unit for inspection.

How to turn over the unit

Procedure for safely inverting the unit to access bottom-mounted components.

CIRCUIT BOARDS AND WIRING CONNECTION DIAGRAM

BLOCK DIAGRAM

PACKING

CHANGES

SCHEMATIC DIAGRAM

Illustrates modifications to the unit's schematic diagram for improved performance.

Related product manuals