EasyManua.ls Logo

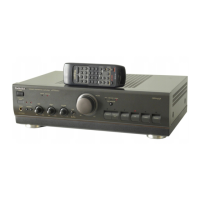
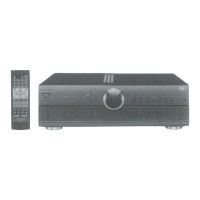
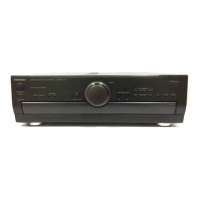
Technics SU-A700

Technics SU-A700
16 pages
To Next Page IconTo Next Page
Loading...
&
t
?-
:
h:'-M
\!'H
WM&m
mmim
.hAti.
TVf
**
-
y'
;
'
Mi
:
■■
?•'
/.
-
**>
:i'
’'’»*!*;
§§§life
RQT1966-B
The
photograph
shows
the
SU-A700
model
jdT
The
configuration
of
the
ventilation
holes
differs
according
to
area.
^^T-he
“E.8"
area
code,
for
example,
indicates
United
Kingdom
specifications
;^^pe
v
^^-1ndlc6tl°r»
is
shown
on
the
packing
case.
;.,
;
V
’'^.Q.-
:
.
:
.
•'.'
••*.
.
.
:-
•.-
r
-:Tj>p;
:
;.^v
this
unit.'please
read
these
instructions
completely
Technics
Stereo
Integrated
Amplifier
SU-A700
SU-A600
Operating
Instructions
Question and Answer IconNeed help?

Do you have a question about the Technics SU-A700 and is the answer not in the manual?

Technics SU-A700 Specifications

General IconGeneral
BrandTechnics
ModelSU-A700
CategoryAmplifier
LanguageEnglish

Summary

Caution for AC mains lead

Connections

A PHONO terminals

Connect to a turntable.

GND terminal

Terminal for turntables with a ground wire.

B TUNER terminals

Connect to a tuner.

D AUX terminals

Connect to video disc players or similar.

To set the power voltage

About the cooling fan

To connect to speakers

To connect main andor second speakers

Connect main (A) and/or second (B) speakers.

To connect bi-wired speakers

Connect bi-wired speakers using two cords per speaker.

To connect the AC power supply cord

Front Panel Controls and Functions

Power Switch and Indicators

Controls for power on/off and operation status.

Volume Control

Adjusts the audio output level.

Tape Monitor Controls

Selects sound source for monitoring during recording.

Tone and Balance Controls

Adjusts bass, treble, and left/right balance.

Input Selectors

Selects the audio input source.

Speaker Select Buttons

Selects which speakers to use.

Remote Control Receptor

Receives signals from the remote control.

Headphones Jack

For connecting headphones.

Listening to Sound

Setting Volume and Power

Set volume to minimum and switch on the power.

Selecting Speaker System

Choose the speaker output (A, B, or both).

Using Tape Monitor

Set tape monitor to SOURCE for listening.

Selecting Sound Source

Choose input like TAPE, AUX, CD, TUNER, PHONO.

Operating Components

Start operation of connected components.

Adjusting Volume Level

Turn the volume control to the desired level.

While listening to music

While listening through headphones

After listening is finished

Recording

To record from compact discs, etc.

Steps to record from CD, AUX, TUNER, PHONO.

Tape-to-tape recording

How to record from one tape deck to another.

To record from tape deck 2 to 1

Steps for recording from deck 2 to deck 1.

To record from tape deck 1 to 2

Steps for recording from deck 1 to deck 2.

To check the sound recorded

How to check recorded sound using tape monitor.

Remote Control Transmitter

Insertion of remote control transmitter batteries

How to insert and replace batteries.

Battery life and notes

Information on battery longevity and handling.

Remote control transmitter operation notes

Tips for effective remote signal reception.

Remote Control Operation

To operate the amplifier

General operation of the amplifier using the remote.

To select an input source

How to choose input sources via remote.

To adjust the volume level

Adjust volume using the remote control.

To listen to radio broadcasts

Select channels for radio reception.

Suggestions for Safety

Use a standard AC well outlet

Use appropriate AC power sources and avoid DC.

Grasp the plug when disconnecting

Proper procedure for unplugging the power cord.

Place the unit where it will be well ventilated

Ensure adequate airflow around the unit.

Avoid places such as the following

Recommended placement locations to avoid damage.

Take particular care if children are present

Warnings regarding child safety with the unit.

If water is spilled on the unit

Precautions if water comes into contact with the unit.

Avoid spray-type Insecticides

Warnings about using insecticides near the unit.

Never use alcohol or paint thinner

Cleaning instructions to avoid damaging finish.

Be sure to place the unit on a flat, level surface

Importance of stable placement for operation.

Never attempt to repair or reconstruct this unit

Warning against unauthorized repairs.

If trouble occurs

What to do if abnormal conditions are detected.

Technical Specifications

Maintenance

Troubleshooting Guide

Problems noted at all times

Common issues and their solutions.

While using the remote control transmitter

Troubleshooting remote control specific issues.
Related product manuals