EasyManuals Logo

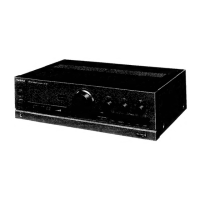
Technics SU-G50 User Manual

Technics SU-G50
20 pages
To Next Page IconTo Next Page
To Previous Page IconTo Previous Page
Page #7 background imageLoading...
Page #7 background image
Ref.
No.
Removal
of
the
Rear
Panel
Ref.
No.
Removal
of
the
AC
Outlet/AC
Iniet
8
9
P.C.B.
Procedure
Procedure
138
1-8-9
Rear
panel
1.
Remove
the
connector
(CN651).
2.
Remove
the
13
screws
(Q@~®).
3.
Remove
the
rear
panel
in
the
direction
of
the
arrow.
e
Release
the
8
claws.
Procedure
1-810
.
Release
the
3
claws.
(See
Fig.
1)
2.
Insert
a
screwdriver
at
the
root
of
the
cooling
fan.
Force
it
out
of
the
motor
shaft.
(See
Fig.
2)
3.
Remove
the
motor
cover
by
used
©
screwdriver.
(See
Fig.
3)
4.
Remove
the
motor
from
the
fan
casing.
(See
Fig.
4)
5.
When
mounting
the
motor
fan,
align
the
fan
casing’s
projection
with
the
hole
of
the fan
motor.
(See
Fig.
5)
Fan
case
Cooling
fan
Projection
(Fig.
2)
Fan
motor
(Fig.
5)
m@
DESCRIPTION
OF
FL
PANEL
[FL901
(RSL0044-F))
eGRID
ASSIGNMENT
7G
ePIN
CONNECTION
Pane
PEPE]
F/FININ|
8
PIN
NO.
CONNECTION
a
N
H
aif
el]
||
6G
SG 4G
3G
26
AN
|
At
LT
ICAL
|
ang
[A
We
SE
RAE
TD
VINE
VASE
LINE
PLD
o
Opoppap
a
a
ogegnos}
a
a

Questions and Answers:

Question and Answer IconNeed help?

Do you have a question about the Technics SU-G50 and is the answer not in the manual?

Technics SU-G50 Specifications

General IconGeneral
BrandTechnics
ModelSU-G50
CategoryAmplifier
LanguageEnglish

Related product manuals