IST-2194.KM01.01 Istruzione / User’s Manual / Manuel d’utilisation Pag.5/9
TECNOCONTROL S.r.l. Via Miglioli 47 SEGRATE ( MI ) Tel: 02/26 92 28 90 Fax: 02/21 33 734
The remote detectors: it has to be installed as described in the specific instructions attached with it. After the in-
stallation and referred to the gas indicated on the testing label of the remote gas detector, apply on the SE194K, the
self-sticking label with the name of the detected gas inserted in the package.
Valve: The manually resetting solenoid valve for the gas cut-off should be installed outside the room in a clearly in-
dicated position and should be protected from direct sunlight and rain.
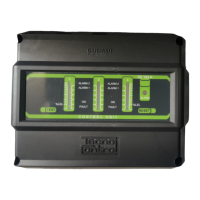
Mounting: The Fig.2 shows the instrument size. It has to be wall-mounted by four screw anchors. The housing
opens and closes with the 4 screws on the cover.
IMPORTANT: TO AVOID IRREVERSIBLE DAMAGE, DISCONNECT THE POWER SUPPLY TO THE CONTROL PANEL, DURING INSTALLATIO (WIRING
CABLES) OR BEFORE UNPLUG OR RE-CONNECT THE FLAT CABLE.
Only if necessary, for maintenance or installation requirements, the housing cover can be separated from its base,
first remove power supply, then disconnect the flat cable, press on the two side tabs as shown in Fig. 3. To recon-
nect it, push the flat cable into the connector, respecting the polarization, the two levers close automatically locking
it. Only then you can reconnect power supply.
Cable glands: the lower side of the housing has 3 inputs designed for metric cable glands (M20x1.5 that accept
external cables Ø 6÷12 mm). These passages are closed, but they are not manually breakable, according to the in-
stallation requirements, they must be drilling. To facilitate the operation, they have a centering for the drill bit.
Electrical Connection: The installation must be provided for the mains, a bipolar disconnect switch dedicated for
the gas detection system. The device, clearly identified, must act only on Phase and Neutral. If it is necessary, you
may install a surge or lightning protector, etc.
The instrument is supply with non-reversible and plug-in terminals. Therefore the cables should be anchored to the
case in order to avoid terminal overstress. The connection to the control unit does not need any hearting. The remote
sensor can be placed at a max. distance of 100 meters from the control unit with a cable of 3x1.5mm
2
or to a distance
of 200 meters using a 3x2.5 mm
2
cable. It is not necessary to use shielded cables.
Fig. 4 shows the 110÷230VAC powering connection with alarm siren and normally open manual resetting valve.
Fig. 5 shows the 110÷230VAC powering connection with alarm siren and normally closed manual resetting valve.
Fig. 6 shows the 24VDC powering connection with both 24VDC alarm siren and normally closed manual resetting
valve with, for example, our power supply unit PS180/24VDC (max load 2,5A) with No.2 internal 12V/7Ah Pb battery
to maintain the system powered on in absence of Main power supply.
Dip-Switch Setting: Before powering unit, you must configure the Dip-Switches on the circuit in the housing cover.
Enable/Disable: SW1 Dip Switches No.1, No.2, No.3 enable or disable the corresponding input of the remote
gas detector (SENSOR-1, SENSOR-2 and SENSOR-3). (No. 4 is not used and its position does not affect
the control unit functioning).
ON = Enabled input The detector is installed, the Led Bar and the Fault Relays and Miscel-
laneous are in operation. (FOR DEAULTS ARE ALL CONFIGURED ON)
OFF = Input DISABLE The detector is absent, the Led Bar is off. Fault relays and alarms do
not intervene. (can also be used to exclude a faulty detector or removed for maintenance).
SET AUX: SW2 Dip-Switch No.1 selects AUX input operation.
OFF = contact lenses for eg contact. Manual button (DEFAULT SETTING)
ON = control of our NC Valve Solenoid Valve with Location Sensor.
In Fig. 7 Schematic and Configuration of SW2 Dip-Switch No.1 to use the AUX input to check if the Valve has ac-
tually been closed. Our valves need to be reassembled with NC Position Sensor.
In Figure 8 Connection Schedule and Configuration of SW2 Dip-Switch No.1 to use the AUX input, placed on the
board in the cover with a NA contact. For example, a manual alarm button.
Relay Thresholds: the SW2 Dip-Switches / No.2 and No.3 set the alarm thresholds. See Table 2.
No.2 and No.3 both OFF = ALARM 1 set to 10%LEL and ALARM 2 set to 20%LEL (DEFAULT SETTING)
No.2 ON and No.3 OFF = ALARM 1 set to 15%LEL and ALARM 2 set to 20%LEL
Logic of Relay: SW2 Dip-Switch No.4 sets the function of the ALARM 2 relay.
ON = Negative logic, the relay is de-energized, it is used for normally open valves.
OFF = Positive logic, the relay is normally energized, in case of power failure or relay failure, it auto-
matically moves to the alarm position. It is used for normally closed valves.
WARNING
Configure Dip-Switches before powering the control panel.
The detector doesn't need adjustments after being installed.
During preheating of the detectors, which is of about 60 seconds, the alarm relays remain inhibited, while the Yel-
low LED and the FAULT relay are activated.
In case of short circuit between the connection cables to a detector, the protection circuit interrupts to it the
power supply. Both the FAULT relay and the yellow LED will activate. Turn off the SE194K, remove the cause of the
short circuit, and then turn on the unit.
If a detector is not installed, to avoid automatic FAULT relay operation you must disable the corresponding input.
FUNCTIONAL TESTING
Periodical testing: we advise to carry out working tests every 6-12 months. For remote detectors, refer to the
specific users’s manual.
 Loading...