19
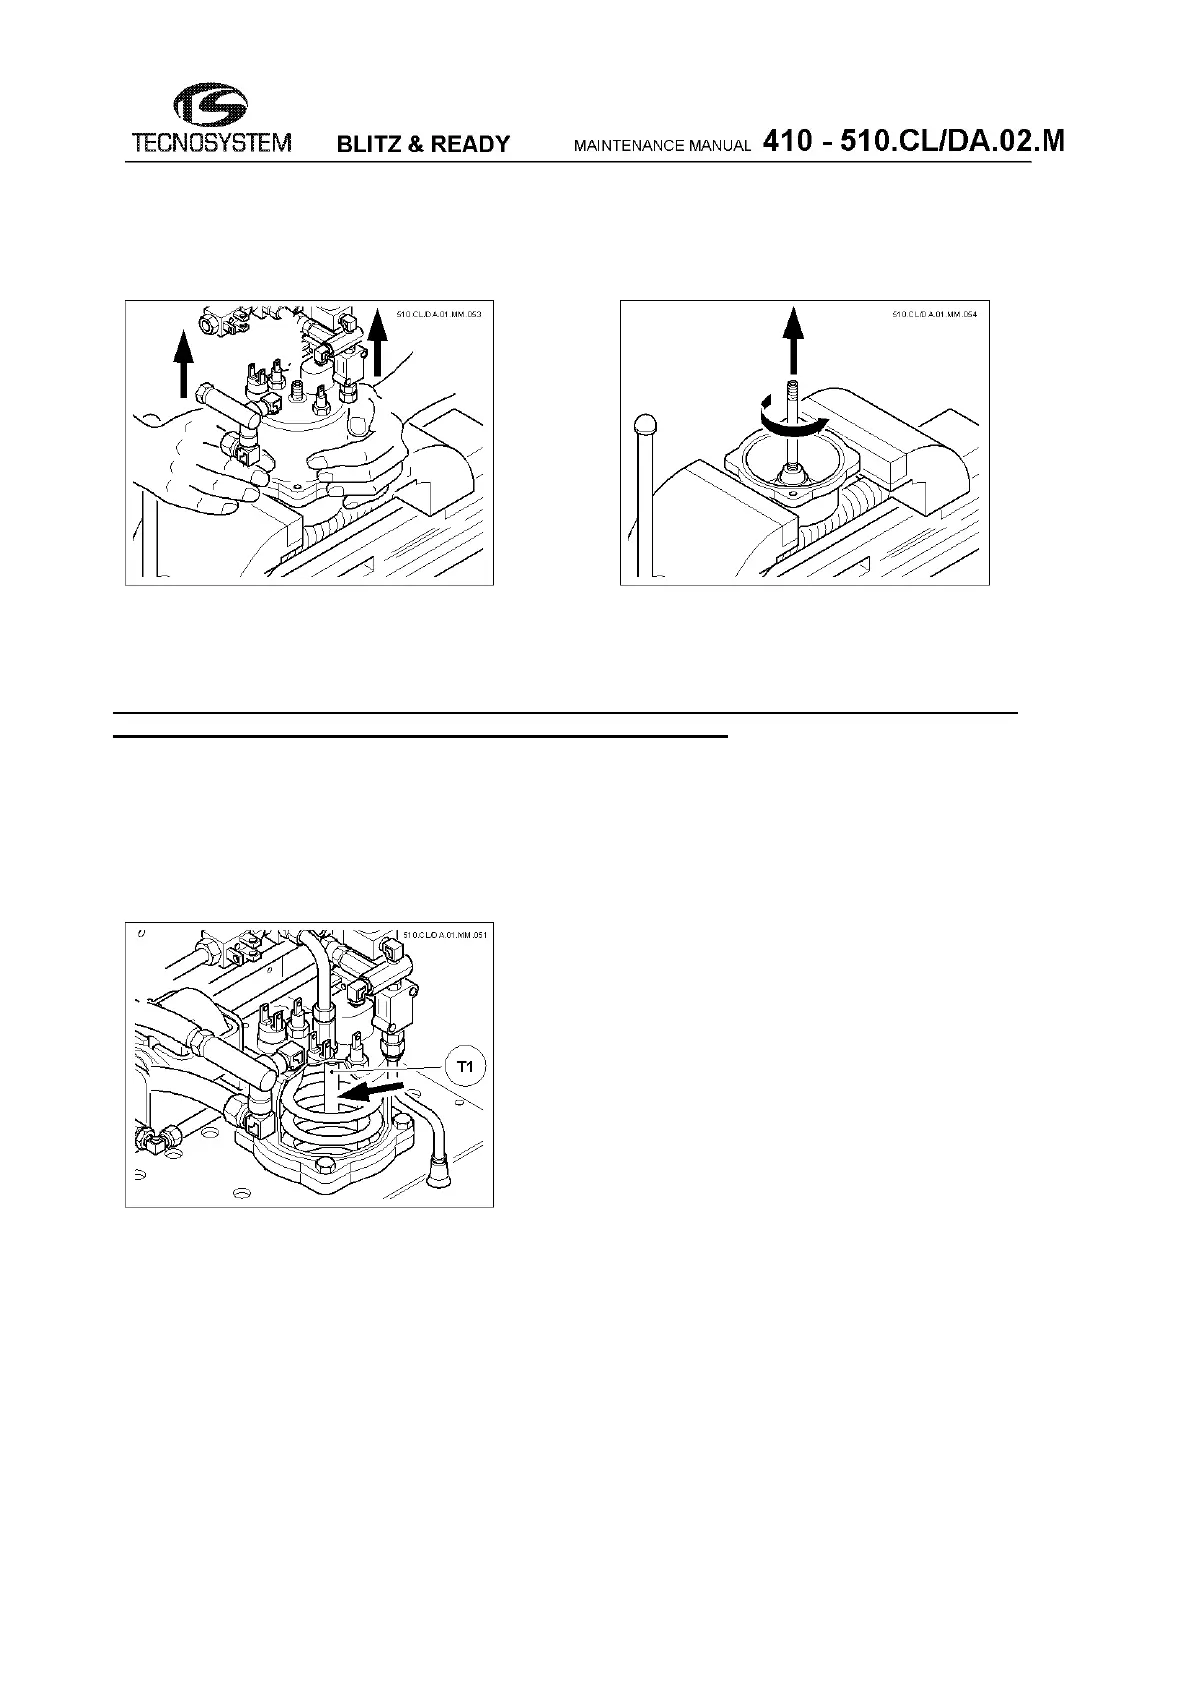
- Open the boiler (see fig. 32).
- Remove the injector (see fig. 33)
- Replace the pipe
fig.32 fig.33
- Reassemble the unit proceeding in the reverse order. Make sure that you put the sealant properly on the
new injector: first on the threaded part screwed into the bottom of the boiler and then – after the boiler has
been reassembled - on the top threaded part before screwing back on the hexagon coupling (see fig.30).
NOTE While screwing back the blocking nut of the curve, it is important to keep blocked, with a
second key, the underplaced hexagon coupling R1 (see fig. 28c).
Operation b – Main stages:
(Version produced since:11/04/06 Serial number: 060275)
Replace the injector T1 (see fig.28a).
fig.28a


 To Next Page