MAINTENANCE INSTRUCTIONS
98-01580-EN-R0_A4LT-E-ChemSaver-MaintenanceInstructions-TB.docx
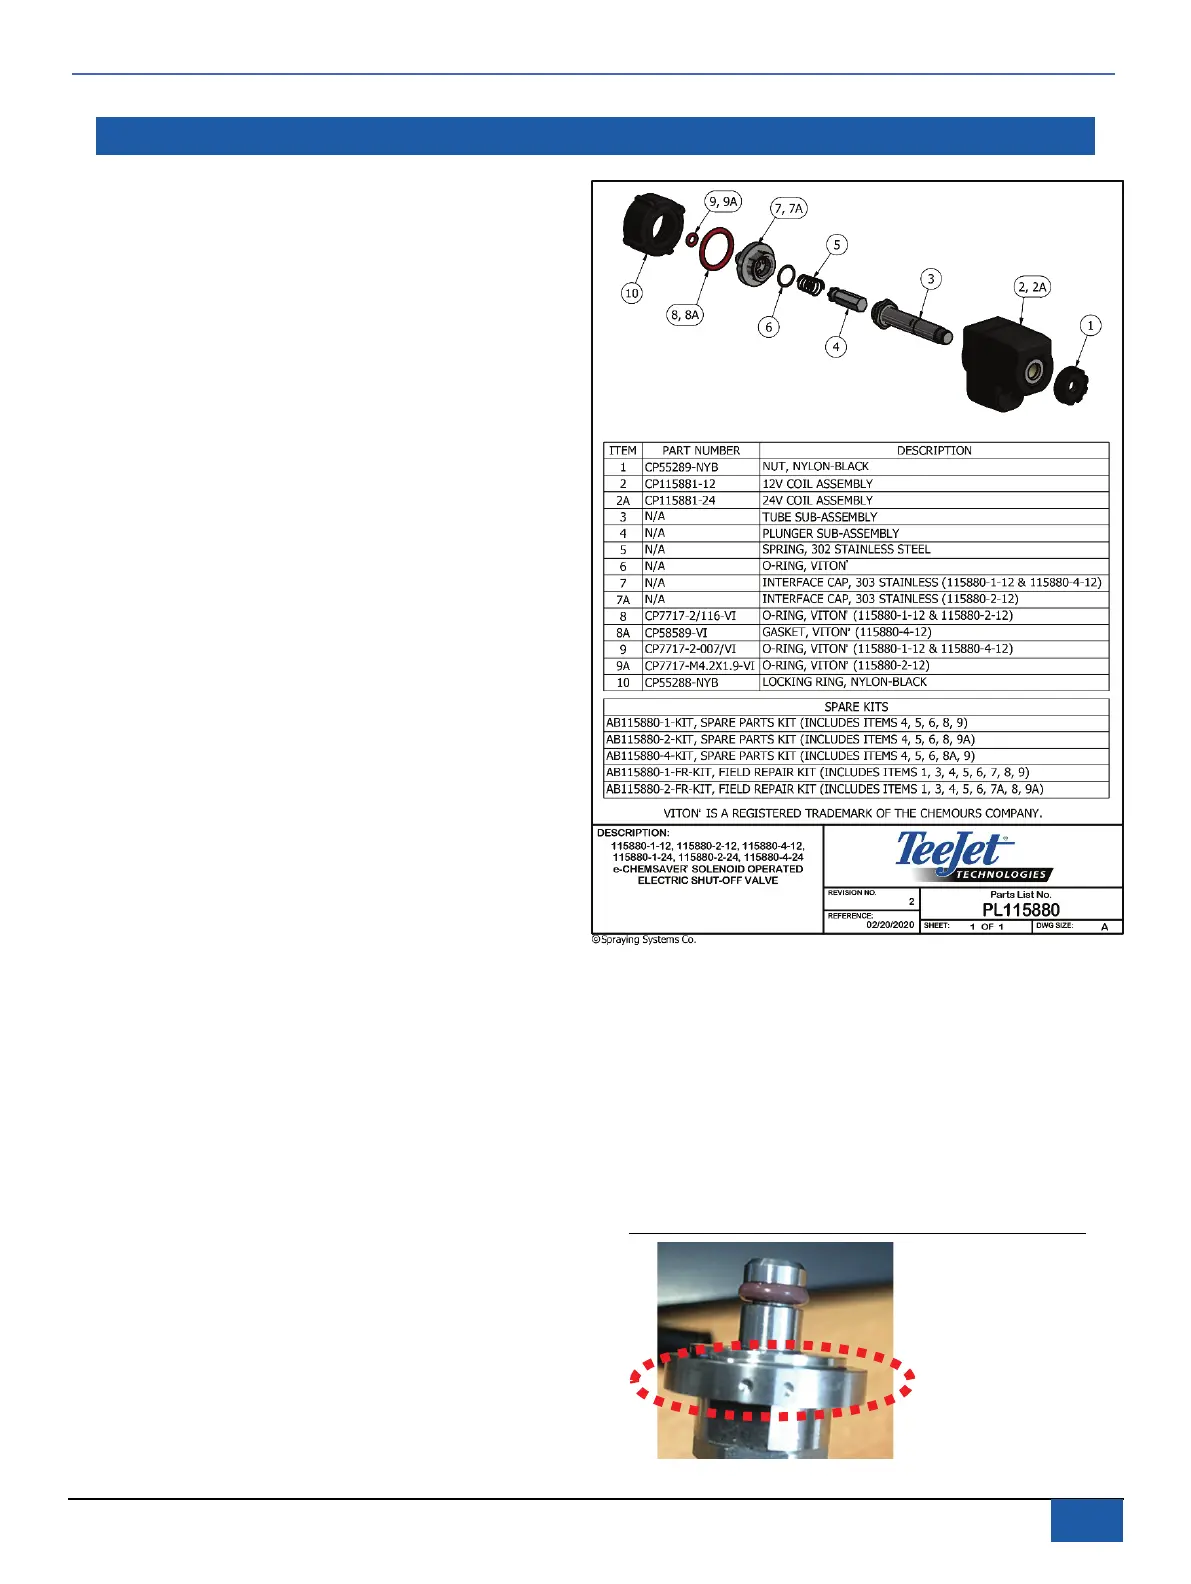
SOLENOID DISASSEMBLY AND REASSEMBLY
NOTE: O-rings (6, 8, 9) should be handled with care as they can be
damaged/deformed.
Disassembly
1.
Loosen and remove the nylon Nut (1).
2.
Separate the Coil Assembly (2) from the rest of the
Tube/Plunger Assembly (3-10).
3.
Remove the Locking Ring (10).
4.
Using e-ChemSaver (CP116231-NYB) wrench or pliers to grip
the stainless steel Interface Cap (7), loosen the Tube Sub-
Assembly (3) using a 14 mm / 9/16" or adjustable wrench.
All repairable parts should be accessible at this point. The Plunger
Sub-Assembly (4), stainless steel Spring (5), and O-rings (6, 8, 9)
can be replaced without further disassembly.
Reassembly
5.
During reassembly, place the Plunger Sub-Assembly (4) and
stainless steel Spring (5) in the Tube Sub-Assembly (3).
NOTE: The Plunger Sub-Assembly (4) should be orientated with
the black insert facing outward (visible) when placed in
the Tube Sub-Assembly (3).
6.
While compressing the Spring (5), thread the Tube/Plunger
Assembly (3-10) to the stainless steel Interface Cap (7) and
tighten using a wrench and pliers.
►
Optional: Apply 1 drop of Loctite Blue 243 to the threads
of the Interface Cap (7) and Tube Sub-Assembly (3).
►
Torque Specifications: Tighten Interface Cap (7) and
Tube Sub-Assembly (3) to 1.36 N-m / 12 in-lbs.
7.
Return the Locking Ring (10) to its original position and slide the
Tube/Plunger Assembly (3-10) through the Coil Assembly (2).
NOTE: The Coil Assembly (2) should be orientated with the
SuperSeal 1.5 connector facing away from the Interface
Cap (7).
8.
Tighten the nylon Nut (1) to the Tube/Plunger Assembly (3-10).
Verification After Reassembly
9.
Lubricate O-ring (9) before re-attaching the e-ChemSaver to the
nozzle body.
10.
Attach the solenoid on the nozzle body and inspect for leaks
when system is on.
RECOMMENDED: At the time of installation, prior to plugging in the
connector, spray a sufficient quantity of CorrosionX
®
,
CorrosionX
®
Heavy Duty, or CorrosionX
®
Aviation corrosion
prevention compound into the connector to wet the
terminals.
e-ChemSaver Models
If, for any reason, the change of the complete e-ChemSaver is
mandatory, there exist 3 different models. For choosing the right one,
refer to the interface cap (7) indicating the number of different points
marked on it.
•
1 MARK – Reference 115880-1-12.
•
2 MARKS – Reference 115880-2-12. (above image)
•
4 MARKS – Reference 115880-4-12.
Figure 1:
Model Markings