Kit desc ription
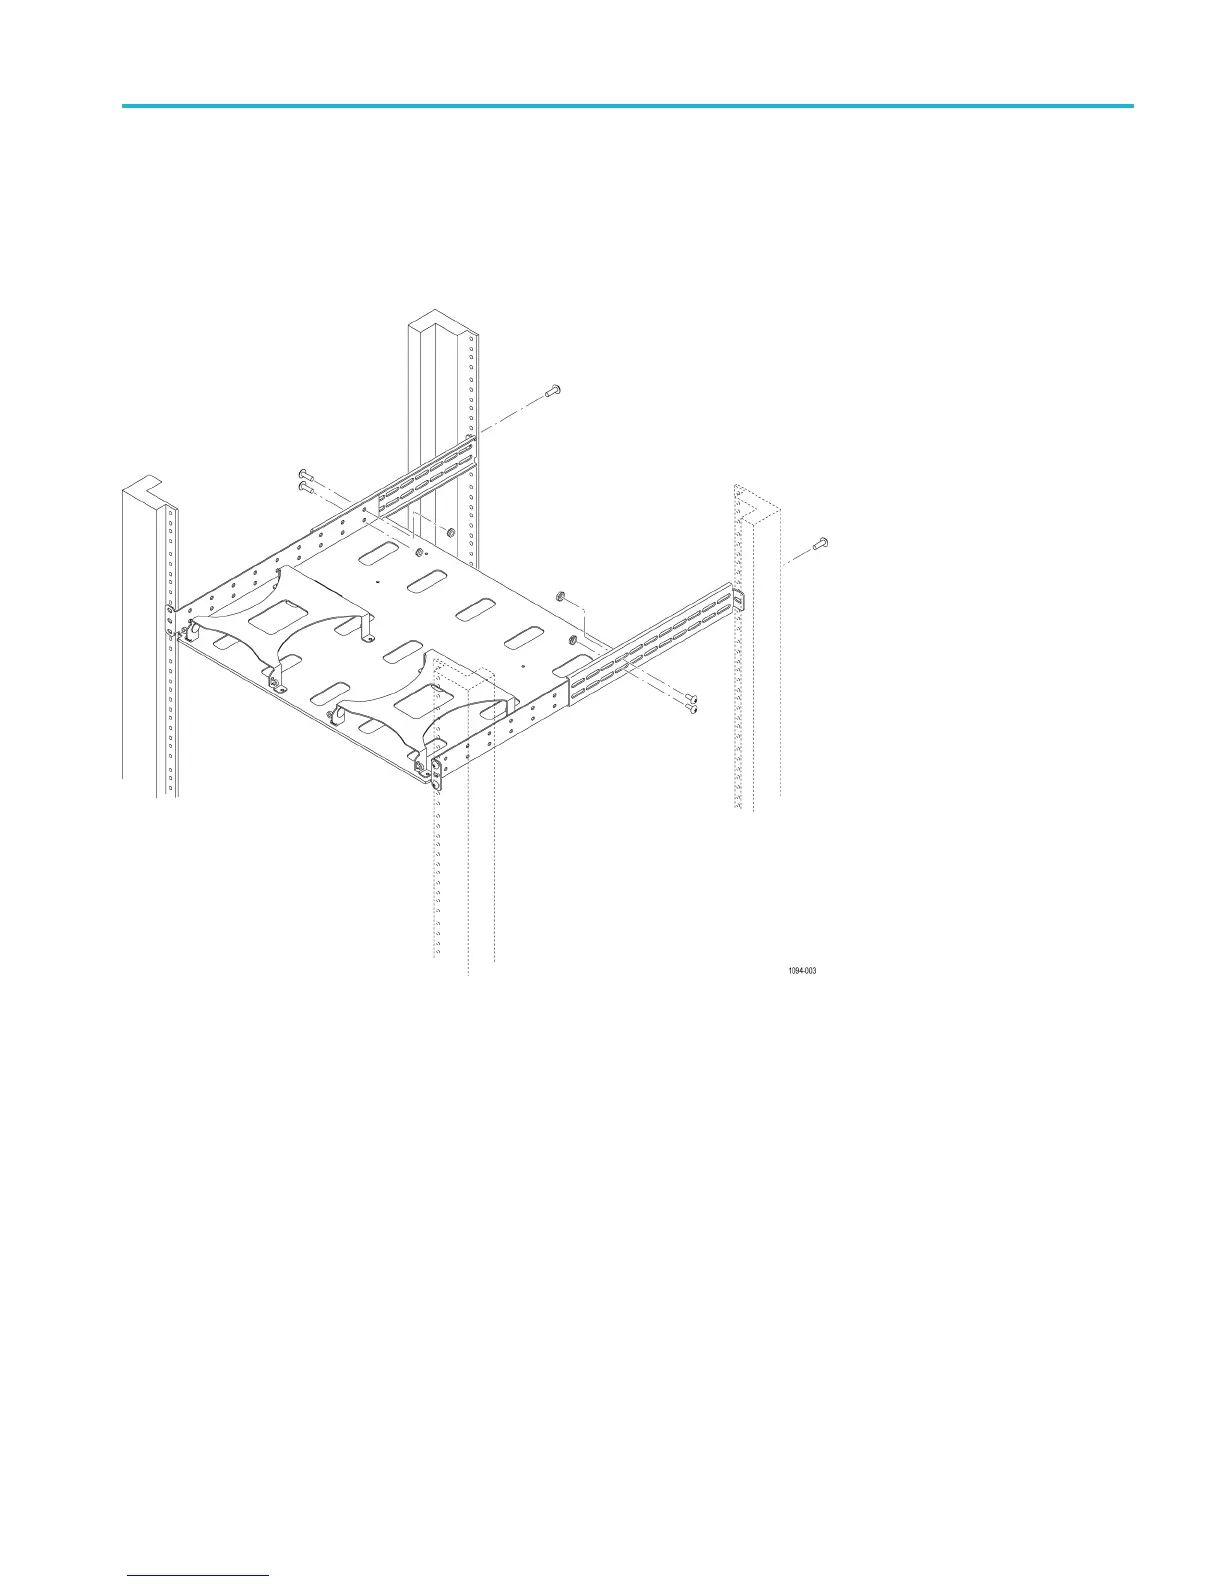
3. Attach the stat
ionary brackets (item 4) to the rear rack using two 10-32
screws, one on each side.
4. Connect the st
ationary brackets (item 4) to the RSA306B main bracket (item
3) using four 10-32 screws and nuts, two sets per bracket.
5. Inse
rt the RSA306 or RSA306B instrument(s) into the rackmount.
RSA306B Rackmount Kit Installation 5
 Loading...


