4
5
6
7
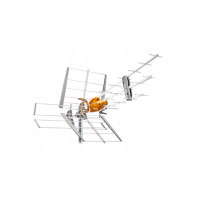
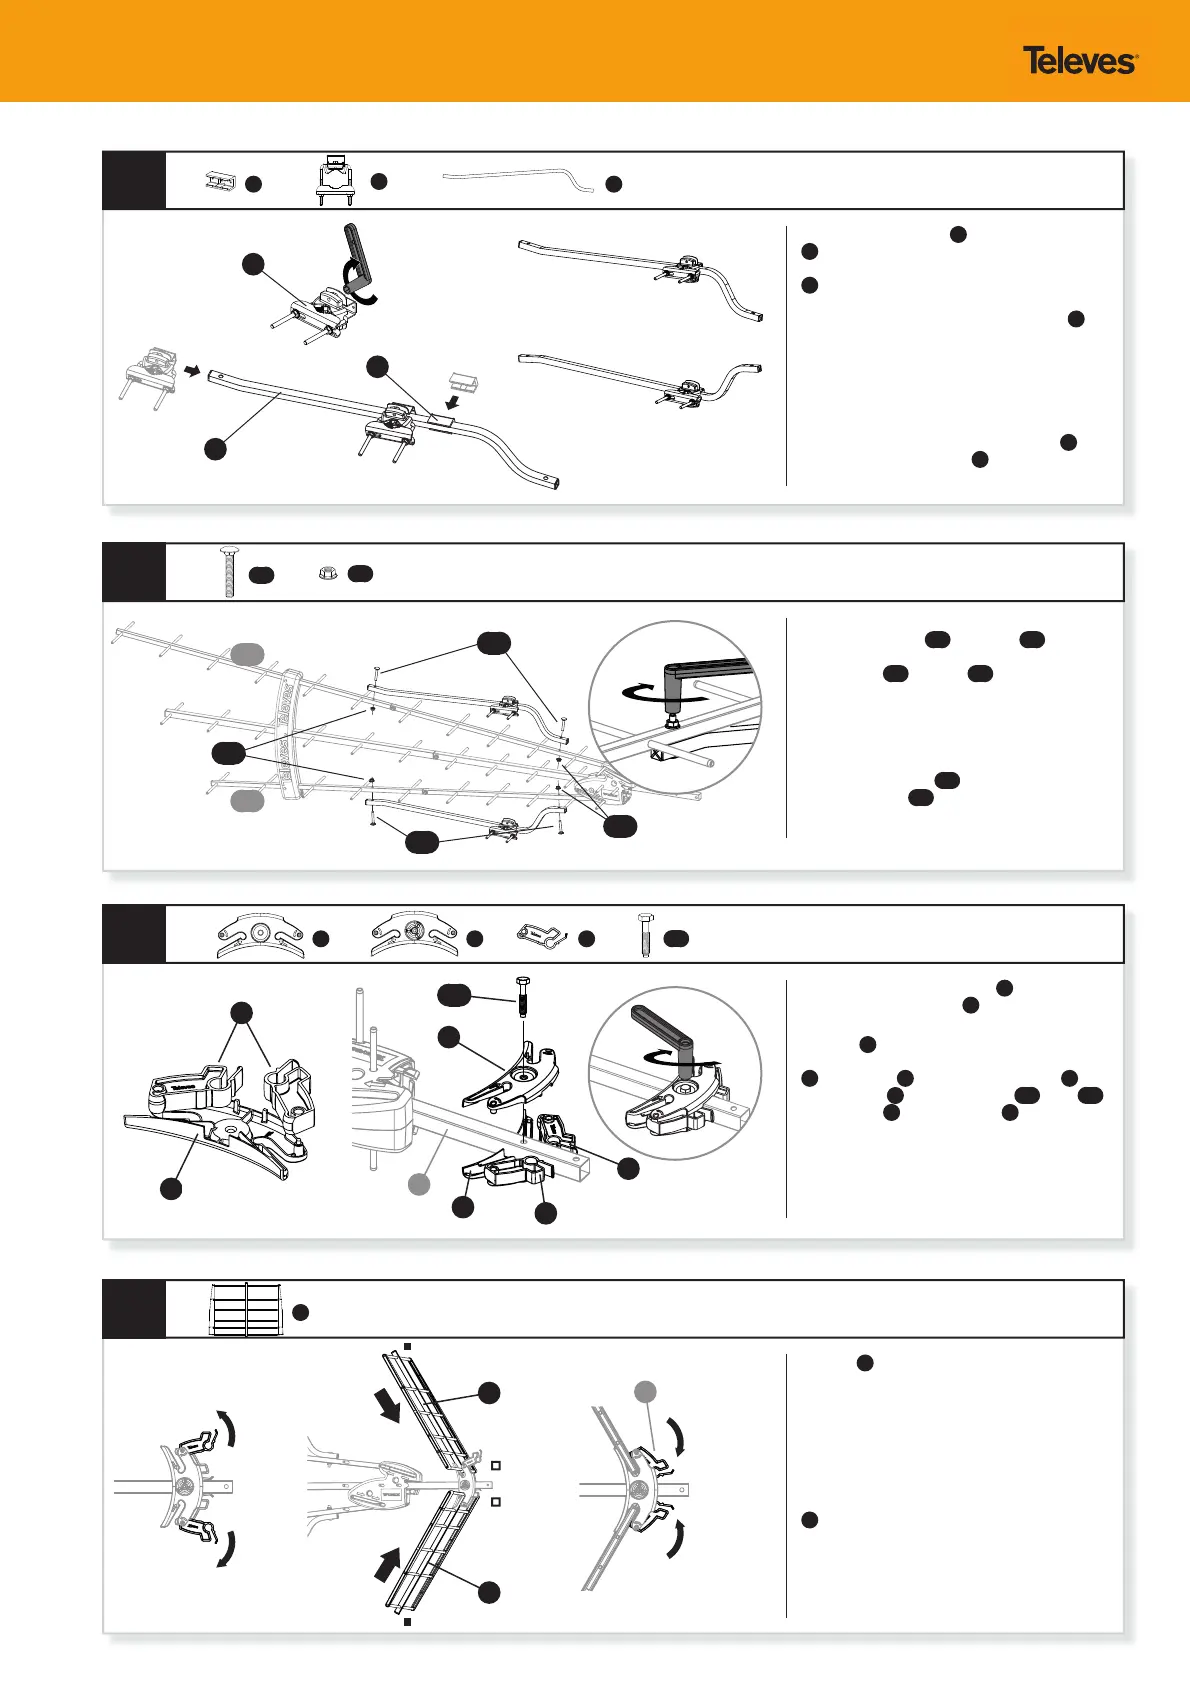
Place the plastic spacers
H
on the support braces
D
, closer to the curved part of the support brace
as indicated. Slide the mounting clamp assemblies
I
on the support braces starting from the support
brace end that is not curved and tighten the bolts
loosely once in place over the plastic spacers
H
, as
they will be fully tightened later.
Note: The mounting clamp assemblies must
be installed so that the nuts face the left side of
the antenna, when looking from the back of the
antenna, to allow for vertical tilt once the antenna
has been installed on the mast. Before proceeding to
the next step make sure the plastic spacers
H
and
mounting clamp assemblies
I
are installed in the
right orientation.
Place the support brace assemblies completed on
step 4 on directors
B1
(top) and
B3
(bottom)
as indicated, and attach them with two pieces of
carriage bolt
AC
and nut
BA
per each support
brace. Make sure the U-bolt side of the mounting
clamps both are located on the left side of the
support braces looking at it from a rear view. Line up
the clamps so that they are ready for mounting once
assembly is complete.
Note: Tighten the nuts
BA
until the square carriage
head of the bolts
AC
sink into the aluminum and
the heads sit ush with the boom. The bolt base will
bite into the aluminum, securing the joint.
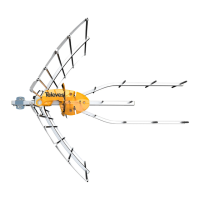
Mount the two black plastic locks
Q
on the rst rear
re ector self-locking clamp
P
bottom piece.
Locate the mounting hole on aluminum Main
assembly
A
next to and behind the orange plastic
main body of the antenna, place self-locking clamp
O
top piece on
A
lined up with the hole in
A
and
bottom piece
P
, secure with bolt
AD
(bolt
AD
goes through
O
and threads into
P
).
Place the
G
UHF re ectors (two pieces, one top and
one bottom) in the self-locking clamp completed
on step 6 by inserting the end of the receptor
without the grey plastic cap on it and with the black
plastic locking mechanism in an upward position
(unlocked).
Once the re ectors are fully seated in the clamp (all
the way to the bottom of the slot), lock them in place
by rmly pressing down on the black plastic pieces
Q
.
An audible “click” will be heard when the re ectors
are securely locked in place.
Q x2 O P
Q
P
A
O
Q
Q
G x2
CLICK!
G
G
H x2 D x2
I x2
I
D
H
AC x4
AD
BA x4
AC
AC
AD
BA
BA
P
B1
B3
Q
 Loading...