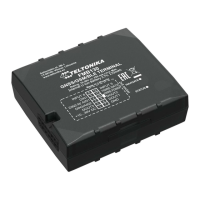
Do you have a question about the Teltonika FMB640 and is the answer not in the manual?
The FMB640 Thermograph is a device designed to monitor real-time information from freezer trailer thermographs, catering to the increasing demand for cold-chain supply chain monitoring. It achieves this by connecting to the thermograph's RS232 communication line via either COM1 or COM2 ports on the FMB640 device. This solution offers an easy installation and configuration process, enabling users to track critical data such as temperature, fridge door status, and alarms from their freezer trailers. The device can also generate events based on this monitored information, providing timely alerts and insights. This feature is available from firmware version 01.02.23.Rev.00 onwards.
The FMB640 Thermograph supports connection with several popular thermograph brands, including Euroscan, DataCold600, Transcan2, and TouchPrint. The specific thermograph used depends on the freezer type. For instance, Carrier freezers are compatible with TouchPrint/TouchLog, while ThermoKing freezers can use Euroscan, DataCold600, Transcan2, or TouchPrint/TouchLog.
The RS-232 interface on the FMB640 supports full-duplex communication, meaning it can send and receive data simultaneously using separate transmission lines. However, it's important to note that when the FMB640 enters Sleep or Deep Sleep mode, the RS-232 port will be powered off.
For TouchPrint/TouchLog thermographs, the installation involves connecting the device according to the provided pinout. The TouchPrint pinout includes connections for 12/24V power, RX, TX, GND, and various inputs for status (ON/OFF) and temperature probes. Similarly, the TouchLog pinout provides connections for power, key alarm, and various other inputs and outputs.
No specific configuration is necessary if the equipment receives information from the thermograph. However, if data is not being received, the speed of the port accessing the configuration menu might need adjustment. To do this, users must press and hold the blue and red buttons simultaneously until "Enter PIN code" appears. The default PIN is "1111", entered by pressing the blue button four times. Navigation through the options is done with the red button. The "ENG Display" option should be set to ON using the left and right arrow keys. Once ON, scroll to "Baud Rate" and ensure it is set to 9600. If not, adjust the speed using the arrow keys and the up/down keys.
The AVL IDs for TouchPrint parameters include Input 1 through Input 6, and Setpoint 1 through Setpoint 3.
To properly integrate DataCold 600 with the FMB640, specific steps must be followed. First, in the FMB640 RS232 settings, "DataCold mode" must be selected, and the Baudrate set to 38400. Second, "Partner mode" needs to be enabled on the DataCold 600 unit itself.
To enable Partner mode on DataCold 600:
An important note for DataCold 600 is that the RX and TX lines are inverted via the RS-232 connection. The pinout for DataCold 600 includes connections for 12/24V power, TX1, RX1, TX2, RX2, GND, and various digital and temperature probe inputs.
Available parameters (AVL IDs) for DataCold 600 cover a wide range of data, including Zone 1 Compartment state, mode, return air temperature, supply air temperature, set temperature, evaporator temperature, and various sensor readings for multiple zones. It also includes parameters for speed mode, ambient air temperature, compressor configuration, installation serial ID, analog input, manufacturer ID, battery state flags, fuel state flags, maintenance hours, run mode codes, error codes, and probe temperatures.
The "Run mode" explanation details different operational states: StartStop (Value 0), Continuous (Value 1), CycleCentry (Value 2), and Unknown/Now available (Value 7).
The "Fuel/Battery Flag Status" explanation defines the meaning of the bit field values: Available (0), Error (1), Alarm (2), and Digital sensor (3).
Similar to DataCold 600, using Euroscan with FMB640 requires specific settings. In the FMB640 RS232 settings, "Euroscan mode" must be selected, and the Baudrate set to 38400. Additionally, "Partner mode" must be enabled on the Euroscan unit.
Enabling Partner mode on Euroscan follows the same procedure as for DataCold 600:
Again, the RX and TX lines are inverted for Euroscan via the RS-232 connection. The pinout for Euroscan is identical to that of DataCold 600.
Available parameters (AVL IDs) for Euroscan include external sensor temperatures (1 through 6) and digital sensor readings (1 through 4).
To ensure the FMB640 device receives data correctly, it must be configured to the specific thermograph type being used (Transcan2 Reefer, Touchprint Reefer, Euroscan, or DataCold Reefer). This is done within the configurator window, under the RS232 \ RS485 section. Users need to select the appropriate mode (e.g., "Euroscan") for COM1 or COM2 settings and set the Baudrate to "Default" or as specified (e.g., 38400 for DataCold 600 and Euroscan).
For each thermograph type, specific I/O parameters (AVL IDs) are used for data sending.
Finally, "Codec 8 Extended" should be selected as the main data protocol in the "Protocol Settings" tab, which is located within the "System" section of the device configuration.
| IP Rating | IP54 |
|---|---|
| GSM | Quad-band 850 / 900 / 1800 / 1900 MHz |
| Digital Inputs | 4 |
| Analog Inputs | 2 |
| Time To First Fix (Hot Start) | 1 s |
| Max Update Rate | 10 Hz |
| Accelerometer | Yes |
| Power Supply | 10 - 30 V DC |
| GNSS | GPS, GLONASS, GALILEO, BEIDOU |
| Data transfer | GPRS |
| SMS | Yes |
| Bluetooth | Yes, Bluetooth 4.0 |
| Power supply range | 10 - 30 V DC |
| 1-Wire | 1-Wire® data protocol compliant |
| CAN | CAN adapter |
| RS232 | Yes |
| RS485 | Yes |
| USB | 1 USB port for configuration and firmware update |
| LED indication | Yes |
| SIM | 2 x SIM card slots |
| Firmware Updates | Via USB, FOTA |