7. Holding the tab on the upper cabin filter,
pull the upper filter out from the HVAC
module.
8. Holding the tab on the lower cabin filter,
pull the lower filter upwards and then out
from the HVAC module.
9. Ensuring that the arrows on both new
filters face towards the rear of the vehicle,
insert the lower cabin filter into the HVAC
module and lower it into place. Then,
insert the upper cabin
filter above it.
10.
Fold the tabs inward so that the cabin
filter cover can be installed.
11.
Install the cabin filter cover by engaging
the lower cover tab then securing the T20
screw using. Tighten the screw to 1.2 Nm/
0.89 ft-lbs.
12.
Reconnect the two electrical connectors
to the components in the front passenger
footwell cover, then resecure the cover
with the push clips.
13.
Align the right side panel with the front
and rear locator slots on the center
console, then apply pressure until all of
the clips are fully secure.
14. Reinstall the front passenger floor mat
then move the front passenger seat back
into place.
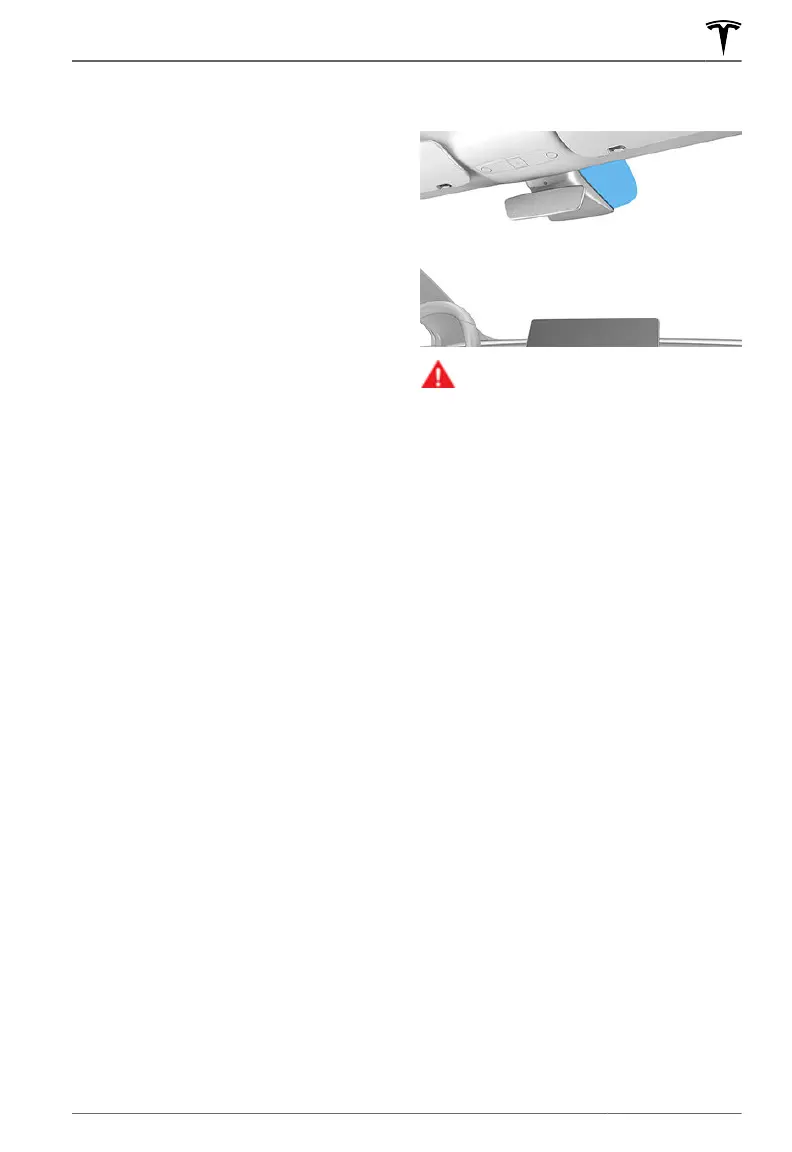
Using RFID Transponders
When attaching an RFID transponder (used
by many automated toll systems) inside
Model 3, place the transponder on the
passenger side of the rear view mirror as
shown. This ensures best results and
minimizes any obstruction to your driving
view.
NOTE: You can also attach a weather-proof
transponder to the front license plate.
WARNING: When attaching a tag to
the windshield, you must ensure that it
does not obstruct the driver's vision.
Failure to do do could result in serious
injury and/or death.
Parts and Accessories
215Maintenance