20
Set up
19
Set up
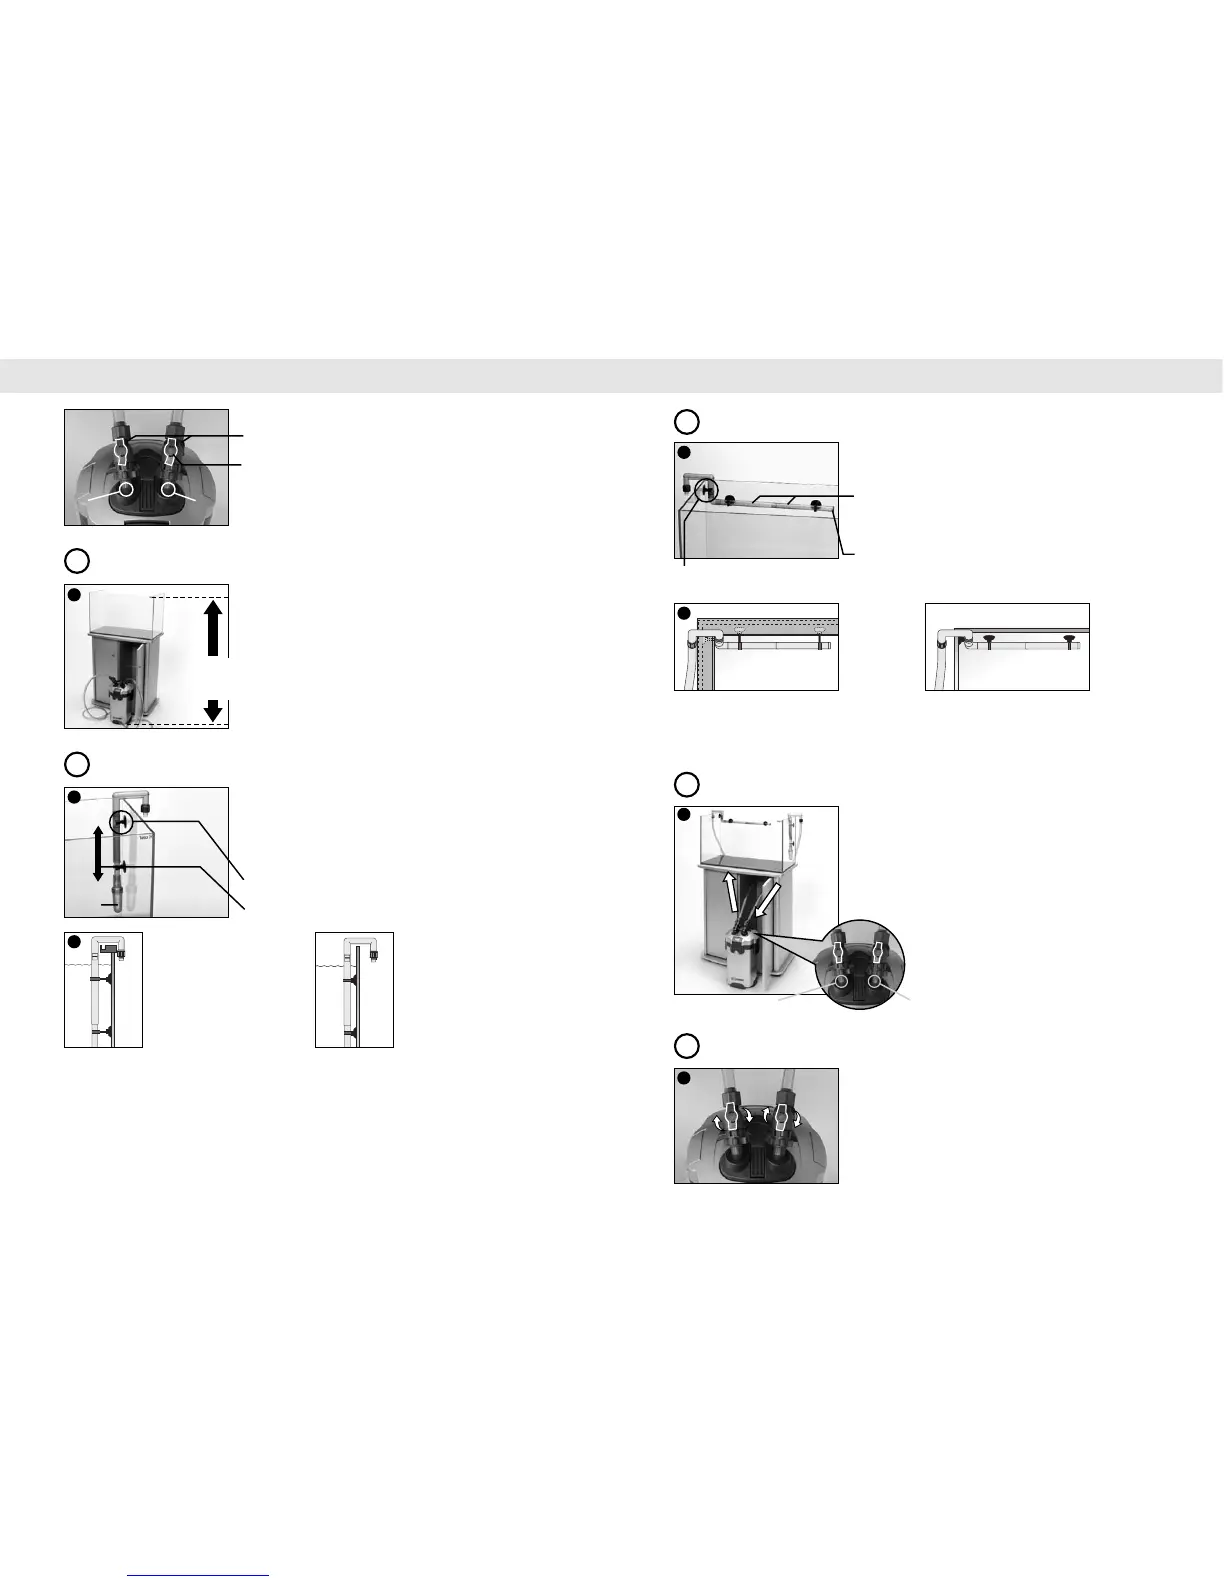
Once the hoses are properly attached, ensure the distance between
the bottom of the filter and the surface of the water is within the
range shown on the illustration.
Connect the water intake pipe to the strainer and after fixing the
suction cup clips use them to affix the unit to the inner wall of the
tank.
The filter comes with both long and short clips. Which clip to use
will depend on the shape/size of the top part of the tank wall.
Suction Cup Clips
Use “large” sized clips for the upper part (thicker pipe) of the flexible pipes.
Adjust the flexible pipe according to the depth of the tank.
Attach the water hoses to the valves.
Note: Use only hoses supplied by the manufacturer.
Installation Positioning of the Filter
5
Installing the Water Intake Pipe
6
11
Firmly insert each hose into the
adaptor unit and tighten the screws.
Turn the valves in the direction
shown in the diagram.
OUT =
Drainage
IN =
Intake
10
EX 600: 50 - 150 cm
EX 700: 60 - 150 cm
EX 1200: 80 - 150 cm
Strainer
a) Example of use
Long Clip
b) Example of use
Short Clip
12
a) Example of use: Long Clip b) Example of use: Short Clip
14
Affix the assembled overflow pipe, spray bar and stopper to the
wall of the tank using the suction cup clips.
13
Installing the Flow Return Pipes
7
Suction Cup Clip
Spray bar
Adjust the length of the spray bar to the width of the tank. Use only one flow
return pipe for tanks that are relatively narrower in width. Remove the stopper
to decrease water pressure in the spray bar.
Stopper
Connect the intake hose to the hose adaptor marked “IN”.
Connect the hose to the water intake pipe and to prevent leakage
tightly secure the hose with the screws.
Connect the flow return hose to the hose adapter marked “OUT”.
Connect the hose to the flow return pipe and tightly secure with
the screws.
Note: Cut the hose to the length required.
15
Note: Extra suction cups and each type of clips are enclosed. Use them in accordance to your tank and your
tank set up.
OUT = Return IN = Intake
Open the valves of the hose adaptor. Turn the valves parallel to the
hose adapter as shown.
16
Start-up Procedure
9
Assembling Water Hoses
8