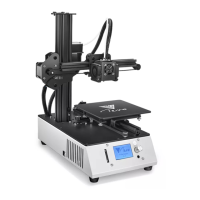
The Tevo Michelangelo is a 3D printer designed for enthusiasts and professionals alike, offering a comprehensive set of features for creating three-dimensional objects. This manual guides users through the assembly, fine-tuning, software preparation, and maintenance of the device, ensuring a smooth and efficient printing experience.
Function Description
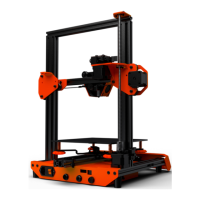
The Tevo Michelangelo is a Fused Deposition Modeling (FDM) 3D printer, which builds objects layer by layer by extruding heated thermoplastic material. It is capable of translating digital 3D models into physical objects, making it suitable for a wide range of applications from prototyping and educational projects to artistic creations and functional parts. The printer operates with motorized and heated components, precisely controlled to achieve accurate and consistent prints. Its core function revolves around the precise movement of the print head (X and Z axes) and the build plate (Y axis), coupled with the controlled extrusion of filament, to construct intricate geometries. The device is designed to be user-friendly, with a focus on ease of assembly and operation, making 3D printing accessible to a broader audience.
Usage Features
The Tevo Michelangelo offers several features that enhance its usability and printing capabilities:
- Assembly and Setup: The manual provides a clear, step-by-step guide for assembling the printer. This includes attaching the rubber feet to the base and connecting the power cord. The emphasis on initial inspection for shipping damage ensures that users start with a fully functional unit.
- Fine-tuning for Optimal Performance: Achieving high-quality prints requires careful calibration, and the Tevo Michelangelo incorporates mechanisms for fine-tuning various components.
- Build Plate Tension (Y-axis): Users can adjust the tension of the build plate wheels on the Y-axis. This involves checking if the wheels turn freely and, if too loose, rotating eccentric nuts with an open-end wrench until the wheels are snug against the aluminum extrusion. Proper tension ensures the build plate moves smoothly without side-to-side wiggle or play.
- Z Gantry Plate Tension: Similar to the build plate, the Z gantry plate wheels can be adjusted. Users check if the wheels behind the plate turn freely and, if loose, tighten them by rotating the eccentric nuts until they are snug against the Z-axis.
- X-carriage Wheels Tension: The X-carriage wheels also require tension adjustment. Users verify if the wheels behind the plate turn freely and, if loose, tighten them using eccentric nuts until they are snug against the X-axis. Correct tension ensures the hotend assembly moves left and right smoothly without front-and-back wiggle or play.
- Belt Tension (Y-axis and X-carriage): The tension of the belts driving both the Y-axis (under the build plate) and the X-carriage is crucial for accurate movement. If a belt is loose, users can loosen specific bolts, pull the motor with the pulley away from the extrusion to tighten the belt, and then re-tighten the bolts. This ensures the belts are taut with no slack or slop.
- Titan Extruder Tension: The Titan Extruder's tension can be adjusted via a specific screw if the filament does not extrude smoothly during printing. This allows for optimization of filament flow.
- Adjusting the Build Plate (Bed Leveling): Critical for print adhesion and quality, the build plate needs to be approximately 1mm from the nozzle across all locations, roughly the thickness of a single A4 paper.
- Auto Home and Disable Steppers: The process begins by selecting "Prepare -> Auto Home" to move the nozzle to the home position, followed by "Prepare -> Disable Steppers" to allow manual movement of the X-carriage and build plate.
- Paper Test: A piece of paper is slid between the nozzle and the build plate, and the four thumbscrews under the bed are adjusted until the paper slides with a slight drag. This process is repeated at least twice, as adjusting one corner affects others.
- Fine Adjustments During Print: Users can make fine adjustments to the bed level during the first layer of a print, observing the extruded lines to ensure optimal surface area contact and smooth extrusion. If necessary, the print can be stopped, the build plate cleared, and the print restarted after adjustments.
- Slicing Software Preparation: The Tevo Michelangelo is compatible with various slicing software, including Simplify3D, Cura, and Repetier-Host. The manual specifically details setup for Repetier-Host.
- Software Download and Installation: Users are directed to download the software from the Tevo website.
- Printer Settings Configuration: Within Repetier-Host, users configure printer settings by setting the Port (for USB connection), Baud Rate to 250000, and leaving other settings untouched in the "Connection" tab.
- Printer Shape Configuration: In the "Printer Shape" tab, users set X Max, Y Max, Print Area Width, Print Area Depth, and Print Area Height to 150mm, and Home X, Home Y, Home Z, X Min, Y Min, Bed Left, and Bed Front to 0.
- Printer Tab Configuration: Specific values for Travel Feed Rate (30000 mm/min), Z-Axis Feed Rate (3600 mm/min), Manual Extrusion Speed (3-25 mm/s), Manual Retraction Speed (150 mm/s), Default Extruder Temperature (210°C), and Default Heated Bed Temperature (80°C) are provided. Options like "Check Extruder & Bed Temperature," "Printer has SD card," and "Send ETA to printer display" are also enabled.
- Slicer Configuration (Slic3r): Users select Slic3r as the slicer and load the "Michelangelo.ini" file from the SD card, then rename and save the print setting, filament, and printer profiles.
- Slicing 3D Objects for SD Print:
- Loading STL Files: Users can load STL files by browsing to their location or by dragging and dropping them into Repetier-Host.
- Slicing and Saving G-code: After the file is open in 3D view, users click the "Slicer" tab, select the correct Print Setting, Printer Settings, and Extruder type, then click "Slice with Slic3r." The resulting G-code file is saved to an SD card, which can then be inserted into the printer to initiate printing from the SD menu.
- Firmware Flashing: The manual provides instructions for flashing new firmware, specifically using Marlin for demonstration.
- Required Downloads: Users need Arduino IDE and the firmware source code (available from Tevo's Facebook page, customer service, Marlin, or Repetier).
- Configuration (Pre-configured): Firmware from Tevo's official sources is typically pre-configured, requiring no modification. For custom configurations, users would edit "configuration.h" and "configuration_adv.h."
- Verify/Compile Process: The process involves opening the Marlin.ino file in Arduino IDE, selecting the correct board (Arduino/Genuino Mega or Mega 2560) and serial port, then clicking "Verify/Compile" to check for errors.
- Upload Process: Once errors are resolved, clicking the "Upload" button flashes the firmware to the controller board, indicated by rapid flashing of a blue or green LED.
Maintenance Features
The Tevo Michelangelo emphasizes preventative measures and provides clear guidelines for addressing issues, ensuring the longevity and optimal performance of the printer.
- Pre-assembly Inspection: Users are instructed to inspect all parts upon removal from the box to ensure no damage occurred during shipment. This proactive step helps identify potential issues before assembly.
- Regular Checks for Tightness and Smoothness: Throughout the fine-tuning section, there's a recurring theme of checking for tight screws and smooth-running wheels. This suggests that periodic checks of these components are essential for maintaining print quality and preventing wear.
- Wheels and Eccentric Nuts: Regularly checking the tension of the build plate, Z gantry, and X-carriage wheels, and adjusting the eccentric nuts as needed, prevents wobbling and ensures precise movement.
- Belts: Ensuring the Y-axis and X-carriage belts are taut and free of slack is critical for accurate positioning and preventing layer shifts.
- Grounding for Static Charge: Before touching the printer, especially its electronics, users are advised to ground themselves to prevent electrostatic discharge, which can damage electronic components. This is a crucial preventative maintenance step for the internal circuitry.
- Post-Assembly Verification: The manual implicitly encourages a thorough check of all connections and mechanical movements after assembly and fine-tuning, ensuring everything is snug and operating as expected before the first print.
- Troubleshooting and Support: Tevo provides robust support channels for maintenance and issue resolution:
- Facebook Group: Users are directed to a Facebook group (https://www.facebook.com/groups/TEVO.3dprinter.owners/) for community support and problem-solving.
- Service Ticket System: For unresolved issues, users can submit a Service Ticket via http://support.tevoprinter.com. The support team aims to respond within 48 hours.
- Replacement Parts Program: Tevo offers a 12-month replacement part program:
- Within 7 Days of Delivery: Missing, damaged, or defective parts are replaced free of charge, including shipping fees.
- After 7 Days of Delivery: Missing, damaged, or defective parts are replaced free of charge, but the customer is responsible for shipping fees.
- Customer Damaged Parts: The customer pays for both the cost of parts and shipping fees.
- Carrier Loss/Damage Claims: For shipments lost or damaged by the carrier, users must report to the carrier within their claim window and inform Tevo within 7 days of delivery. Photos/videos of damage and any claim numbers from the carrier should be submitted with the Service Ticket. If electronic parts (LCD Panel, Power Supply, Mainboard) are defective, the customer ships the part back to Tevo for a new replacement.
By following these guidelines for assembly, usage, and maintenance, users can maximize the performance and lifespan of their Tevo Michelangelo 3D printer.