5 - 15
MAINTENANCE
Read all of this manual to become thoroughly familiar with this vehicle. Pay particular attention to all Notices, Cautions, Warnings, and Dangers.
5
SPARK PLUGS
Tool List Qty. Tool List Qty.
Spark Plug Socket, 13/16” .......................................... 1 Ratchet.................................................................... 1
Plug Gauge, Wire Type ............................................... 1 Anti-seize Compound........................................... AR
Torque Wrench, ft. lbs. ................................................ 1
Use care not to over-tighten the plug. Over-tightening can cause damage
to the aluminum cylinder head threads.
Remove and inspect the spark plug at intervals indicated in the Periodic
Service Schedule. Spark plug should be properly gapped. Tighten to 16
ft. lbs. (22 Nm) torque
Remove and inspect the spark plug at intervals indicated in the Periodic
Service Schedule. Spark plug should be properly gapped. Tighten to 16 ft.
lbs. (22 Nm) torque.
Fouled spark plug is indicated by a wet, black appearance. This could be
caused by a dirty air filter element or other restrictions in the air intake sys-
tem. Incorrectly adjusted valves, spark plug wire which are in poor condi-
tion or poor quality fuel could also contribute to the problem.
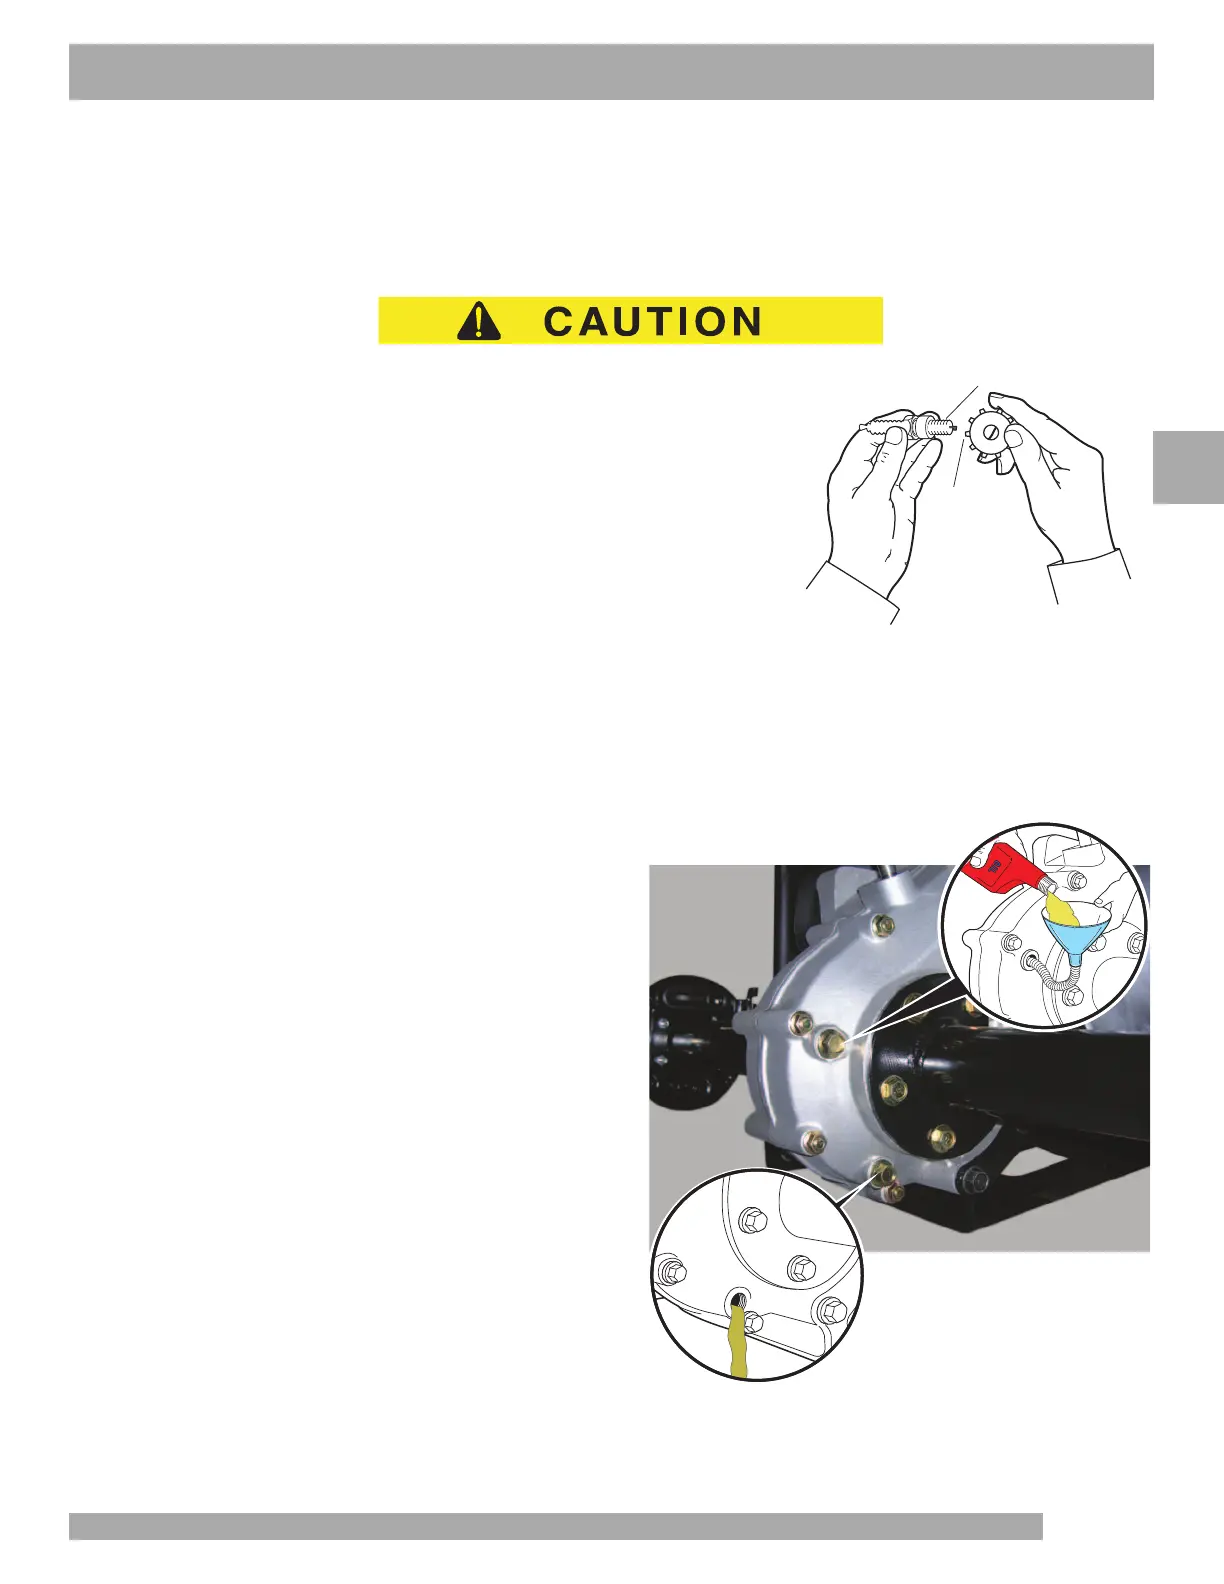
REAR AXLE
The rear axle is provided with a lubricant level check plug located on the driver side at the rear of the housing.
Unless leakage of rear axle lubricant is evident, an annual lubricant check is sufficient.
Checking The Lubricant Level
Tool List Qty.
Socket, 13 mm ............................................................ 1
Ratchet........................................................................ 1
Drain Pan .................................................................... 1
Funnel ......................................................................... 1
Clean the area around the check and fill plugs. Remove
the check plug. The correct lubricant level is just below the
bottom of the threaded hole. If lubricant is to be added,
remove the fill plug and add lubricant using a funnel. Add
lubricant slowly until lubricant starts to seep from the check
plug hole. Install the check plug and the fill plug. In the
event that the lubricant is to be replaced, a drain plug is
provided at the bottom of the differential housing.
.030"
(.75 mm)
Gap
Spark Plug
Drain Plug
Fill / Check Plug

 Loading...