GASOLINE UTILITY VEHICLES
Page 20
Owner’s Manual and Service Guide
Read all of manual to become thoroughly familiar with this vehicle. Pay particular attention to all Notes, Cautions and Warnings
Schedule when the tires are cool. Be sure to install valve
dust cap after checking or inflating.
A tire explosion can cause
severe injury or death. Never
exceed inflation pressure
rating on tire sidewall.
To prevent tire explosion, pressurize tire with small
amount of air applied intermittently to seat beads.
Never exceed the tire manufacturer’s recommenda-
tion when seating a bead. Protect face and eyes from
escaping air when removing valve core.
Use caution when inflating tires. Due to the low vol-
ume of these small tires, overinflation can occur in a
matter of seconds. Overinflation could cause the tire
to separate from the wheel or cause the tire to
explode, either of which could cause personal injury.
Tire inflation will depend on the type of tires fitted but
under no condition should inflation pressure be higher
than recommended on the tire sidewall. Standard and
optional tires should be inflated to pressure designated in
GENERAL SPECIFICATIONS on page 4-1. If pressure is
not designated in GENERAL SPECIFICATIONS, inflate
to pressure designated on tire sidewall. All four tires
should have the same pressure for optimum handling
characteristics. Do not overinflate. Due to the low vol-
ume of these small tires, overinflation can occur in a mat-
ter of seconds. Be sure to install valve dust cap after
checking or inflating.
Wheel and Tire Service
Tool List Qty. Required
Lug wrench, 3/4" ......................................................... 1
Impact socket, 3/4", 1/2" drive..................................... 1
Impact wrench, 1/2" drive............................................ 1
Torque wrench, 1/2" drive, ft. lbs. ................................ 1
To prevent injury caused by
a broken socket, use only
sockets designed for impact
wrench use.
The vehicle is fitted with low pressure tubeless tires
mounted on one piece rims. When removing wheels with
an impact wrench, use only impact sockets. Regular
sockets are not designed for impact pressures exerted
by power tools.
Generally, the most cost effective way to repair a flat tire
resulting from a puncture in the tread portion of the tire is
to use a commercial tire plug.
Tire plug tools and plugs are available at most
automotive parts outlets and have the advantage
of not requiring the tire be removed from the wheel.
If the tire is flat, raise vehicle and remove wheel. Refer to
‘Lifting the Vehicle’ for proper lifting procedure and safety
information. Inflate tire to maximum recommended pres-
sure. Immerse the tire in water to locate the leak and
mark with chalk. Insert tire plug in accordance with man-
ufacturer’s specifications.
If the tire is to be removed or mounted, the tire changing
machine manufacturer’s recommendations must be fol-
lowed in order to minimize the possibility of personal
injury. Be sure to position tire on wheel correctly. Arrow
on tire indicates rotation when moving forward.
To prevent injury, be sure
mounting/demounting
machine is anchored to floor.
Wear OSHA approved safety equipment when mount-
ing/demounting tires.
Follow all instructions and safety warnings provided by
the mounting/demounting machine manufacturer.
Do not tighten lug nuts to more than 85 ft.
lbs. (115 Nm) torque.
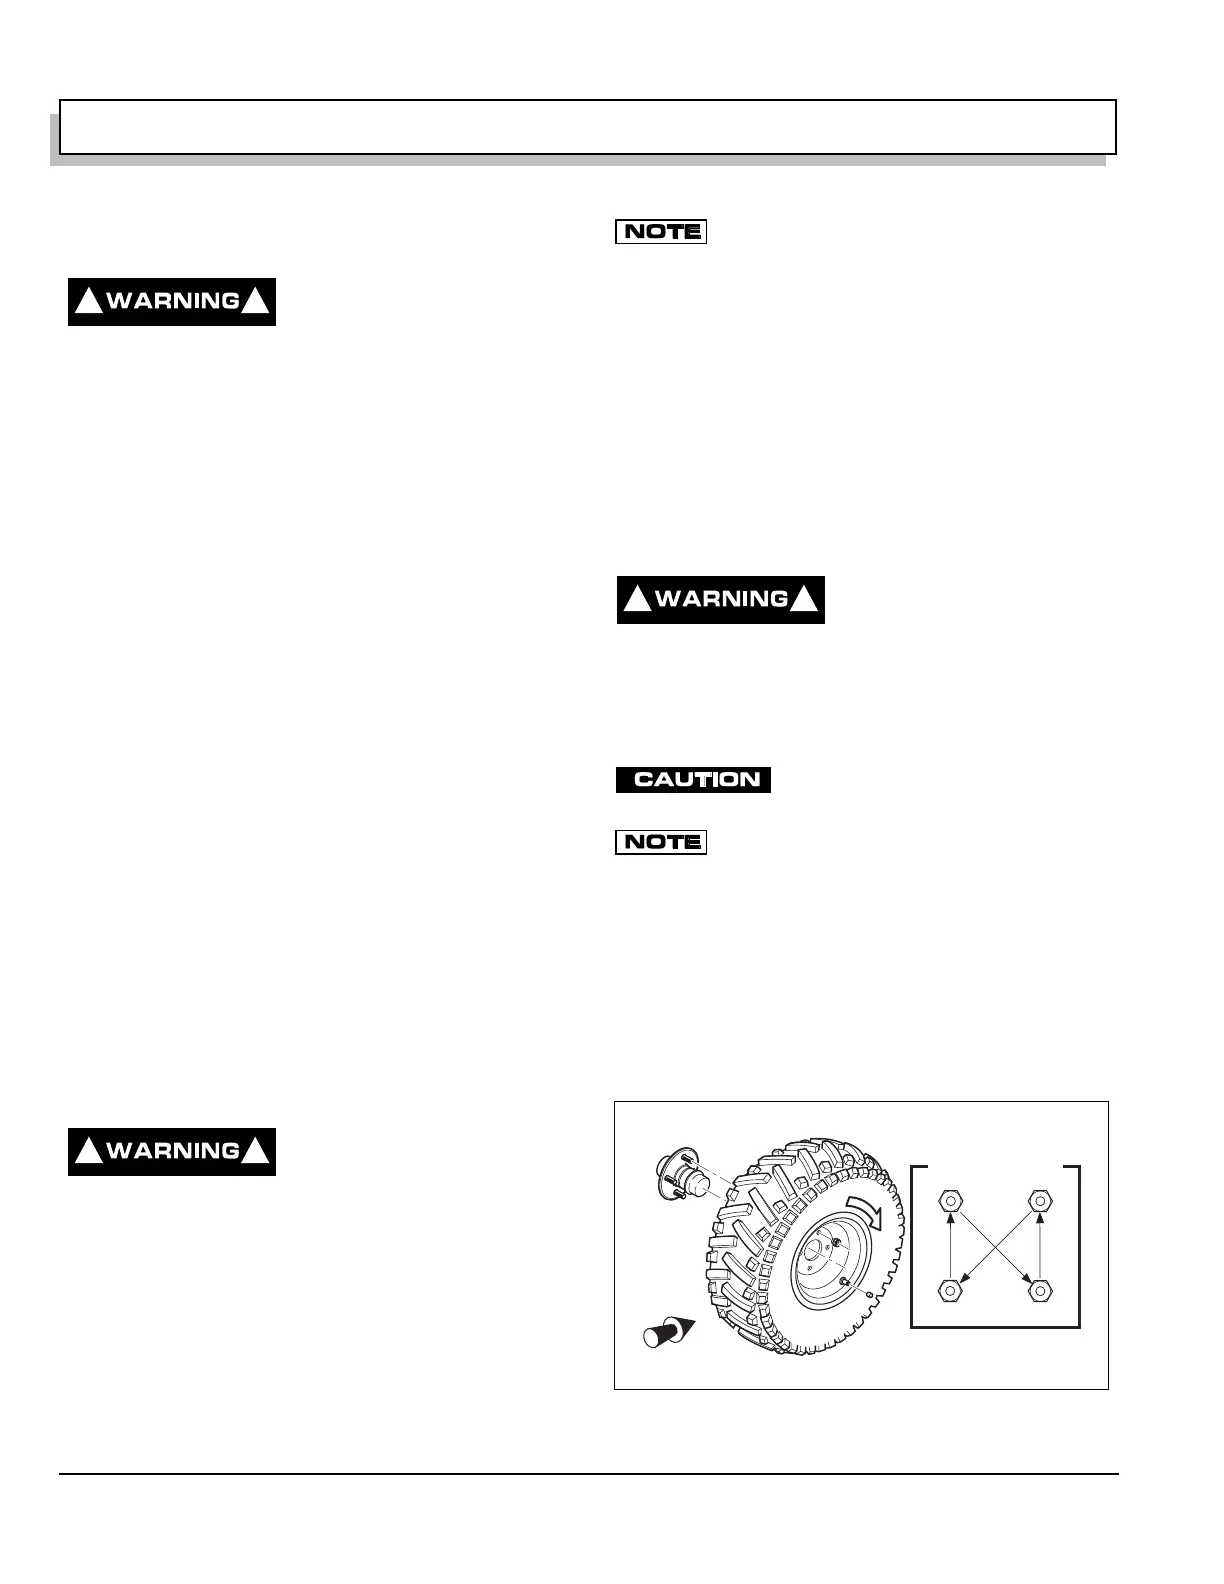
It is important to follow the ‘cross sequence’ pat-
tern when installing lug nuts. This will assure
even seating of the wheel against the hub.
With the valve stem to the outside, mount the wheel onto
the hub with lug nuts. Be sure to position the wheel on
hub correctly with arrow indicating direction of rotation
when moving forward. Finger tighten lug nuts in a ‘cross
sequence’ pattern (Ref Fig. 39 on page 20). Then,
tighten lug nuts to 50 - 85 ft. lbs. (70 - 115 Nm) torque in
20 ft. lbs. (30 Nm) increments following the same ‘cross
sequence’ pattern.
! !
! !
Fig. 39 Wheel Installation
! !
Tire style may vary
1
2
3
4
'Cross Sequence'
Front of
Vehicle
R
o
t
a
t
i
o
n