www.SteamPoweredRadio.Com
4.
6 How to Install a New Receiver Module
The
AM,
FM
, and
NOAA
Weather receiver modules are available as kits for field installation.
Use
the
part numbers listed
in
Table 4-1 when ordering the kits for field installation:
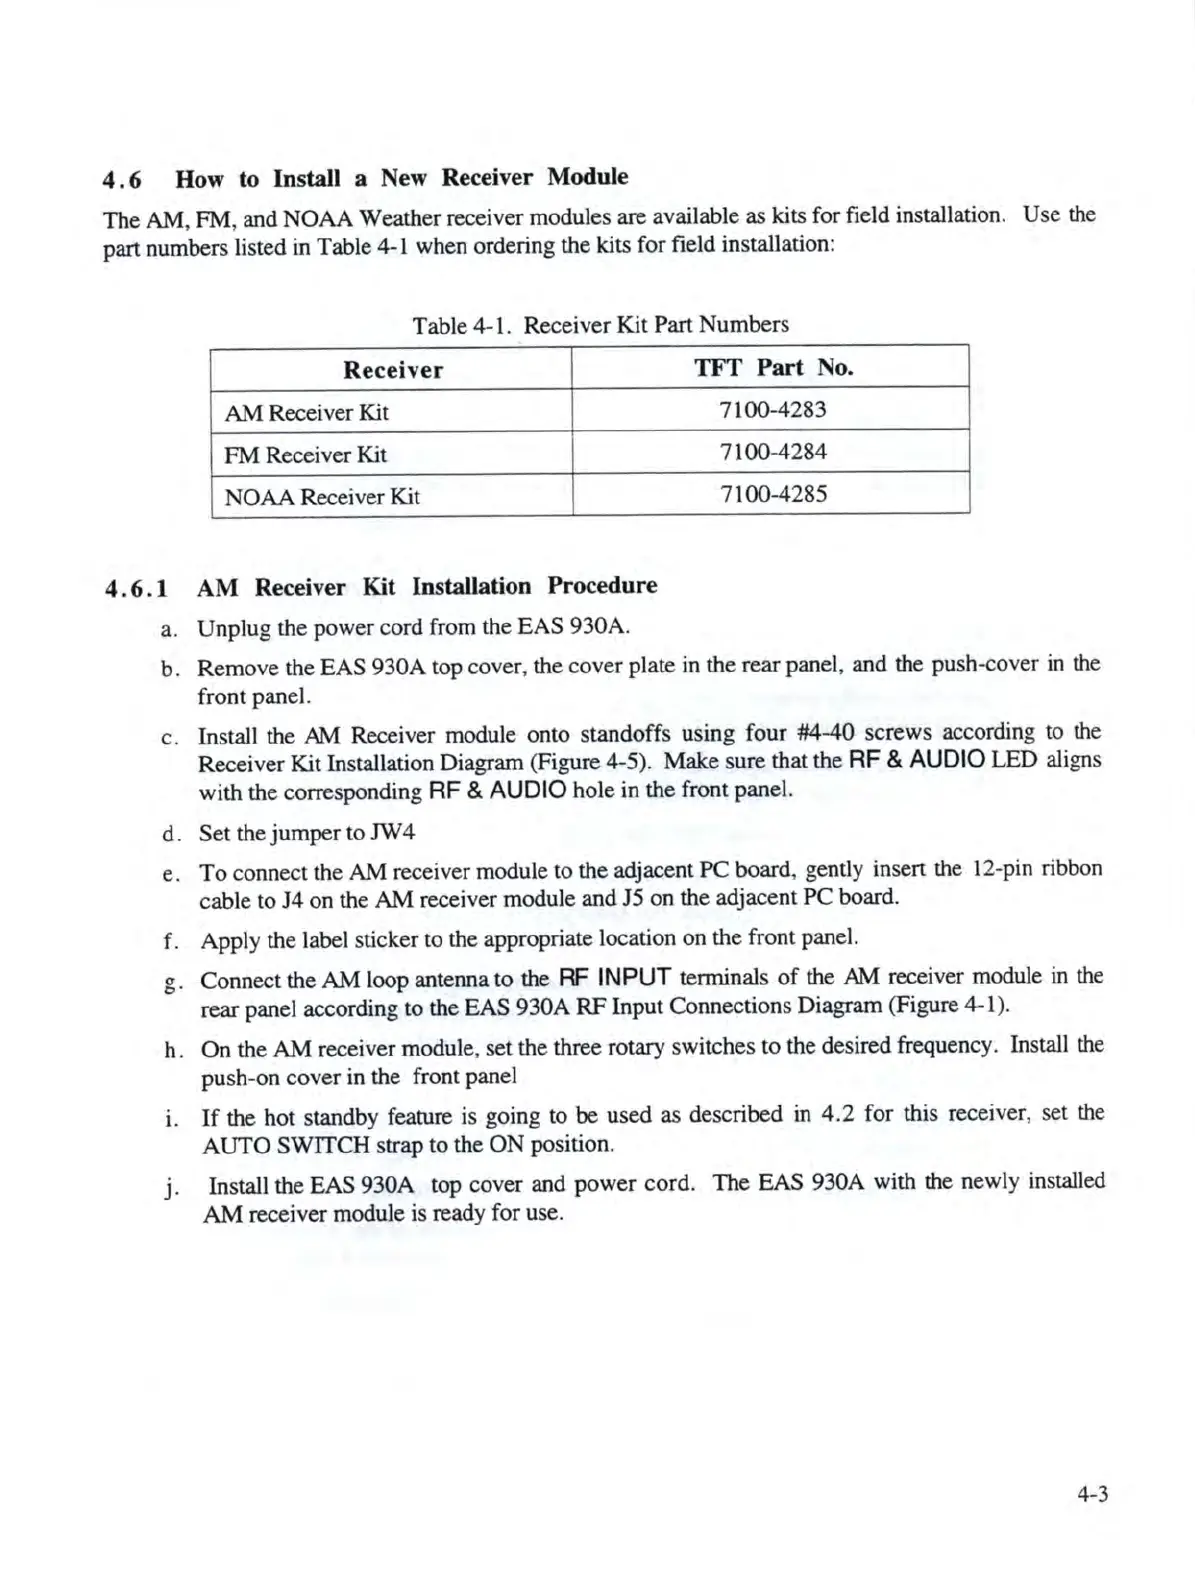
Table 4-1. Receiver
Kit
Part Numbers
Receiver
TFT Part No.
AM
Receiver Kit
7100-4283
FM
Receiver Kit
7100-4
284
NOAA
Receiver
Kit
7100-4285
4 . 6
.1
AM Receiver Kit Installation Procedure
a. Unplug the
power
cord
from the
EAS
930A.
b.
Remove
the
EAS
930A
top
cover
, the
cover
plate in the rear panel, and the push-cov
er
in
the
front panel.
c.
Install the
AM
Receiver module onto standoffs using
four
#4-40
screws according to the
Receiver Kit Installation Diagram (Figure 4-5). Make
sure
that the RF & AUDIO LED aligns
with
the corresponding RF & AUDIO
hole
in the front panel.
d.
Set
the
jumper
to
JW
4
e.
To
connect the
AM
receiver module to the adjacent
PC
board, gently ins
ert
the 1
2-
pin ribbon
cable
to
14
on
the
AM
receiver module and JS on the adjacent
PC
board.
f . Apply the label sticker to the appropriate location on the front panel.
g. Connect the
AM
loop antenna to the RF
INPUT
terminals
of
the
AM
receiver module
in
the
rear
panel according
to
the
EAS
930A
RF
Input Connections Diagram (Figure 4-1).
h.
On
the
AM
receiver module, set
the
three rotary switches
to
the desired frequency. Install the
push-on
cover
in the front panel
i.
If
the hot standby feature is going to
be
used as
de
scribed in 4.2 for this receiver, s
et
the
AUTO
SWITCH
strap
to
the
ON
position.
j . Install the EAS 930A top cover and
power
cord.
The
EAS
930A with the newly installed
AM
receiver module is ready
for
use.
4-3