THE ADVANCED SWITCHING SYSTEM
THE GIGRIG G3 USER MANUAL
2.4. PROGRAMMING
1. Choose a preset that you wish to programme by pressing a PRESET FOOTSWITCH. It will light up and
the corresponding number will also appear on the LCD screen.
2. Select the EFFECTS LOOPS and CONTROL FUNCTIONS you want to use with that preset.
3. Repeat for the other presets you wish to programme.
4. There is no store button, G3 remembers every time you press a button and automatically saves after
each step.
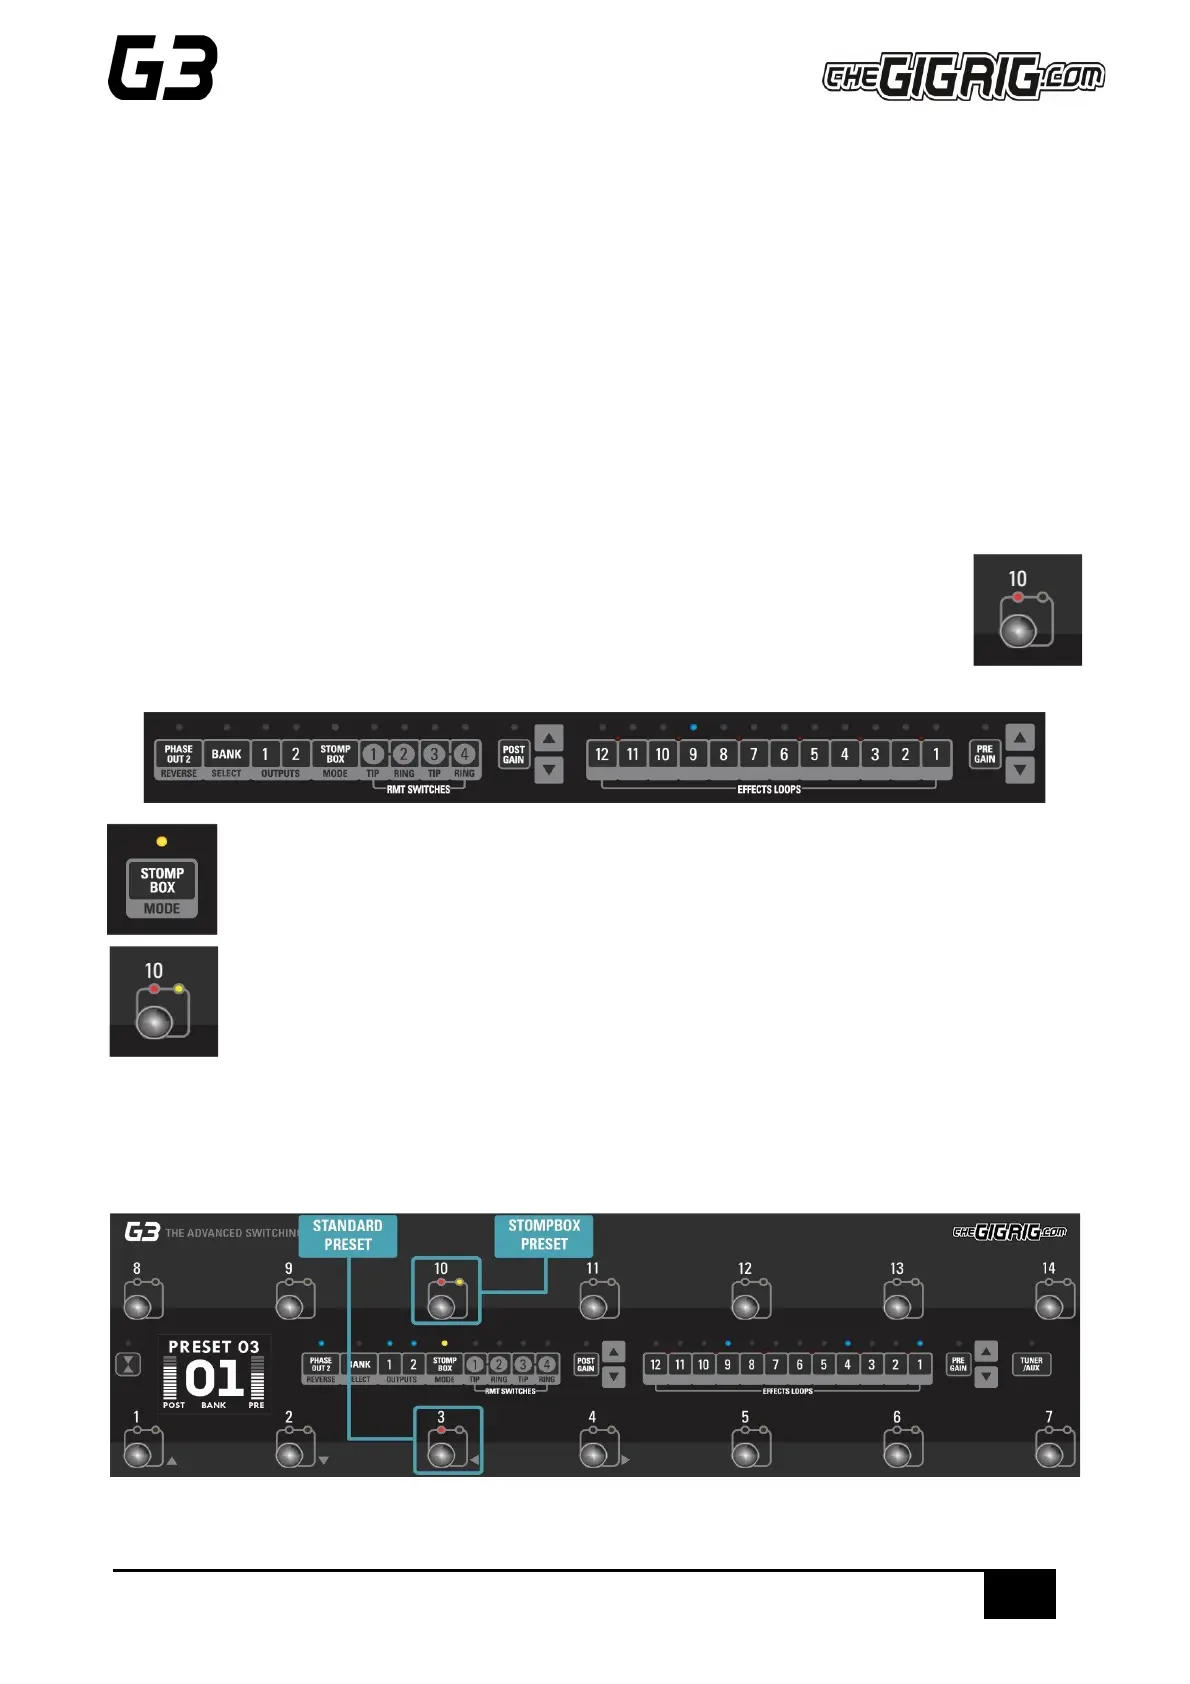
2.5. STOMPBOX MODE
This enables you to add any LOOP, or combination of LOOPS and CONTROL FUNCTIONS, on top of any standard
PRESET. This gives you the ability to create and build sounds on the fly without being tied to traditional presets.
1. Choose the PRESET you want to turn into a STOMPBOX Mode preset, eg; using PRESET 10.
2. Select the LOOP(s) you want to turn on. In this example below, I want to add a delay that is in
LOOP 9.
3. Now make sure everything else is turned off including OUTPUTS and PHASE OUT2.
4. Now press the STOMPBOX MODE button. A yellow LED will turn on next to the main preset
LED.
Preset 10 is now in STOMPBOX Mode and will add the delay in LOOP 9, ON TOP of any other
preset.
You can add as many STOMPBOX MODE presets as you like. All Stompbox Mode presets will clear when you
press any normal preset. This can, however, be changed in the DEEP EDIT MENU by selecting either STICKY
STOMP or FLASH.