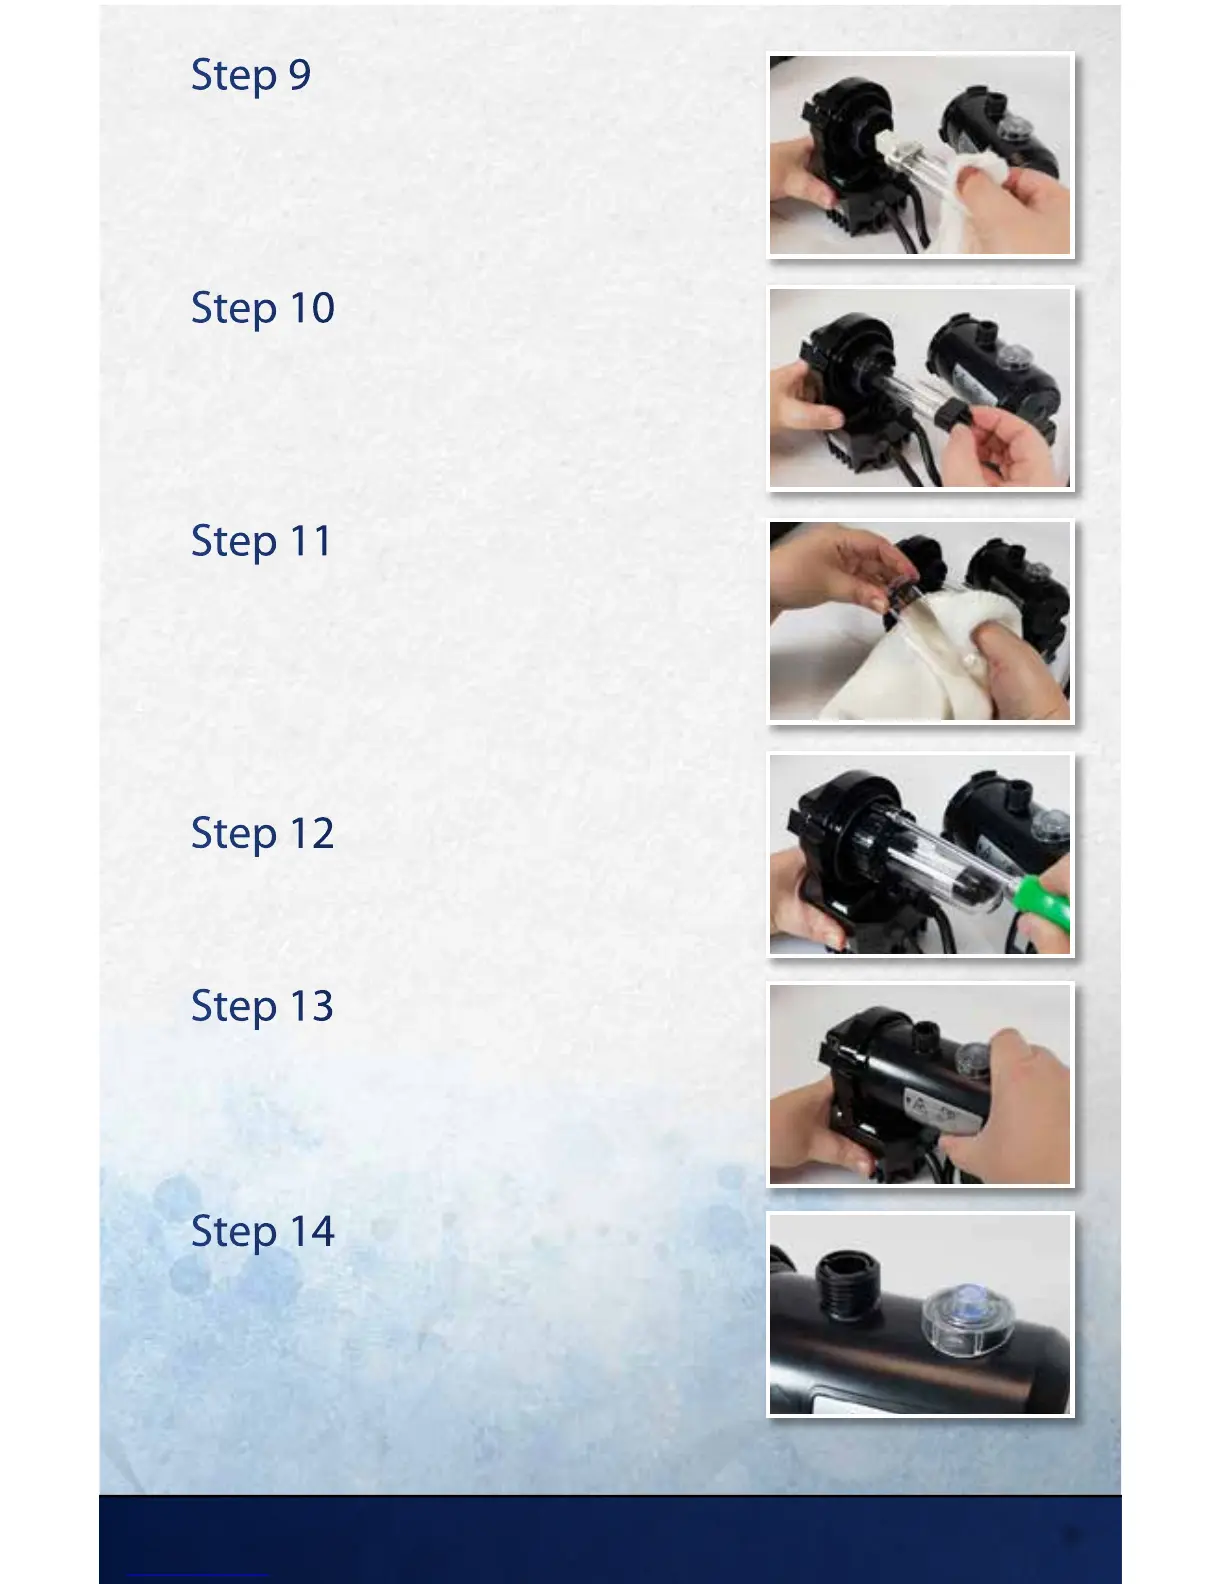
Step 9
Replace UV Bulb
Replace the UV bulb by gently removing the bulb
from the socket and replacing with a new one. Avoid
touching the new bulb with your hands as the oils
from your skin cause damage to the bulb.
Step 10
Transfer Rubber Cap
Be sure to remove the rubber cap from the old bulb
and place it on the new bulb.
Step 11
Clean Quartz Sleeve
Clean the quartz sleeve using a soft damp cloth. Any
debris buildup will greatly reduce the eectiveness
of the UV Clarier. If your quartz sleeve is cracked or
damaged, it must be replaced. Note: Condensation
may form on the quartz sleeve. This cannot be avoided
and does not impair the function or safety of the unit.
Step 12
Reassemble UV
Once cleaned, reassemble the o-ring and quartz sleeve
and lock into place with the tension nut and screw.
Step 13
Connect UV Housing
Place the UV housing back on to the UV and twist to
lock into place.
Step 14
Test UV
Temporarily plug in the UV Clarier to test. The view
window on the UV housing will tell you if the UV bulb
is working.
15425 Chets Way | Armada, MI 48005
9