EasyManua.ls Logo

Thermo King Smart Reefer 3 - User Manual

Thermo King Smart Reefer 3
2 pages
Print Icon
To Next Page IconTo Next Page
Loading...
Optiset Plus
The controller can be programmed with OptiSet Plus
temperature profiles that allow the user to select named
products and/or numeric setpoints. See the appropriate
Operator’s Manual for more detailed information about
using OptiSet Plus.
Numeric Setpoint - If the controller does not have
named products loaded, the far left soft key will
display
SETPOINT as shown below. This is the factory
default setting. Change the numeric setpoint like you
normally would on an SR-3 Controller.
Named Products - The controller can be
programmed to allow only named products to be
selected. In which case the far left soft key will
display
PRODUCT as shown below.
Named products can have a single setpoint, or they
can have a setpoint range that allows the user to
select a setpoint within that range.
NOTE: In OptiSet Plus the terms “numeric setpoint”
and “setpoint” mean the same thing and are
displayed as numbers. The terms “named product”
and “product” mean the same thing and are displayed
as words.
NOTE: Alarm Code 127, Setpoint Not Entered, may be
generated if the
+ or - soft keys are used to change
the numeric setpoint or named product, but the
YES
or
NO soft keys are not used to accept or decline the
new setting within 10 seconds.
Named Products or Numeric Setpoint -The
controller can be programmed to allow named
products or numeric setpoints to be selected. In
which case the far left soft key will display
PRODUCT/
S
ETPOINT as shown below.
Selecting a Numeric Setpoint
To select or change a numeric setpoint complete the
following steps. This example shows the Standard Display
with the PRODUCT/SETPOINT soft key. Using the
Standard Display with the
SETPOINT soft key is basically
the same but some of the screens differ slightly.
1. Begin at the Standard Display.
If the Temperature Watch Display is showing, press
the
MENU soft key once to return to the Standard
Display.
2. Press the
PRODUCT/SETPOINT (or SETPOINT) soft
key on the Standard Display.
3. The “Named Product / Numeric Setpoint?” Screen
briefly appears, then the “Named Product or Numeric
Setpoint?” Screen will appear.
4. Press the
NUMERIC soft key.
5. The “Setpoint” Screen briefly appears, then the
“Current Setpoint Is” Screen will appear.
6. Press the
+ or - soft keys to change the setpoint.
7. Press the
YES soft key to select the new setpoint.
If the
NO key is pressed the setpoint change selected
with the
+ or - soft keys will not be accepted, the
setpoint will not be changed and the display will
return to the Standard Display.
If the
YES soft key is pressed, the setpoint change
selected with the
+ or - soft keys will be accepted,
and the following screens will appear.
8. The “Programming New Setpoint” Screen will briefly
appear.
9. The “New Setpoint Is 40” Screen briefly appears.
10. The Standard Display appears with the new setpoint.
NOTE: Pressing the
EXIT soft key at any point will
return to the Standard Display.
NOTE: If no keys are pressed for 30 seconds while in
the Named Product Changer Screens, the HMI will
return to the Standard Display.
Selecting a Named Product
To select or change a named product complete the
following steps. This example shows the Standard Display
with the
PRODUCT/SETPOINT soft key. Using the
Standard Display with the
PRODUCT soft key is basically
the same but some of the screens differ slightly.
1. Begin at the Standard Display.
If the Temperature Watch Display is showing, press
the
MENU soft key once to return to the Standard
Display.
2. Press the
PRODUCT/SETPOINT (or PRODUCT) soft
key on the Standard Display.
3. The “Named Product / Numeric Setpoint?” (or Named
Product) Screen briefly appears, then the “Named
Product or Numeric Setpoint?” (or Named Product)
Screen will appear.
4. Press the
NAMED soft key.
5. The “Product” Screen briefly appears, then the
“Current Product Is” Screen will appear.
6. Press the
+ or - soft keys to change the named
product.
7. Press the
YES soft key to select the new named
product.
If the
NO key is pressed the named product change
selected with the
+ or - soft keys will not be
accepted, the named product will not be changed and
the display will return to the Standard Display. (Over)
1
2
4
6
7
1
2
4
6
7
Question and Answer IconNeed help?

Do you have a question about the Thermo King Smart Reefer 3 and is the answer not in the manual?

Summary

Optiset Plus Controller Overview

Optiset Plus Capabilities

Controller allows selection of named products and/or numeric setpoints.

Setpoint and Product Terminology

Clarifies terms 'setpoint'/'product' and specific notes.

Selecting Setpoints and Products

Selecting a Numeric Setpoint

Step-by-step guide to changing a numeric setpoint on the controller.

Selecting a Named Product

Step-by-step guide to selecting a named product from the controller's list.

Managing Named Product Setpoints

Selecting the Setpoint for a Named Product

Procedure to select a setpoint for a named product with a programmed range.

Changing the Setpoint for a Named Product

Procedure to adjust the setpoint for a named product with a programmed range.

Overview

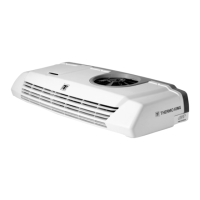
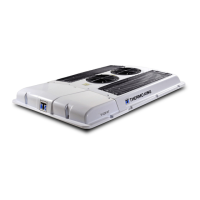
The OptiSet Plus system is a sophisticated controller designed for managing temperature profiles within refrigerated transport units, offering users the flexibility to select either pre-defined named products or specific numeric setpoints. This system is an integral part of the SR-3 Smart Reefer 3 Microprocessor, providing precise control over the refrigeration environment.

Function Description

The primary function of the OptiSet Plus controller is to maintain a desired temperature within a refrigerated space. It achieves this by allowing users to define and select specific temperature settings, either through a list of named products, each with its own temperature profile, or by directly entering a numeric setpoint. The system is designed to be user-friendly, guiding the operator through various screens to ensure accurate temperature management.

When operating with named products, the controller can be programmed such that each product has a single, fixed setpoint, or a range of setpoints, offering greater flexibility. For instance, "Grapefruit" might have a default setpoint of 35.5°F, while "Potatoes" might have a setpoint range of 40-50°F, allowing the user to choose a specific temperature within that range. This feature is particularly useful for mixed loads or for products that require different temperature conditions at various stages of transport.

The numeric setpoint functionality allows for direct temperature input, similar to how an SR-3 Controller operates. If no named products are loaded onto the controller, the system defaults to displaying "SETPOINT" on the far-left soft key, enabling the user to adjust the temperature numerically. This provides a straightforward method for temperature control when specific product profiles are not required or available.

The controller also incorporates a "Temperature Watch Display," which, if active, can be exited by pressing the MENU soft key to return to the Standard Display, ensuring that the user always has a clear view of the primary operational screen.

Usage Features

The OptiSet Plus controller is designed for intuitive use, primarily through a series of soft keys and a display screen that guides the operator through various selection and adjustment processes.

Selecting a Numeric Setpoint:

To select or change a numeric setpoint, the user begins at the Standard Display. Pressing the "PRODUCT/SETPOINT" (or "SETPOINT") soft key brings up a screen that briefly displays "Named Product / Numeric Setpoint?" before showing "Named Product or Numeric Setpoint?". The user then presses the "NUMERIC" soft key. The "Setpoint" screen appears, followed by "Current Setpoint Is," displaying the current temperature. The user can adjust this temperature using the "+" or "-" soft keys. After making the adjustment, pressing the "YES" soft key confirms the new setpoint. If "NO" is pressed, the change is discarded, and the display returns to the Standard Display. Pressing the "EXIT" soft key at any point will also return the display to the Standard Display, providing an easy way to cancel an operation.

Selecting a Named Product:

The process for selecting a named product is similar. From the Standard Display, the user presses the "PRODUCT/SETPOINT" (or "PRODUCT") soft key. After the "Named Product / Numeric Setpoint?" screen, the user selects the "NAMED" soft key. The "Product" screen appears, followed by "Current Product Is," displaying the currently selected product (e.g., "Grapefruit"). The user can then use the "+" or "-" soft keys to scroll through the available named products. Pressing "YES" confirms the selection, and the display shows "New Product Will Be" followed by the chosen product (e.g., "Potatoes"). If "NO" is pressed, the selection is canceled, and the display reverts to the Standard Display.

Changing the Setpoint for a Named Product (with a Setpoint Range):

If a named product has been programmed with a setpoint range, the user can adjust the setpoint within that range. After selecting the named product and confirming with "YES," if the product has a setpoint range, the "Change Setpoint for [Product Name]" screen appears, followed by "Current Setpoint of [Product Name] & Setpoint Range Is [Min] to [Max]." The user can then use the "+" or "-" soft keys to adjust the setpoint within the specified range. Confirming with "YES" accepts the new setpoint, while "NO" cancels the change.

Important Operational Notes:

  • The system differentiates between "numeric setpoint" and "setpoint" (displayed as numbers) and "named product" and "product" (displayed as words). This distinction helps in navigating the menu options.
  • The controller is designed to prevent accidental changes. If no keys are pressed for 30 seconds while in the Named Product Changer Screens, the Human-Machine Interface (HMI) will automatically return to the Standard Display, preserving the current settings.
  • An "Alarm Code 127, Setpoint Not Entered" may be generated if the "+" or "-" soft keys are used to change a setpoint or product, but the "YES" or "NO" soft keys are not used to accept or decline the new setting within 10 seconds. This feature ensures that changes are intentionally confirmed by the user.

Maintenance Features

While the manual primarily focuses on operational aspects, certain design choices imply maintenance considerations:

  • User Interface Clarity: The clear, step-by-step instructions and intuitive screen prompts reduce the likelihood of operational errors, which can indirectly contribute to better system maintenance by preventing misconfigurations that might lead to system stress or malfunction.
  • Automatic Return to Standard Display: The feature where the HMI returns to the Standard Display after 30 seconds of inactivity in changer screens helps prevent the system from being left in an intermediate state, ensuring that the controller is always operating under a confirmed setpoint. This reduces the risk of unintended temperature excursions due to an unconfirmed setting.
  • Alarm Code for Unconfirmed Setpoints: The "Alarm Code 127" serves as a diagnostic aid, alerting the operator if a setpoint change was initiated but not confirmed. This helps in quickly identifying and rectifying potential issues related to temperature control, ensuring that the system operates as intended.

The OptiSet Plus system, as part of the SR-3 Smart Reefer 3 Microprocessor, is a robust and user-friendly solution for precise temperature management in refrigerated transport, designed to offer both flexibility and reliability in various operational scenarios.

Thermo King Smart Reefer 3 Specifications

General IconGeneral
ModelSmart Reefer 3
Power SourceDiesel, Electric
Control SystemMicroprocessor-based
WeightVaries by configuration
DimensionsVaries by configuration
CompatibilityCompatible with a wide range of trailer types and sizes

Related product manuals