44
TK 56430-18-IP-EN
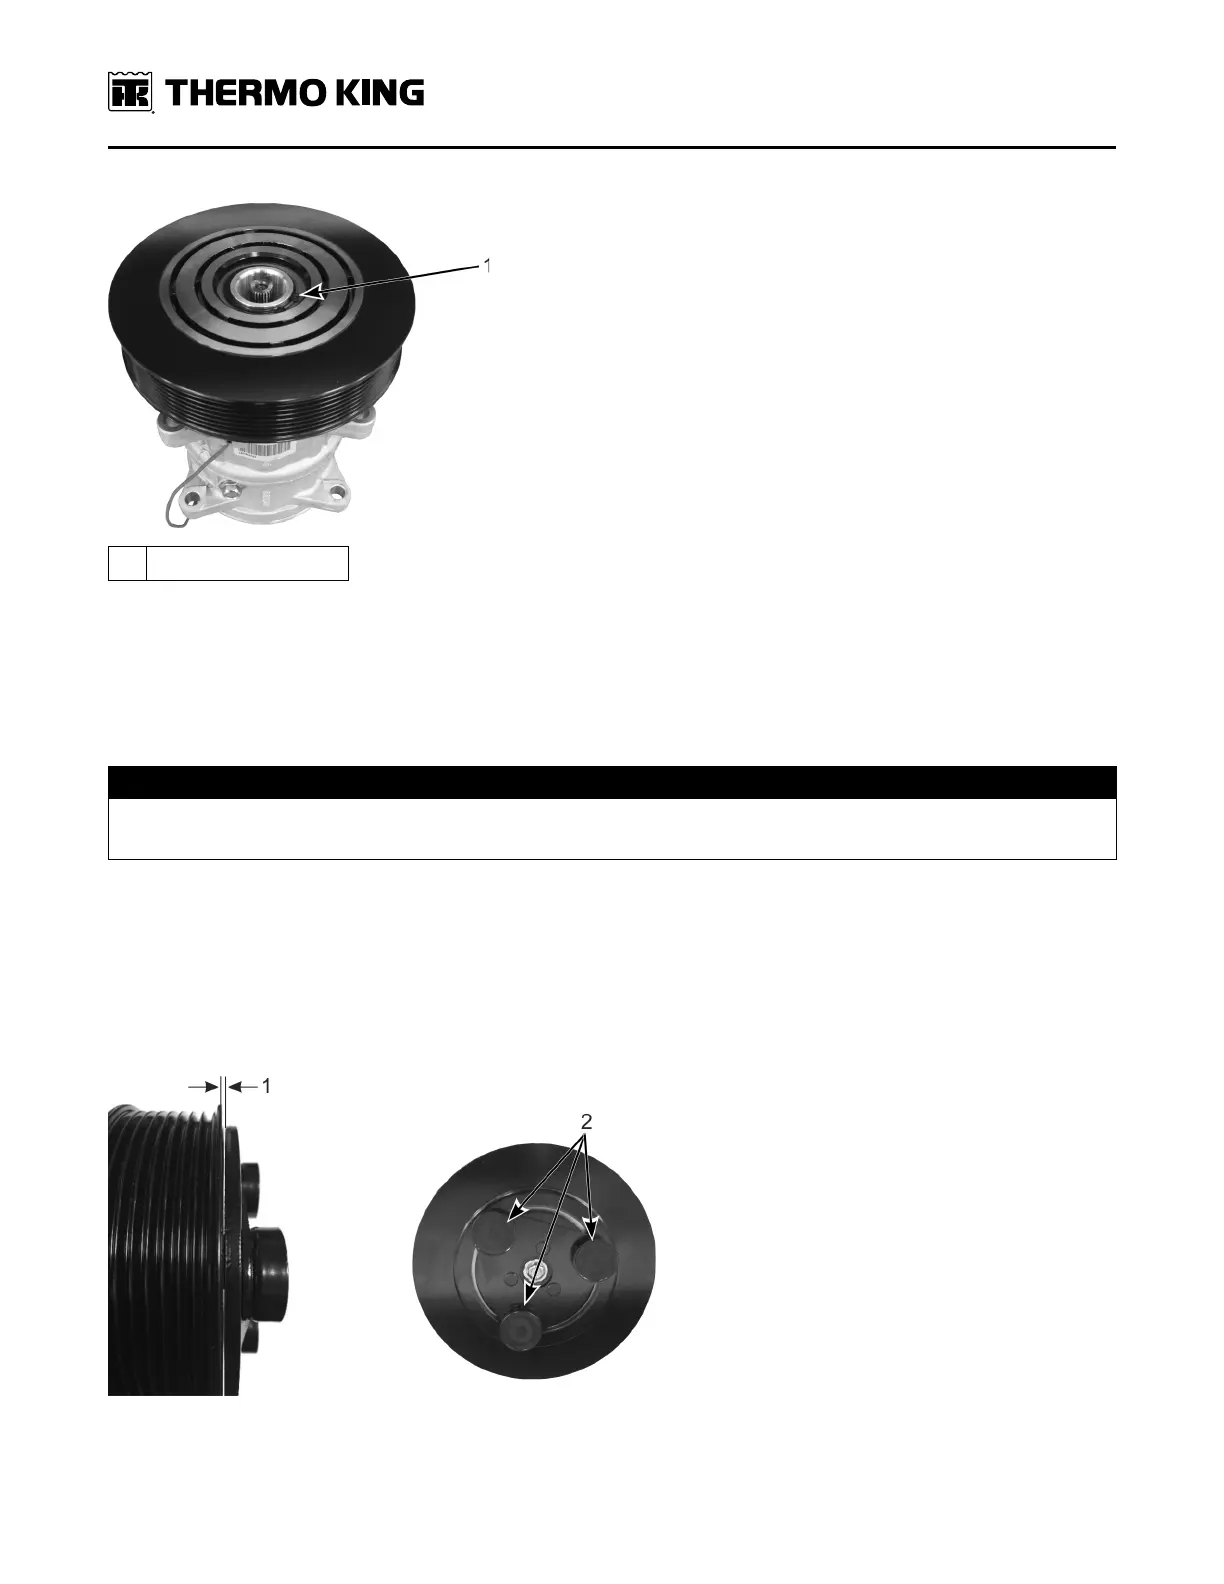
Figure 36. Install Pulley and Snap Ring.
1. Snap Ring
Place all the shims back into the female socket on the backside of the armature assembly. Carefully slide the armature
onto the compressor shaft verifying none of the shims fall out while doing so. If using a new clutch kit, the shims
removed from the original clutch will often times set the proper air gap on the replacement clutch assembly. Install the
armature retaining bolt (use new bolt if installing new clutch kit) and torque to 8.7 to 10 ft-lb (12 to 14 Nm). Check the air
gap at three points (under each of the armature’s rubber dampers) on the compressor clutch (Figure 37, p. 44).
Setting Air Gap
NNOOTTIICCEE
EEqquuiippmmeenntt DDaammaaggee!!
FFaaiilluurree ttoo pprrooppeerrllyy sseett tthhee aaiirr ggaapp wwiillll rreessuulltt iinn pprreemmaattuurree cclluuttcchh ffaaiilluurree..
Calculate the average of the three air gap readings. If the average air gap between the three readings is out of
specification, remove the armature assembly as previously described and install the appropriately sized shim(s). In the
event the air gap requires adjustment, five shims have been provided in the hardware kit. SShhiimm SSiizzeess PPrroovviiddeedd iinn
HHaarrddwwaarree KKiitt:: 00..0044,, 00..0022,, 00..000044 iinncchheess ((11..00,, 00..55,, 00..11 mmmm)).. The shims are not marked with their size. Use a dial caliper
or similar measuring device to find the size of each shim. Reinstall the armature assembly, torque the retaining bolt,
and recheck the air gap. Continue adjusting the shim sizes until the proper air gap is achieved.
NNoottee:: Clutch Air Gap Specifications: 0.03 to 0.08 inches (0.76 to 2.0 mm).
Figure 37. Measure and Set Air Gap.
SSeeccttiioonn 55 -- CCoommpprreessssoorr SSeelleeccttiioonn aanndd IInnssttaallllaattiioonn SSttaannddaarrddss
 Loading...