Do you have a question about the Thermo Scientific 20 GENESYS and is the answer not in the manual?
Alerts user to important information and instructions for using the instrument.
Warns of electrical hazards and requires qualified personnel for procedures.
Alerts users to hot surfaces and the need to follow associated instructions.
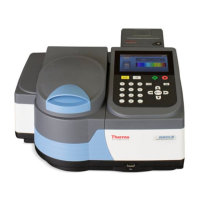
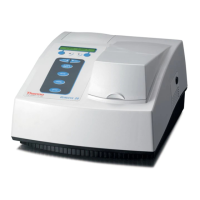
Lists and identifies the main parts of the 20 GENESYS9 spectrophotometer.
Allows selection of units for reporting concentration values.
Allows selection of the language for screen displays.
Allows setting of RS232 communication parameters like baud rate and parity.
Controls paper feeding and advancement in the printer.
Selects data format and printer destination.
Guides the user through aligning the instrument's lamp for optimal energy output.
Displays total lamp operating hours and allows resetting the counter.
Allows setting the initial power-on wavelength for the instrument.
Allows enabling or disabling the instrument's error beeper.
Configures automatic lamp turn-off after a set period of inactivity.
Displays the software revision of programmed parts within the instrument.
Provides basic guidelines for instrument care to minimize maintenance and increase lifespan.
Sample data outside photometric range causes display to flash until condition is resolved.
Indicates the lamp has failed; message persists until lamp replacement.
Error when zeroing a sample with high absorbance at low energy.
Error when zeroing a sample with the sample compartment door open.
Error when a non-functional key is pressed.
Error when transmitting data with incorrect parity settings.
Error when data bits or stop bits settings are incorrect for transmission.
Insufficient energy to initialize filter wheel during start-up.
Insufficient energy to initialize monochromator during start-up.
Condition occurs if sample compartment door is open during autozero.
| Wavelength Range | 190 - 1100 nm |
|---|---|
| Wavelength Accuracy | ± 0.5 nm |
| Wavelength Reproducibility | ± 0.1 nm |
| Detector | Silicon photodiode |
| Display | color LCD touchscreen |
| Data Output/Connectivity | USB, Ethernet |
| Optical Design | Double beam |
| Data Interval | 0.2, 0.5, 1.0, 2.0, 5.0 nm |
| Photometric Repeatability | ± 0.001 A at 1 A |
| Baseline Flatness | ±0.001 A |
| Baseline Stability | ±0.0005 A/hour at 500 nm after 1 hour warm-up |
| Power Requirements | 100 - 240 V, 50/60 Hz |