Do you have a question about the Thermo Scientific Antaris II and is the answer not in the manual?
Discusses safety features, spatial/environmental requirements, and system installation/operation.
Explains safety precautions and important information formats (Note, Notice, Caution, Warning, Danger).
Contact sales/service rep or use document info for emergency, safety, operation, or parts assistance.
Recommends leaving system in original container until service engineer arrives for unpacking and installation.
Systems comply with domestic/international safety regulations and product standards. Modifications void authority.
Systems comply with FCC limits for Class A digital devices, designed for commercial environments.
Instruments comply with EU WEEE Directive. Product should be disposed of or recycled through contracted companies.
Materials contaminated with hazardous agents cannot be returned. Contact support for decontamination.
Guidelines to avoid burn injury and fire/explosion risk, including purging, cooling, and replacement parts.
Covers protect from laser/NIR radiation and electrical hazards. Never operate with damaged or removed housing.
Clean outside with damp cloth and mild soap. Avoid harsh detergents, solvents, abrasives, and internal mirror cleaning.
Instruments are heavy; use proper lifting techniques and get assistance. Support baseplate, avoid power supply.
Covers protective covers, risk of shock, and symbols related to electrical hazards and components.
Check line voltage/frequency before connecting. Specific requirements in "Specifications". Use qualified person for checks.
Instruments use rear-mounted power supplies adjustable to AC voltages and line frequencies. Use exact replacements for components.
Use appropriate grounded power cord for your site. Contact support for replacements if needed. Do not remove ground prong.
Describes how to turn the instrument on and off using the power switch on the rear panel.
Two fuses protect the power supply. Use exact replacements meeting specifications (2A, 250V, fast-acting). Disconnect power before changing.
Instruments are Class I laser products. Avoid direct eye exposure to laser beam or reflections. Follow safety warnings.
Provides laser specifications like type, wavelength, power, and CDRH classification, potentially for registration.
Explains indicators like Power, Scan, Laser, and Source for monitoring instrument status.
Describes indicators and buttons on the operation panel that alert operators and initiate actions.
Guidelines for safe use of compressed gases for purge, sampling, cooling. Wear eye protection, ensure ventilation.
Avoid caustic agents to prevent instrument degradation. Damage is not covered by warranty.
Purge with dry air/nitrogen for volatile solvents. Avoid fire/explosion by providing ventilation and using sealed sample cells.
Pyrolysis can produce corrosive acids (HCl, HF) or phosgene. Handle with care and proper ventilation.
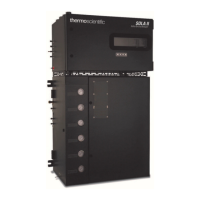
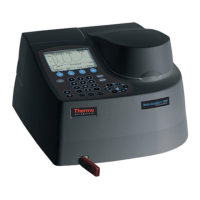
Shows locations of safety labels on the Antaris II. Replacement labels available.
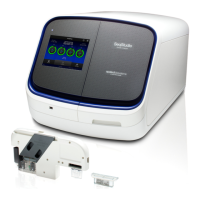
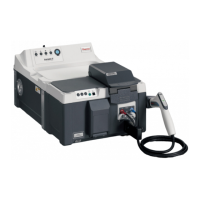
Shows safety labels and compliance information for the Antaris MX.
Shows an image of a "Heated cell" accessory with a hot surface warning symbol.
Choose accessible site with nearby AC power and rigid, level surface supporting twice instrument weight.
Ensure system fits workspace and allows clearance for cover opening and service access.
Service engineers need access to the controlling computer. Options include Windows/local admin accounts or presence of an administrator.
Standard table depth of 76 cm accommodates instruments and accessories. Surface must be rigid and level.
Provides spatial requirements for Antaris II/MX with integrated computers on tabletops, shelves, or carts.
Some models have a beam port for directing NIR beam to external samples. Optional parts may be needed.
Minimum 63.5 cm clearance above instrument for opening covers and servicing. Additional 38 cm for integrated computers.
Instrument can be installed in a 30 in rack enclosure meeting EIA Rs-310C, requiring six rack units (6U).
Instrument weight poses tip hazard. Use anti-tip extensions, feet, or anchors designed by manufacturer or engineer.
Frequent temperature fluctuations can cause drift. Specifies safe operating, optimal, and storage temperature ranges.
Excessive moisture degrades components. Specifies safe operating, optimal, and storage humidity ranges.
Floor vibration or noise can affect performance. Minimize noise and vibration. Rollout drawers isolate from minor vibrations.
Intense magnetic fields affect performance; keep 5.5m away. Complies with IEC 61326 and US 47CFR15.
Static discharge can damage components. Follow guidelines for reducing electrostatic discharges when servicing.
No special ventilation required unless analyzing toxic samples or using solvents that interact with IR sources.
Power connections should be accessible. Use dedicated, uninterrupted 3-wire sources. Avoid conduit ground for safety.
UPS and power line conditioners are available or can be purchased locally to protect against power disturbances.
Allocate 50% more power than typical system usage. Refer to "Specifications" for details.
Install a telephone with an outside line near the instrument for assistance.
Purge with dry air/nitrogen if environment is humid or contaminated. Prevents damage to optical components.
Install purge line and necessary fittings before system arrival. Details on shutoff valve and male/female fittings provided.
Recommends generators for clean, dry air/nitrogen if no source is available. Position away from instrument to reduce noise.
Thermo Fisher offers dry-air generating systems for instrument purge. Read manufacturer's instructions for installation/maintenance.
Details electrical requirements including voltage, current, line frequency, and disturbances. Locate power source within 3m.
Lists power consumption (Watts and Btu/hr) for various components including analyzers, computers, and accessories.
Specifies requirements for source line pressure, purge pressure, flow rate, filtering, and dew point for purge gas.
Specifies requirements for coolant gas in rackmount enclosures to protect unpurged instruments.
Shows illustrations of purge gas generator dimensions and mounting options.
Ensure administrators are informed, system remains packed, and administrator is present for installation tasks.
Verify temperature and humidity levels meet specified operating and optimal performance ranges.
Confirm site accessibility, doorway clearance, vibration, magnetic fields, surface stability, work height, and clearance.
Verify availability of dedicated power line, sufficient power, proper earth ground, and adherence to codes.
Ensure customer-supplied computer meets standards and network services are configured.
| Brand | Thermo Scientific |
|---|---|
| Model | Antaris II |
| Category | Measuring Instruments |
| Language | English |