- 19 -
External Pressure
Reducer (Optional)
For applications requiring a maximum pressure less than 55 PSI (380 kPa), an
External Pressure Reducer (EPR) is available. An EPR allows an adjustable
operating pressure of 10 to 50 PSI (70 to 345 kPa). If the pressure of the fluid
leaving the chiller exceeds the relief valve setting, the relief valve will bypass
excess fluid back into the chiller to relieve the overpressure.
The back pressure of the connected
equipment and the flow rate of the
recirculating fluid to your application
determined the system pressure. Con-
nect the EPR as described.
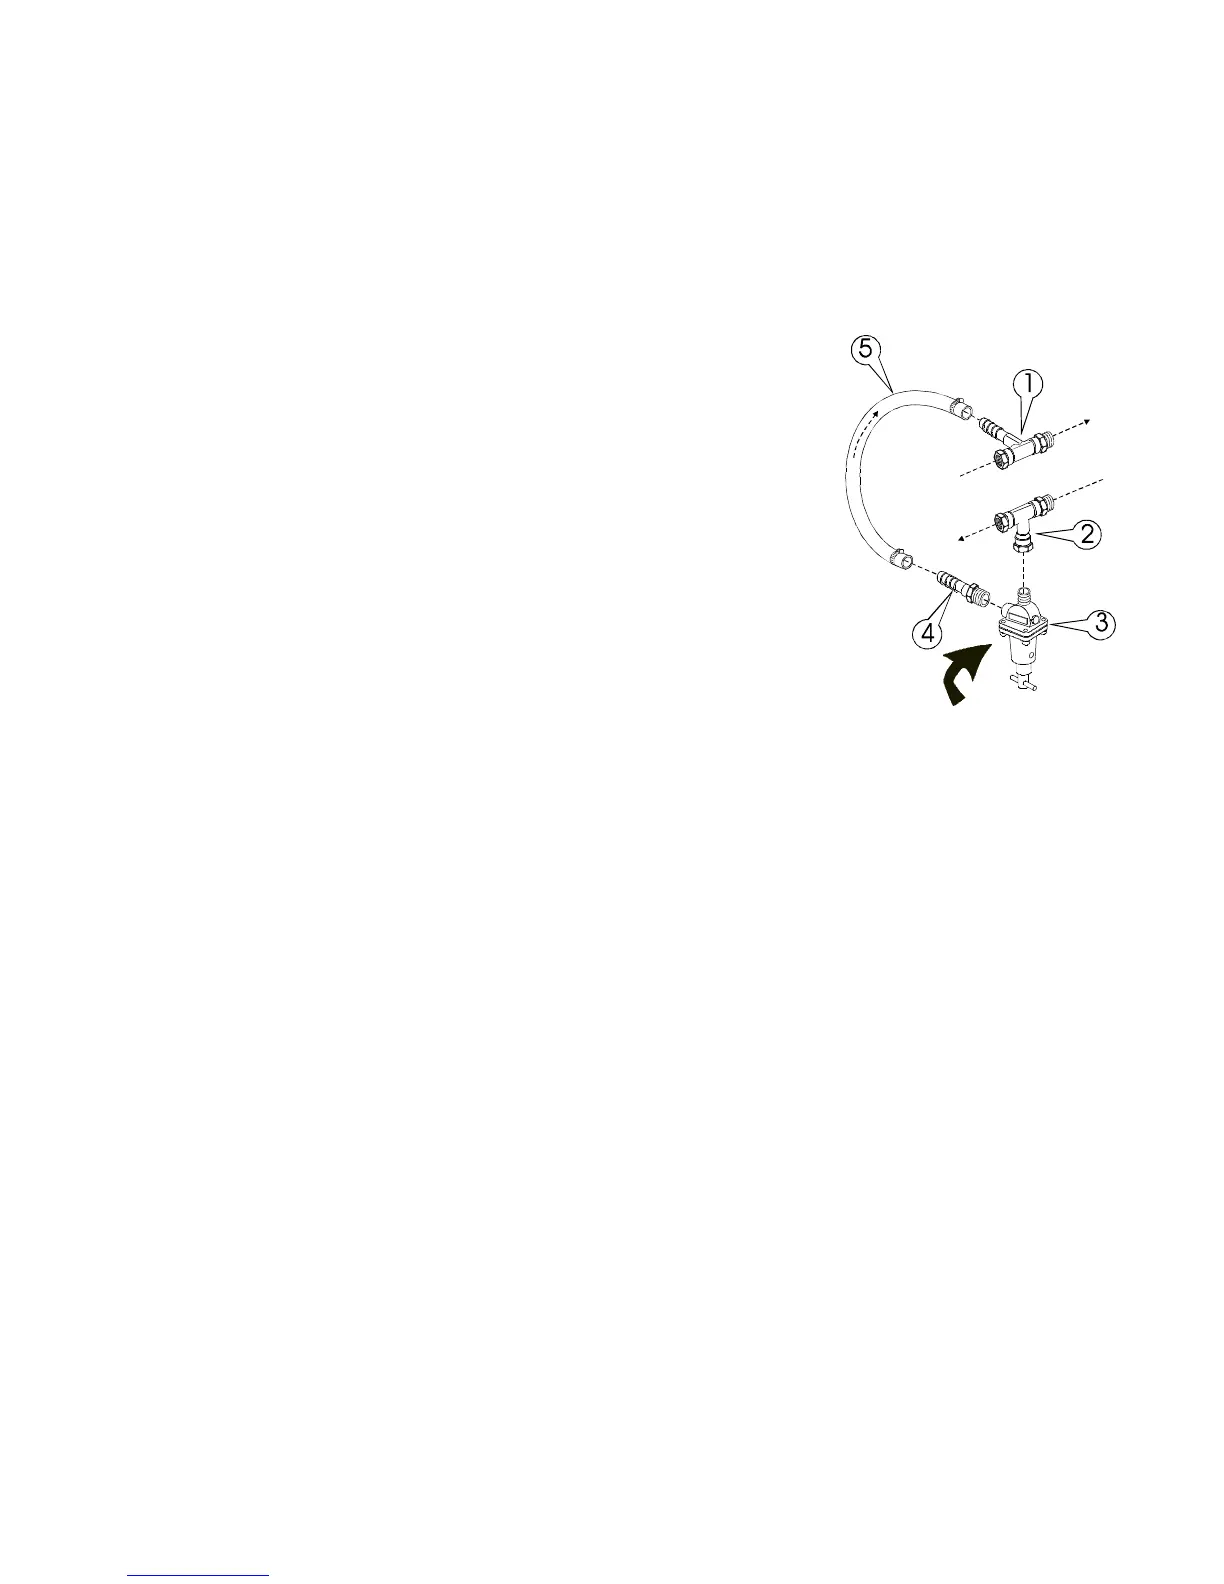
NOTE: Install the fittings in the exact
sequence shown.
NOTE: Use Teflon
®
tape on all threaded
fittings.
Connect the Inlet Tee Assembly (1) to
the chiller. Connect the Outlet Tee
Assembly (2) to the chiller. Attach the
relief valve (3) to the Outlet Tee Assembly (2). Attach the Hose Nipple (4) to
the Relief Valve (3). Attach the Hose (5) between the Inlet Tee Assembly (1)
and the Hose Nipple (4).
The EPR is now installed. Connect the inlet (to your application) to the remain-
ing fitting of the Outlet Tee Assembly (2). Connect the outlet (from your
application) to the remaining fitting of the Inlet Tee Assembly (1).
Tighten the hose clamps tight enough to prevent leakage. Do not overtighten or
the clamps will bite into the flexible tubing and cause excessive wear. If a
torque wrench is available, torque hose clamps to 50 in/lbs (280 cm/kg).
Nylon-reinforced hose tends to cold-flow, so the clamps will need to be re-
torqued later. (The hose clamps do not actually loosen, but rather the hose
outside diameter decreases.)
The "T" adjustment handle is equipped with a locknut. To adjust the relief
pressure setting loosen the locknut and turn the "T" handle to the minimum
pressure setting (direction of arrow).
To simulate blockage, close (or pinch off) the hose between the EPR outlet tee
assembly and your application. Monitor the operating pressure of the unit. Turn
the "T" handle until the desired relief pressure is set. (The EPR valve cannot be
set lower than the total back pressure of the instrument being cooled or the
instrument will not receive any flow.)
Tighten the locknut to secure the position of the "T" handle. Open the hose
between the EPR outlet tee assembly and your application.