Do you have a question about the ThermoFisher Scientific QuantStudio 6 Pro and is the answer not in the manual?
Details network configuration, security settings, and password policies.
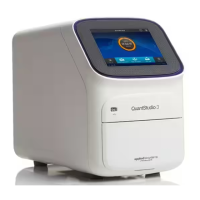
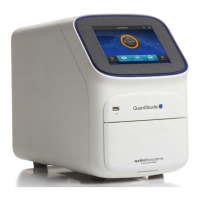
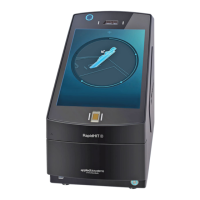
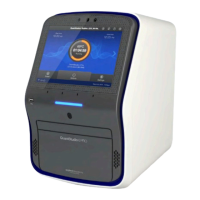
Describes the physical components and features of the instrument.
Covers facial authentication and voice activation functionalities.
Explains the instrument's software interface and components.
Details various types of PCR runs supported by the instrument.
Lists and describes system template file names for different blocks.
Outlines the typical workflow for running experiments on the instrument.
Details safety precautions and hazards associated with instrument use.
Describes the initial installation and verification process.
Explains the limitations and features of guest access mode.
Instructions for signing into the instrument profile.
How to manage the instrument's microphone for voice commands.
Details how to use voice commands for hands-free operation.
Procedures for signing out of the instrument.
Overview of how to initiate a plate run.
Steps to create and start a run using templates or saved files.
Instructions for loading a plate into the instrument drawer.
Procedure for removing a plate from the instrument.
Explains template files with restricted editing properties.
Details how to edit plate file properties like sample setup or export settings.
Describes editing method parameters like temperature, time, and cycles.
Navigating between method, amplification plot, and time remaining screens.
Modifying sample and target information after a run has started.
Temporarily stopping a run to add reagents or edit cycles.
Terminating an instrument run before completion.
Displaying the current run's method parameters.
Monitoring amplification plots and data during an active run.
Checking the estimated time left for an ongoing run.
Preventing unintended changes by locking the touchscreen.
Managing instrument reservations for scheduled runs.
Operations for copying and deleting plate files.
Transferring plate files to different locations.
Removing plate files from the instrument or storage locations.
Operations for viewing and deleting data files.
Explains calibration procedures for the instrument and interchangeable blocks.
Recommends frequencies for performing calibrations and verifications.
Explains the purpose and pass criteria for different calibration types.
How to check calibration status and set reminders on the instrument.
Generating and exporting calibration status reports.
Guides through performing ROI/uniformity, background, and dye calibrations.
Steps for performing instrument verification with RNase P plates.
Procedures for calibrating custom dyes for specific assays.
Calibration process for custom melt curve analysis runs.
Configuring the instrument to require user sign-in.
A suggested sequence for creating instrument and Connect profiles.
Compares local profiles with Connect profiles and their features.
Defines roles (Standard, Administrator) and their associated functions.
Verifying the instrument's connection to the Connect platform.
Steps to connect the instrument to a Thermo Fisher Connect account.
Creating a user profile stored locally on the instrument.
Associating a local instrument profile with a Connect account.
Procedures for disconnecting the instrument from a Connect account.
Describes the profile linking process when already signed in.
Describes profile linking when not signed in to the instrument.
Managing user profiles on the instrument.
Administrator tasks for managing all user profiles on the instrument.
Describes the components of the SAE module.
Lists instrument features unavailable when SAE is active.
Details the functions controlled, audited, and signed within the SAE module.
Defines the roles (Administrator, Scientist, Technician) within the SAE module.
Shows examples of dialog boxes and prompts used in the SAE module.
Explains profile availability when the SAE module is active.
Lists system components compatible with SAE functions.
Step-by-step guide to enabling SAE across system components.
Procedure for disabling the SAE module on the instrument.
How local administrators sign in when SAE is enabled.
Steps for signing into the instrument with an SAE account.
Procedures for signing out when SAE is enabled.
Modifying the SAE account password directly on the instrument.
Applying an electronic signature to a plate setup.
Providing a reason for changes made that require auditing.
Accessing records of electronic signatures applied to plate files.
Accessing audit logs via desktop software or Administrator Console.
Operating the instrument when the SAE server is unavailable.
Understanding when electronic signatures are needed to start a run.
Troubleshooting common SAE error messages.
Procedure for installing an interchangeable block into the instrument.
Steps to replace the instrument's installed block.
How to safely remove the instrument block.
Cleaning procedures to remove fluorescent contaminants from the sample block.
Instructions for safely replacing instrument fuses.
Procedures for powering the instrument on/off, storing, and moving it.
Displays instrument information like model, serial number, and software version.
Accesses various settings for instrument configuration.
Accesses settings for instrument maintenance, support, and software updates.
Enabling and configuring facial authentication and voice commands.
Viewing, exporting, or deleting past run records.
Customizing how data files are named.
Accessing and viewing instrument notifications.
Controlling whether notifications appear on the home screen.
Configuring email alerts for specific instrument events.
Removing notifications from the instrument display.
Physical dimensions and weight of the instrument.
Required space around the instrument and computer for installation/maintenance.
Space requirements for the instrument and computer system setup.
Recommendations for proper lighting for facial authentication.
Details power supply, voltage, and consumption specifications.
Specifies operating conditions like altitude, humidity, and temperature.
Steps for direct wired connection to a computer or local area network.
Configuring a wired network connection for the instrument.
Setting up a wireless network connection for the instrument.
Diagram illustrating physical connections between instrument and computer.
Instructions for obtaining and installing the QuantStudio desktop software.
General information and best practices for instrument networking.
Lists available kits, consumables, accessories, and reagents.
Catalog numbers and amounts for 96-well 0.2 mL consumables.
Catalog numbers and amounts for 384-well consumables.
Catalog numbers and amounts for 96-well 0.1 mL consumables.
Lists additional accessories, tools, and supplies.
Explains hazard symbols and attention words used on the instrument.
Safety guidelines for third-party accessories.
General safety precautions for operating the instrument.
Lists standards related to instrument safety and EMC compliance.
Guidelines for safe handling, storage, and disposal of chemicals.
Precautions for working with potentially biohazardous materials.
Lists related documents, guides, and manuals for the system.
Information on how to obtain support and contact customer service.
Details the terms and conditions of the product warranty.
| Instrument Type | Real-Time PCR System |
|---|---|
| Number of Channels | 6 |
| Detection Method | Fluorescence |
| High-Resolution Melt | Yes |
| Temperature Accuracy | ±0.25°C |
| Temperature Range | 4°C to 100°C |
| Connectivity | Ethernet, USB |
| Software | QuantStudio Design and Analysis Software |
| Supported Applications | Gene Expression, Genotyping, Copy Number Variation, miRNA, Protein Detection |
| Optical System | LED-based |
| Power Requirements | 100-240 VAC, 50/60 Hz |
| Sample Capacity | 96-well |
| Block Format | 96-well |