 Loading...
Do you have a question about the THORENS TD 115 and is the answer not in the manual?
| Drive System | Belt Drive |
|---|---|
| Speeds | 33, 45 rpm |
| Tonearm | TP 30 |
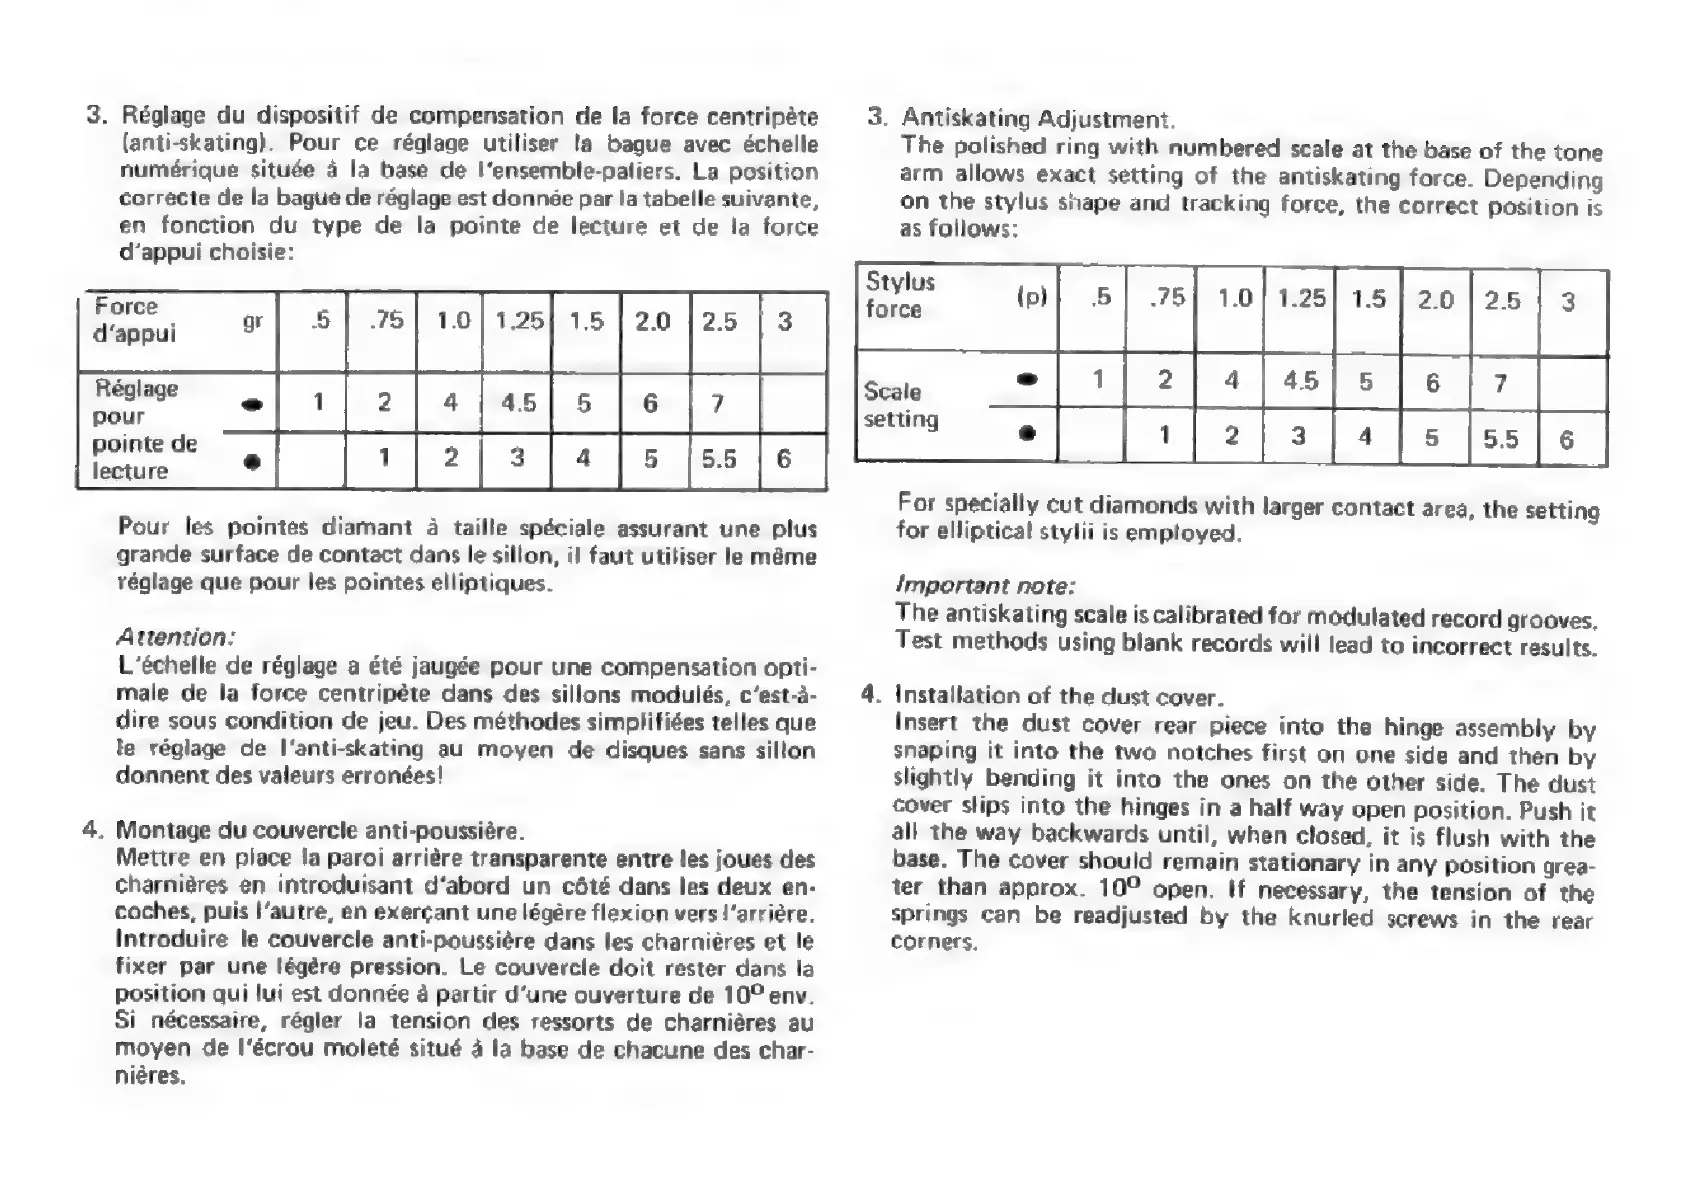
| Anti-skating | Yes |
| Effective length | 230 mm |
| Effective mass | 12.5 g |
| Offset angle | 23 degrees |
| Weight | 6.5 kg |
| Platter | non-magnetic |
| Motor | DC motor |
| Wow and Flutter | 0.05% |