GB Installation and user instructions
Technical specification
Unit weight, complete for 3 bikes: approx. 18.5 kg.
Max. permitted load 60 kg (ball load taken into consideration).
Instructions for checking before and during travel
The vehicle driver is solely responsible for ensuring that the product is in faultless
condition and that it is securely fastened.
The bike carrier shall be assembled and fitted securely in accordance with the
instructions.
Prior to departure, the function of the light bar's lamps shall be checked.
The bikes should contain no loose items during transport. Check that belts and
other fasteners are secure, re-tighten if necessary.
The vehicle's total length increases when the bike carrier is attached. The bikes
themselves may increase the vehicle's total width and height. Take especial care
when reversing.
Immediately replace any damaged or worn parts. The bike carrier shall always be
locked during transport.
The car's on-road behavior may change when taking curves and during braking
when this product is fitted.
Applicable speed limits and other traffic regulations shall always be followed.
Speed should always be tailored to suit safety considerations with regard to traffic
conditions and the load being carried.
Tandem bikes may not be carried.
Thule absolves itself of responsibility for any personal injuries or consequential
damage to property or wealth caused by incorrect fitting or use.
Modifications to this product are not permitted.
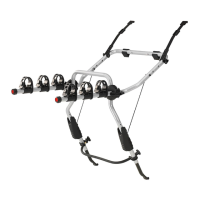
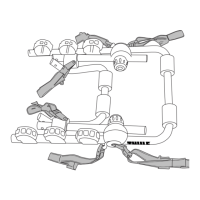
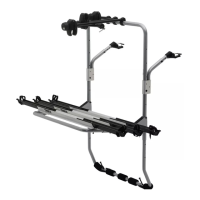
Assembly of the RMS bike carrier
1. Insert the locking cylinder (20) in the knurled knob (8). Note! Check that the
inhibitor washer in the lock knob (8) is in the correct position. This may require
adjustment.
2. Slide in the catch (18) on the tension arm (10), then tighten with the knurled knob
(8) and screw (19).
3. Slide the frame holders (5,6,7) on the tubular bar (2).
4. Fit the tubular carrier in the sockets and tighten using the screws (4) washers (3)
and nuts (15).
5. Lower the text bar onto the sign holder (13) using a screwdriver. Press the
number plate into the number plate holder (13) and raise the text bar once again.
An extra number plate must be used.
Fitting the bike carrier to the towbar
1. Loosen the tiltknob (12) until the spring is no longer under tension, and there
is sufficient room for the ball.
2. Raise the tension arm (10) and lift the bike carrier onto the towbar. (A)
3. Press down the tension arm (10) to the middleposition. (B)
4. Lift the bike carrier to the endstop and tighten the screwknob (12). (C)
Press down the tension arm (10) to the bottom position. (D)
Proper tightening resistance on lever is approx. 35-40 kg, if not, the puck (16)
must be adjusted (see under Adjustment of Puck (E)).
5. Tighten the securing knob (8). Lock and remove the key (9).
6. Insert the electrical plug (14) in the vehicle's socket.
7. Check that the bike carrier is securely fastened (if not, see under Adjustment
of Puck). (E)
8. If necessary, tighten the tiltknob (12) once more.
Note! Lever not be used with key in locking knob (risk of damage key)
Adjustment of Puck (E)
The puck (16) is pre-adjusted from the factory but if the bike carrier is not securely
fastened after the mounting or if it is not possible to press down the tension arm (10),
the puck (16) should be adjusted.
1. Undo the tension arm (10) completely, loosen the tiltknob (12) and then undo
the screw (17). Then turn the puck (16) clockwise if the carrier is too loose, and
anti-clockwise if the tension arm (10) cannot be pressed down.
2. Retighten the screw (17) and then follow the normal tightening procedure A - D.
Check that the bike carrier is fastened securely (if not, repeat 1. and 2.).
Lock and remove the key (9).
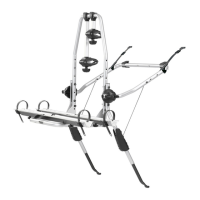
Putting bikes in the bike carrier
1. Place the first bike in the carrier, with its handlebars facing the right. Always
place the heaviest bike furthest in. Attach the frame holder as high as possible
on the bike frame.
2. Place the second bike with its handlebars facing the left, following all the other
instructions as detailed in point 1 above.
3. Place the third bike with its handlebars facing the right, following all the other
instructions as detailed in point 1 above.
4. Secure each wheel in the movable wheel holder, using the tensioning straps (11).
1
2
3
4
Lowering the bike carrier for loading and unloading
1. Loosen the securing knob (8) and release the tension arm (10) to the position.(B)
2. Undo the tiltknob (12) until the bike carrier achieves a suitable angle. In this
position, the bike carrier can also be swung out of the way.
Raising the bike carrier to the transport position
1. Raise the bike carrier to its horizontal position.
2. Tighten the tiltknob (12) and press down the tension arm (10). Tighten the
securing knob (8), lock it and remove the key.
Note! The lever must not be used with the key in the locking knob (risk of
damage to key)
3. Check that the bike carrier is securely fastened.
Removal of the bike carrier from the towhook
1. Undo the electrical connector (14) from the vehicle's trailer socket.
2. Undo the securing knob (8), release the tension arm (10) to the intermediate
position (B).
Loosen the tiltknob (12) until the spring is no longer under tension, and there
is sufficient room for the ball.
3. Lower the bike carrier.
4. Release the tension arm (10) completely and remove the bike carrier.
Care and maintenance
Check the light bar regularly to ensure that it functions properly. Clean the bike carrier
regularly and lubricate all moving parts. Use rust-prevention oil to protect holes and
recesses from dirt and salt water.
501-6535-03
 Loading...