10
51100986 - A
4.4 InstallInG the Wheels
1
WARNING
Beforeeachjourneymakesurethat
bothofthewheelsaresecurelylocked
inthecarrieraxle.
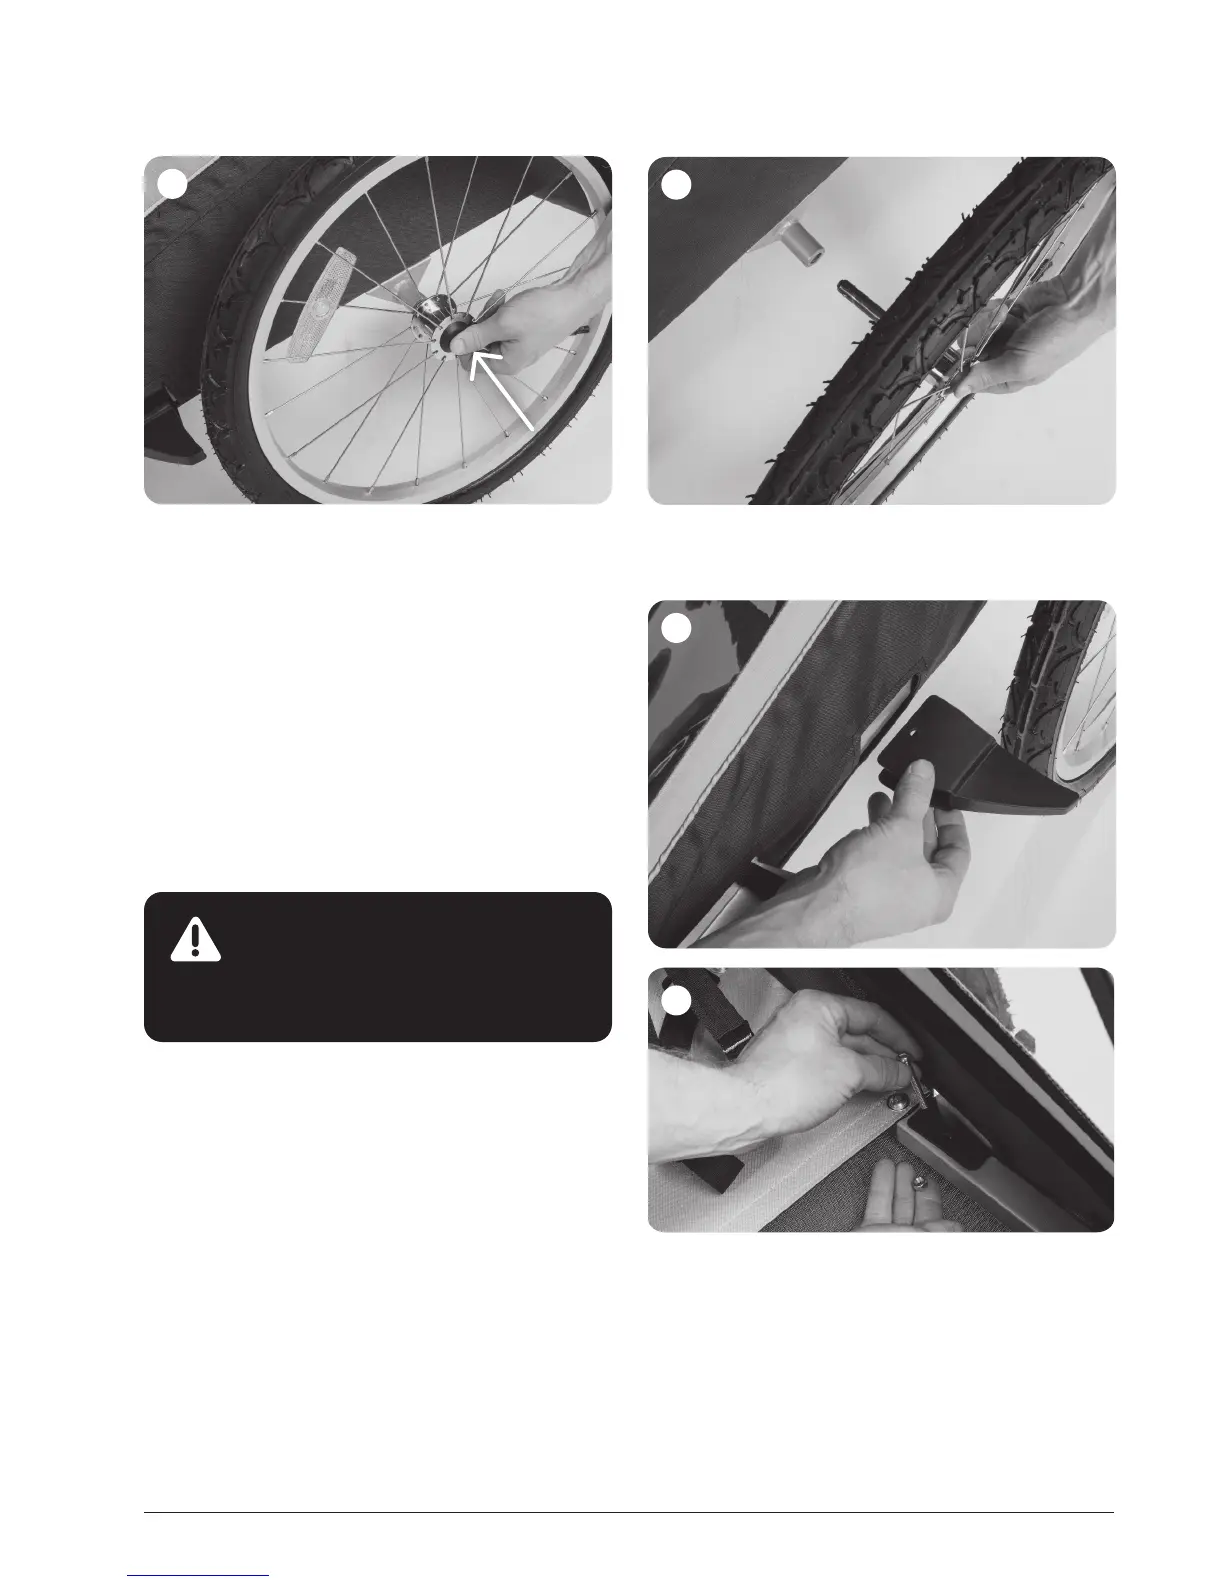
A. Pressandholdthewheelreleasebuttononawheel.
B. Insertthewheelaxleintoanaxlesocket.
(Seeimage1)
C. Releasethewheelreleasebutton.
D. Pressthewheelfullyintotheaxlesocket.
E. Verifythatthewheelissecurelyattachedtothe
carrierbygivingitasharppull.
F. Repeatfortheotherwheel.
G. Usingatirepressuregaugechecktheairpressure
ineachtire.Theminimumrecommendedtire
pressureis30psi(2.1bar)andthemaximumis35
psi(2.5bar).
H. Ifairpressureistoolowineitheroneofthetiresll
themupusingabicycletirepump.
4.5 removInG the Wheels
A. Pressandholdthewheelreleasebuttononawheel.
(Seeimage2)
B. Pullthewheeloutofthecarrieraxle.
C. Repeatfortheotherwheel.
2
4.6 InstallInG the Wheel deflectors
3
A. Installwheeldeectoronthelowerframeinfrontof
thewheelswherethere'saholeinthefabric
(Seeimage3)
B. Aligntheholeonthewheeldeectortoholeon
theframe.
C. Insertboltfromthetopthroughthealignedholes.
(Seeimage4)
D. Tightennutsecurelytotheboltusing10mmwrench
andPhillipsscrewdriver(#3)
E. Repeatfortheotherside.
4