12
51100986 - A
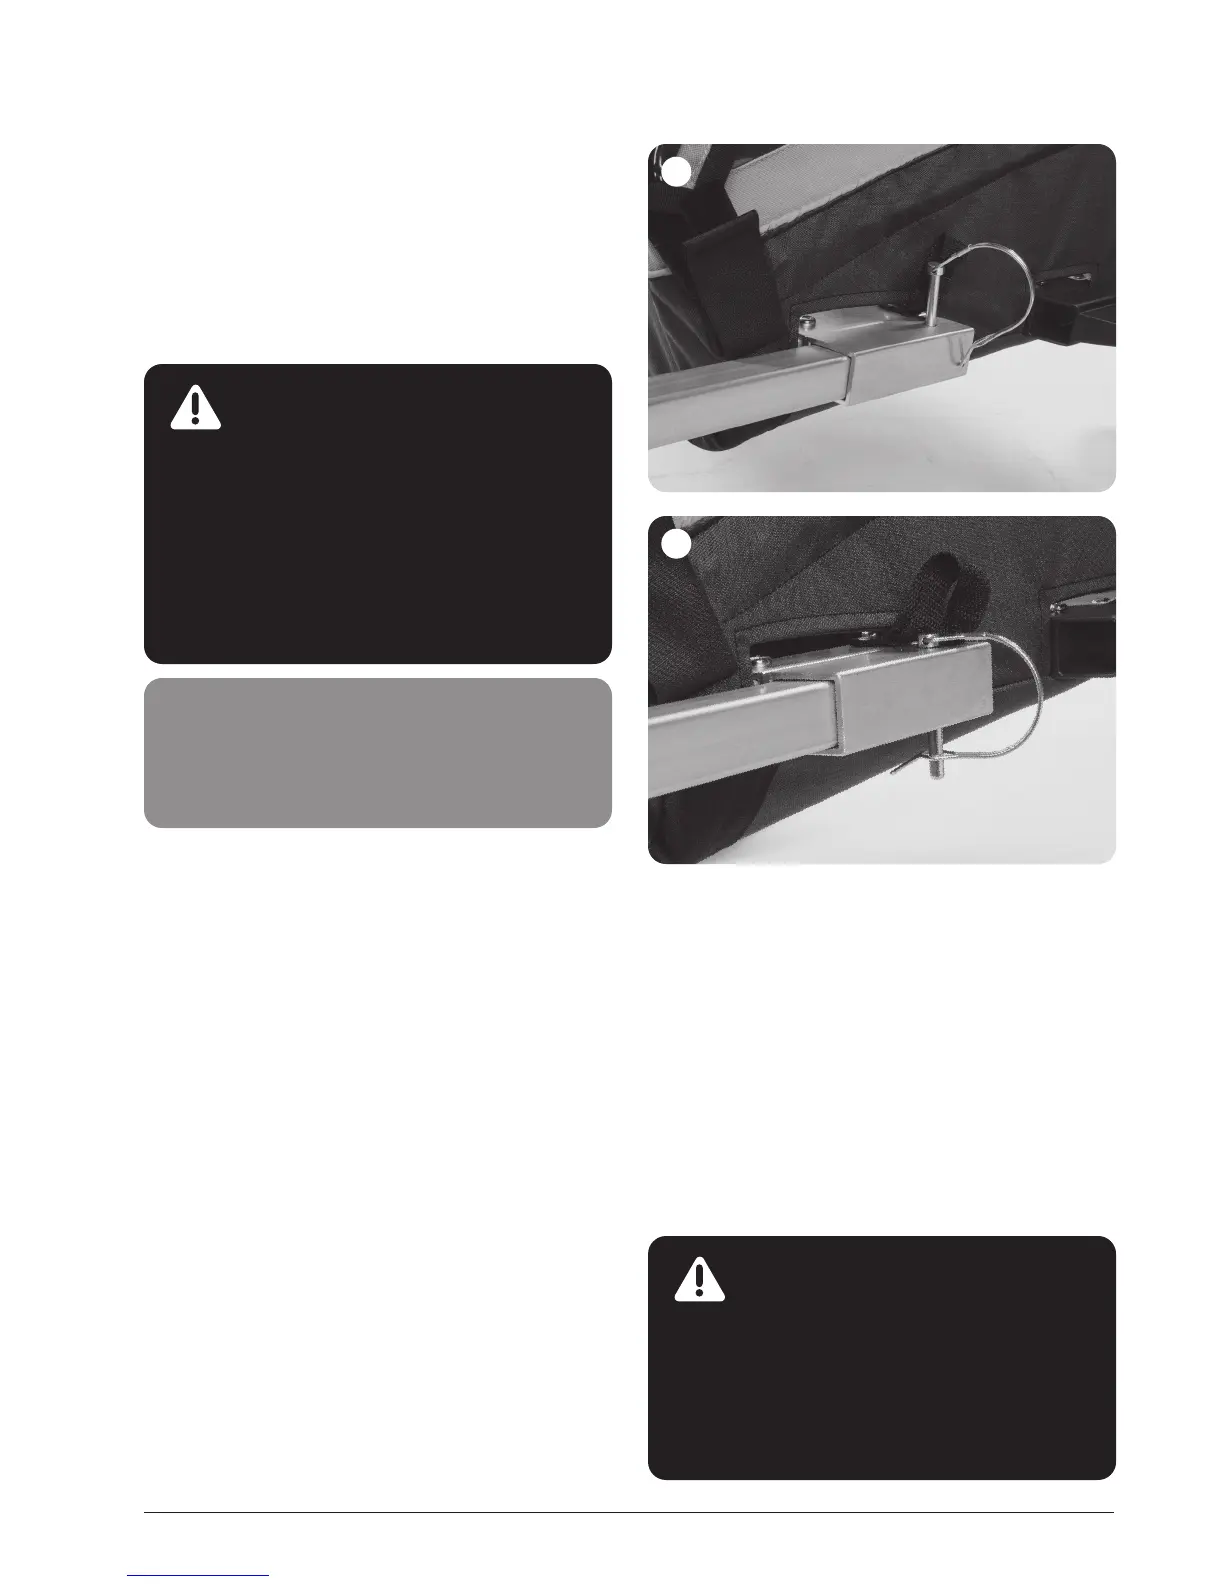
4.7.4 InstallIng the hItch aRM
A. Inspectthehitcharmforanysignsofdamageorwear
thatcouldcompromisethesafeuseofthehitcharm.
B. PositionthehitcharminfrontoftheThulechildcarrier
withthehitchballpointingforwardsandtotheright.
C. Insertthehitcharmintothewingontheleftcornerof
thecarrier(Seeimage1)
D. Insertthesafetypinthroughthebackofthewingand
throughthehitcharmandclosetheD-clip.
(Seeimage2)
E. Verifythatthehitcharmissecurelyattachedtothe
Thulechildcarrierbygivingitasharppullawayfrom
theThulechildcarrier.
F. Toremovethehitcharm,removethebackuppinand
pullitout.
2
1
4.7.3 InstallIng the ezhItch
tM
on a solId axle
A. VerifythattheezHitch™iscompatiblewithyourbicycle.
B. Removethenutandwasher(s)fromtheleftendofthe
axle,theendoppositeofthesprockets.
C. PuttheezHitch™ontheleftsideoftheaxle.
D. Reinstallthenutandwasher(s)ontotheaxle.
E. Tightenthenuttothebicyclemanufacturer's
recommendedtorque.
WARNING
The nut on the rear axle must be tightened by
at least 5 full turns to ensure adequate clamping
force. You may discard the original washer on
some axles to make room for the ezHitch
TM
.
Check with your bicycle retailer to be certain.
Depending on the hub type, the existing torque
support washer for the hub must stay on the
frame. Please follow the assembly instructions
for the hub and the manufacturer’s torque
specications when fastening the axle nut.
NOTICE
For internal hubs, please reference instruction
manuals supplied with the Thule Internal Hub
Hitch Adapter kit for installation details.
WARNING
The safety pin must always be in use. A hitch
arm that has not been secured properly may
come loose during travel.
Make sure that the hitch arm is correctly attached
and secured to the Thule child carrier. Any kind
of incorrect assembly may lead to the Thule child
carrier becoming separated from the bicycle.