Page 10 <&(%$*4.8"4,7%H'*#$"&8#I%/7*,#*%4,77%JKLLLKLMMKNOPO1 Item 63585
?@<6AQ RS6;@ACRE D@CEA6E@ET6?6AFS
E&$*- User can also cycle through and set
the special parameters for Battery Type,
Temperature Ratio, and Output Duration.
4. When Digital Voltage Meter is in E&(5,7 mode,
press and hold the Display button until Battery
Type display appears, as shown below.
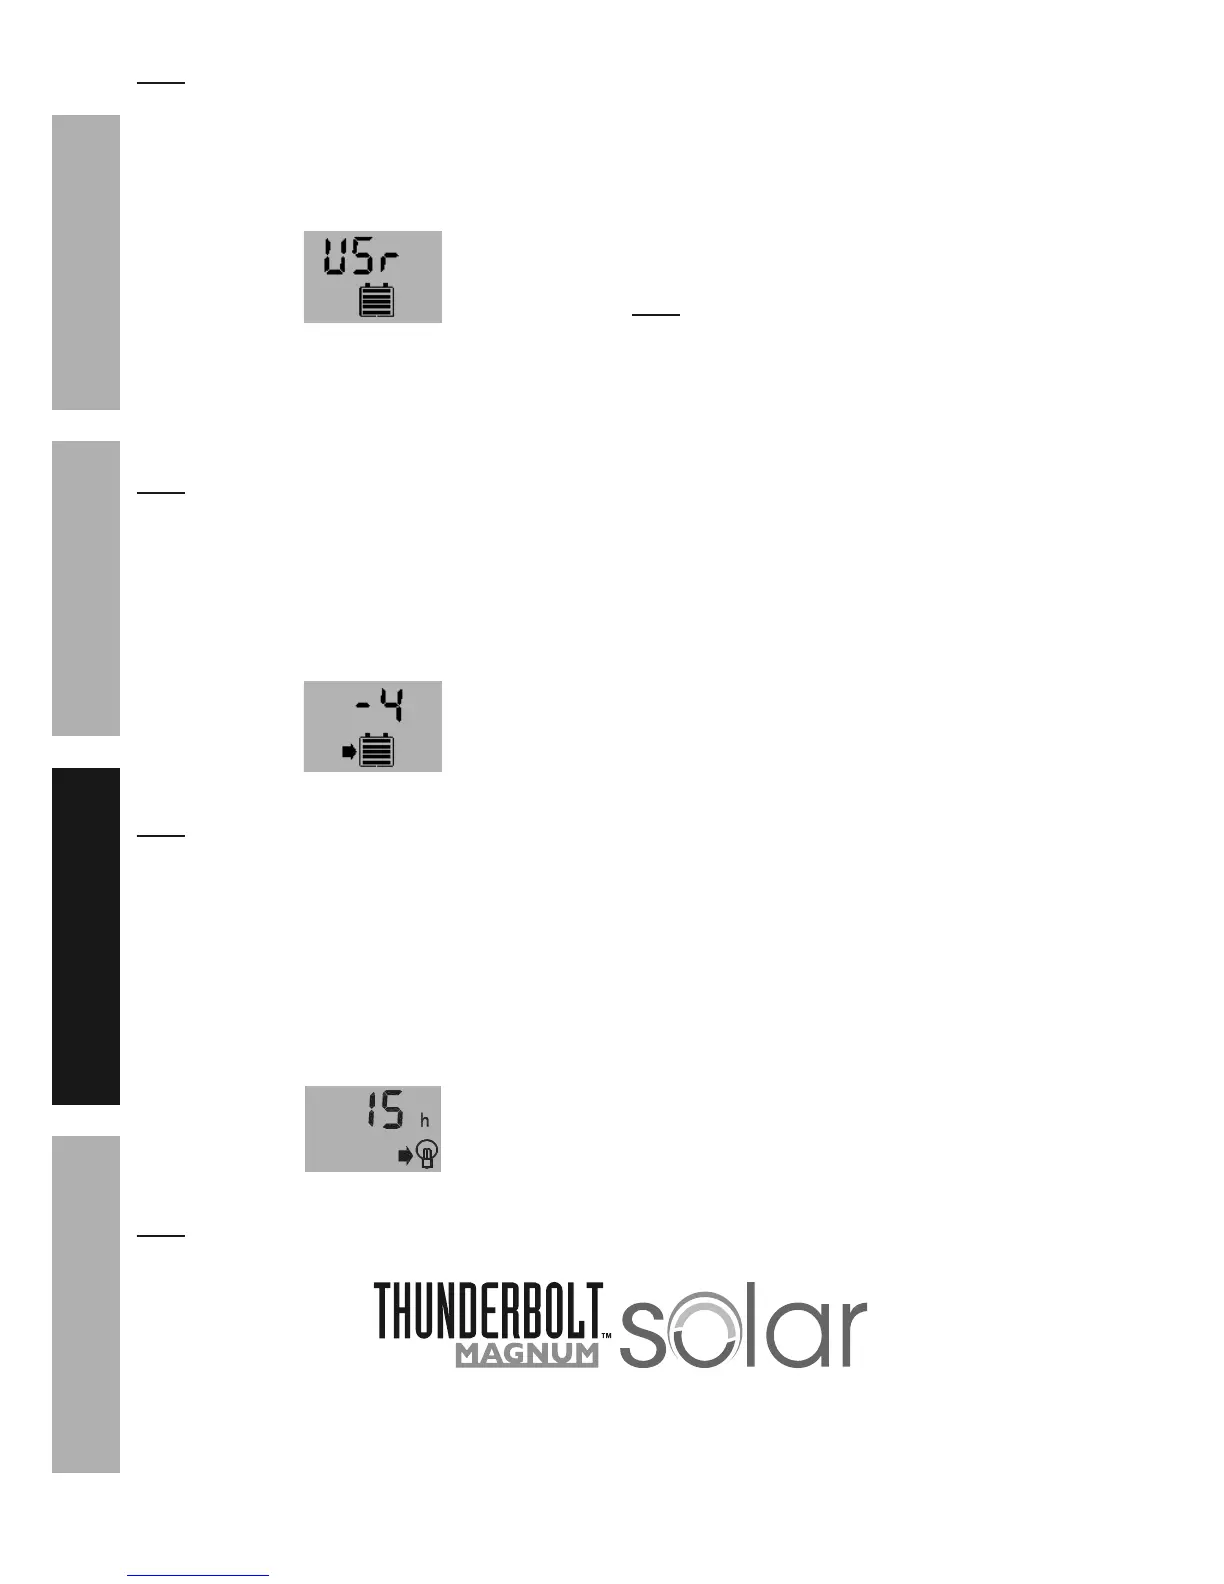
W,$$*(>%A>/*
1. Press and hold Display button until Battery
Type display starts blinking, then press Display
button to toggle down through each battery
type. Use Load button to toggle back up.
E&$*- The different battery types are User Mode
(USr), Sealed, (SLd), Flooded (FLd), and Gel (GEL).
2. When desired Battery Type is found, press and
hold Display button until display stops blinking.
The set value will be saved by the controller.
3. Press Display button once to cycle to
Temperature Ratio display, as shown below.
A*5/*(,$'(*%;,$"&
E&$*- A reading of -4 indicates -4mV/cell/°C.
4. Press and hold Display button until display starts
blinking, then press either Display button to
increase setting or Load button to decrease.
5. When finished, press and hold Display
button until display stops blinking. The set
value will be saved by the controller.
6. Press Display button once to cycle to Ouput
Duration display, as shown below.
R'$/'$%X'(,$"&8
E&$*- 15h indicates 15 hours before the
output automatically shuts off.
7. Press and hold Display button until display starts
blinking, then press either Display button to
increase setting or Load button to decrease.
8. When finished, press and hold Display
button until display stops blinking. The set
value will be saved by the controller.
9. Let the controller sit for about five seconds
and it will return back to E&(5,7 mode.
E&$*- The user may see the following Error
Codes when voltage limits are reached:
E11: Low-voltage protection; battery voltage
is below 10.5-10.8V. Controller will shut off
and enter low-voltage protection state.
E12: High-voltage protection; battery voltage
is above 16.1V. Controller will stop input
and enter overvoltage protection state.
E13: Overload protection; indicates the
occurence of overcurrent. Controller will stop
output and enter overload protection state.
E14: System short-circuit protection.