Page 6 <&(%$*4.8"4,7%H'*#$"&8#I%/7*,#*%4,77%JKLLLKLMMKNOPO1 Item 63585
?@<6AQ RS6;@ACRE D@CEA6E@ET6?6AFS
@##*5+7>
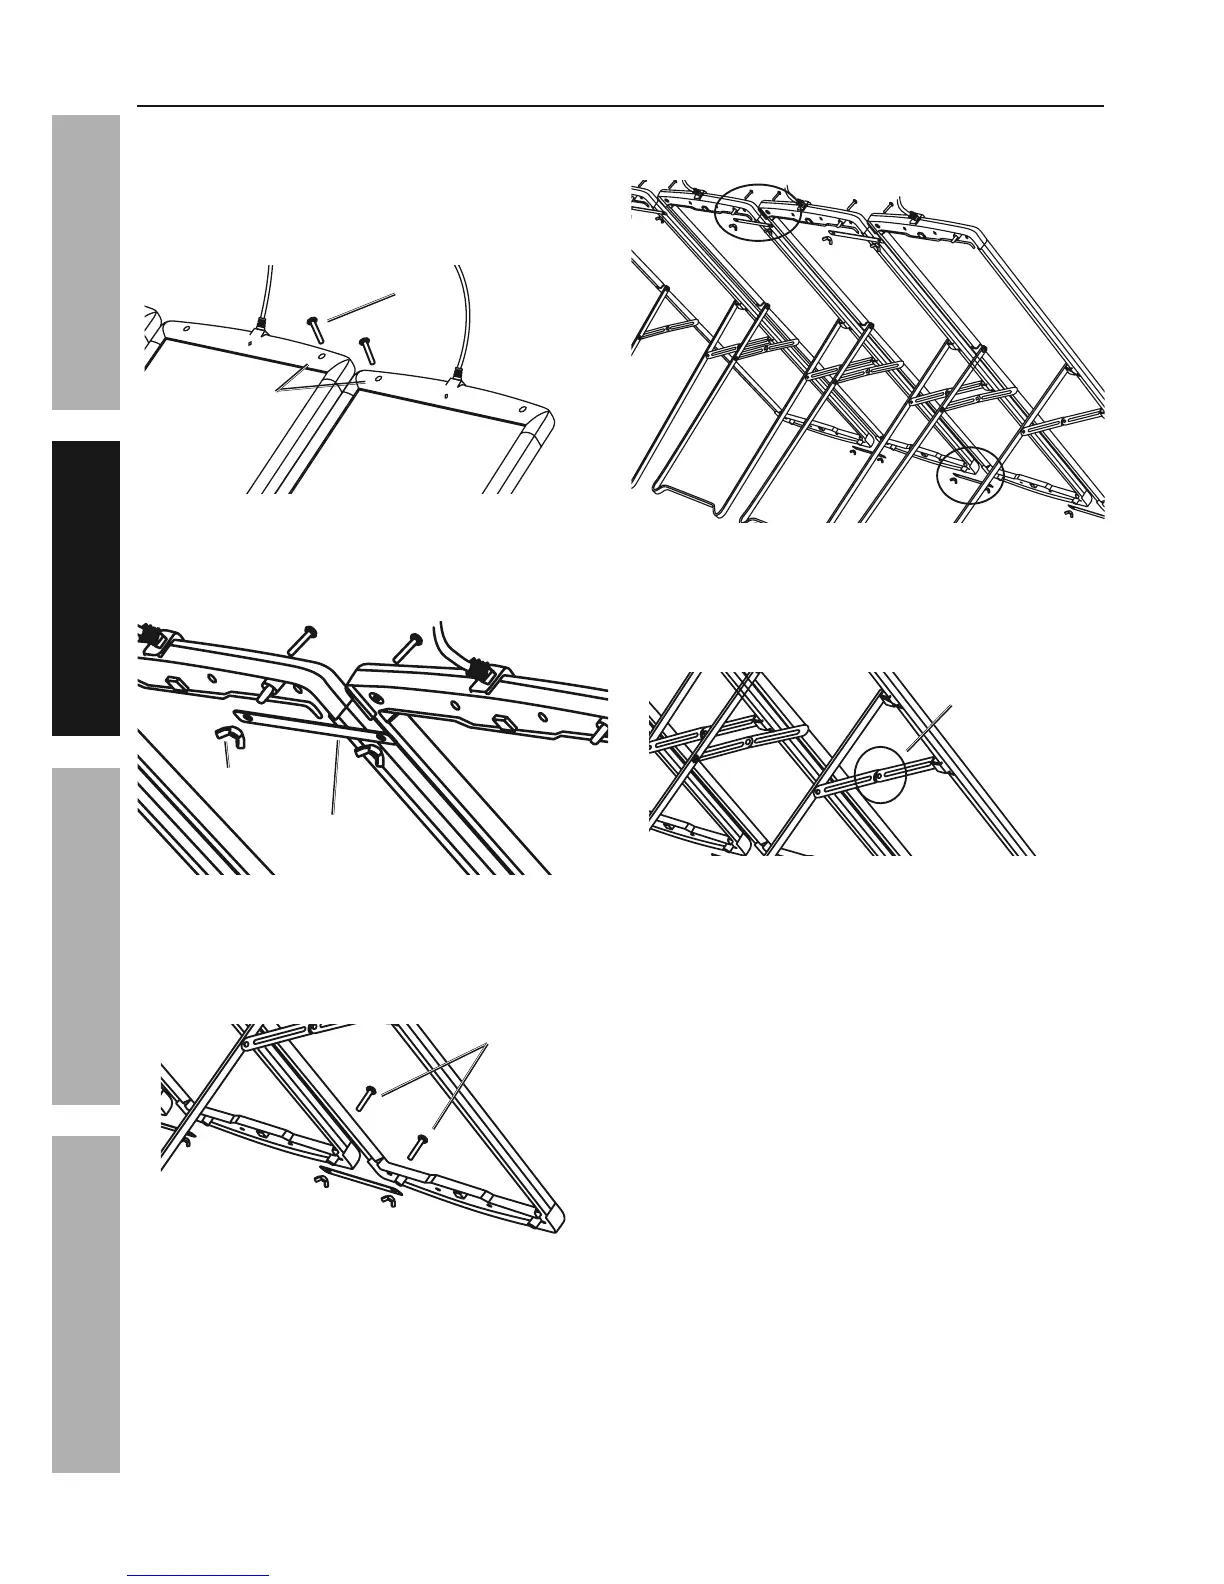
1. Place two panels side-by-side on a flat surface.
X&%8&$%9(&/%$.*%/,8*7#%&(%,77&)%
,8>&8*%$&%7*,8%&(%#$*/%&8%$.*51
2. Insert Screws (6) into the innermost mounting
holes of first two solar panels. See Figure A.
?4(*)%\M]
D&'8$"83%B&7*#
<"3'(*%@
3. Use Wing Nuts (9) to fasten the
Connection Brace (7) onto the top back
ends of solar panels. See Figure B.
U"83%E'$%\P]
T&88*4$"&8%
W(,4*%\O]
<"3'(*%W
4. Repeat for the bottom ends of panels.
Insert Screws into mounting holes along the
bottom end and fasten Connection Brace onto
the back using Wing Nuts. See Figure C.
?4(*)#
<"3'(*%T
5. Repeat Steps 1-4 for the other two
solar panels. See Figure D.
<"3'(*%X
6. The Mounting Stands on each panel come
pre-assembled. After panel assembly, stand
panels upright and pull each Mounting Stand
out to locked position. See Figure E.
G&4[*9%S&#"$"&8
<"3'(*%6