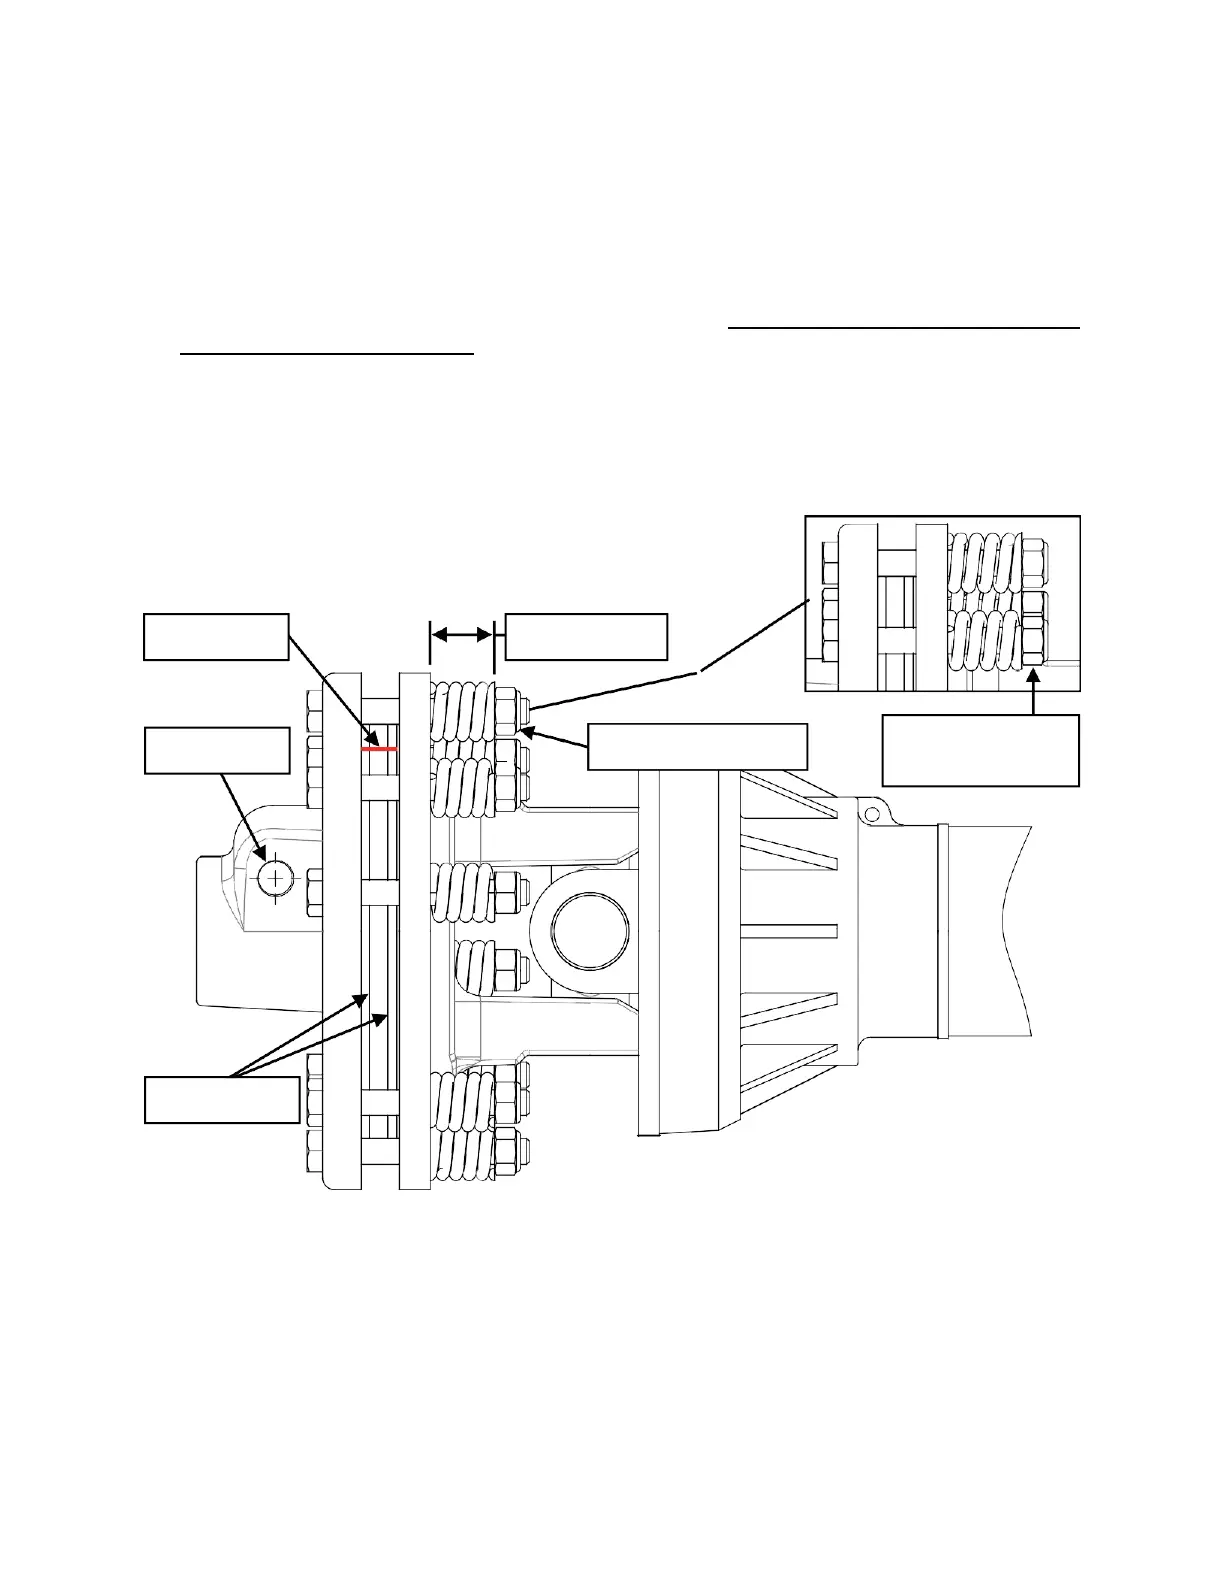
Fig. A: Nuts flush
with bolt ends
PTO SHAFT CLUTCH RUN-IN
The stump grinder is shipped with a slip clutch PTO shaft. Follow the steps below before using
your stump grinder to ensure the PTO shaft clutch plates are set properly.
1. Connect the PTO shaft to the stump grinder and tractor with the clutch end of the PTO shaft
mounted to the stump grinder. Insert the locking pin on the clutch yoke and tighten the nut
using a 17 mm wrench or socket.
2. Using a coloured pencil or marker, scribe a line across the exposed edges of the clutch
plates.
3. Using a 16 mm wrench or socket, loosen all 8 spring tension nuts uniformly until the ends of
the nuts are flush with the ends of the bolts (Fig. A).
4. Start the tractor and engage the PTO for 2-3 seconds to permit slippage of clutch surfaces.
Disengage the PTO then re-engage a second time for 2-3 seconds. Disengage the PTO
again, shut off the tractor, and remove the key. Wait for all components to stop rotating
before removing the PTO shaft from tractor.
5. Inspect the clutch and ensure that the scribed markings made across the clutch plates have
changed position. Slippage has not occurred if the two marks on the clutch plates are still
aligned. A clutch that has not slipped must be disassembled to separate the clutch plates.
 Loading...