6
7. Setting Up
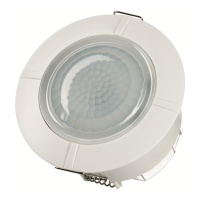
Walk Test (Test Mode)
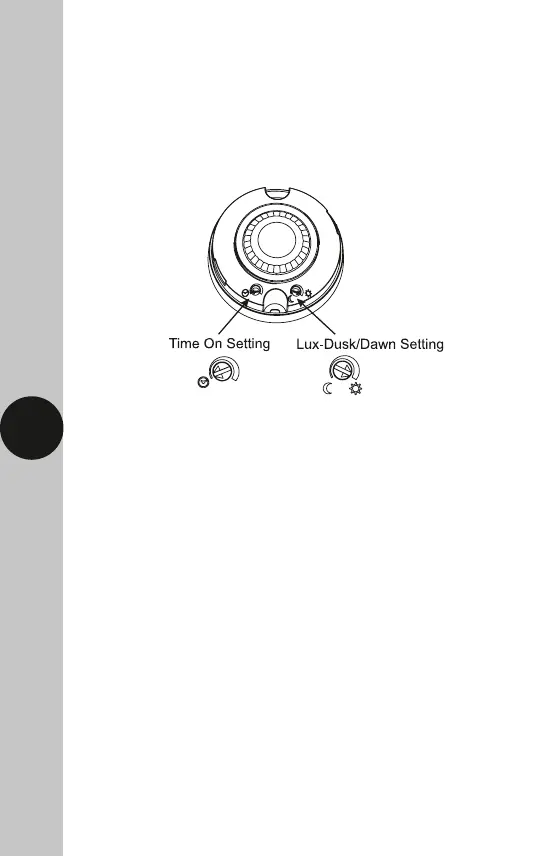
• The adjustment knobs located beneath the sensor head are factory
set to “Test Mode”. Double check they are set as follows;
Time Setting – fully anticlockwise
Lux-Dusk/Dawn Setting – fully clockwise
• Turn the power to the unit ON. The lamp will immediately illuminate
as the unit goes through its “warm-up” period. After approximately
45 seconds the lamp will extinguish. This indicates the unit is wired
correctly and the unit is in Test Mode.
• Try to remain outside the detection area during the warm-up period.
• The unit will now operate during daytime as well as at night,
illuminating the lamp for approx. 3 seconds each time. This allows
testing to be carried out to establish whether the sensor is covering
the required area.
• Walk around the sensor to establish the detection area. The sensor
will detect within an approximate 8 metre diameter circle from
the centre of the sensor location with a 3m ceiling. As you cross
a detection “zone” the lamp will illuminate.
• Now stand still until the lamp extinguishes (this should take approx.
3 seconds). Start moving again after 2 seconds. As you cross each “zone”
the lamp will illuminate.
• Repeat the above, walking at various distances and angles to the unit.
This will help you confirm the detection pattern.