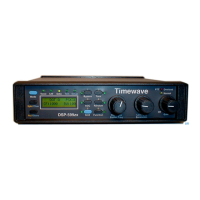
7
In the voice mode, two front panel push buttons , marked "1.8k/3.1k" and "2.4k/3.1k" ,
select the bandwidth of the voice filter. These buttons select 1.8 kHz., 2.4 kHz., and 3.1
kHz. bandwidths from one of two sets of voice filters. With both front panel bandwidth
select buttons out, the filter bandwidth is the 3.1kHz. When the "2.4k/3.1k" button is
pushed in and the other bandwidth select button is out, the bandwidth of the voice filter is
2.4 kHz.. If the "1.8k/3.1k" bandwidth select button is pushed in, it has precedence and
the voice filter bandwidth is 1.8 kHz., regardless of the state of the other button. An
alternate set of voice filters is provided in the DSP-9 V2.0X firmware release. These
alternate filters have bandwidths of 1.8 kHz., 2.0 kHz., and 2.4 kHz. Select the alternate
set by shorting configuration header #3 with a jumper. (Remove the back bezel and the
back panel to reach the back panel internal jumpers. Do not remove the circuit board from
the DSP-9). The configuration headers are located between the RCA audio input and
output connectors. Factory setting is 1.8 kHz., 2.4 kHz., and 3.1 kHz.
To activate heterodyne/tone elimination and random noise reduction, depress the push-
buttons marked "NRt" and "NRr", respectively. Tone elimination, random noise reduction
and bandpass filtering can operate simultaneously or independently. Just depress the
desired combinations of push-buttons. One voice bandpass filter is always active in the
voice mode.
A new feature to V2.0X voice filter firmware is the addition of Automatic Gain Control
(AGC) to the NRt algorithm. This feature enhances the ability of the DSP-9 to eliminate
weak hetrodynes.
5. Troubleshooting
Self-Test
The DSP-9 has a self-test feature that verifies proper hardware and firmware operation. If
a problem arises in the initial installation or in day-to-day operation of the DSP-9, running
the self-test may help determine the nature of the problem. The self-test checks the
following operational aspects of the hardware:
1. Front panel push-button operation
2. Rear panel configuration header operation (optional)
3. Audio circuitry performance
Self-Test Hardware Configuration
1. Rotate the DSP-9 volume control fully counter-clockwise to the "OFF' position.
2. To run the optional back panel configuration header test, remove the DSP-9 rear
bezel and back panel with a #1 phillips screwdriver. The shorting jumpers must be
removed from configuration headers 2 and 3. ( Header 1 is the 22 ohm speaker
loading resistor and is not tested in the DSP-9 self-test.) The configuration
jumpers are located between the RCA phono audio input and output connectors.
At power up when the DSP-9 processor is scanning the front panel switches to
determine if the self-test is to be envoked, it also checks if a shorting jumper is
 Loading...