How to troubleshoot RS-232 #2 communication error on Titan Logix Corp Measuring Instruments?
A
amanda00Sep 12, 2025
If you are experiencing an RS-232 #2 communication error with your Titan Logix Corp Measuring Instruments, check the RS-232 #2 connector and wiring connections. The display or the remote RS-232 device might be defective.
R
Robert RussellAug 25, 2025
Why does my Titan Logix Corp Measuring Instruments display restart at erratic intervals?
M
madelineterryAug 25, 2025
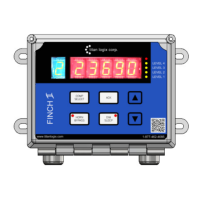
If your Titan Logix Corp Measuring Instruments display restarts at erratic intervals, check the power supply wiring for intermittent or corroded connections. Also, ensure that the battery voltage is at least 8VDC and steady. If the issue persists, the Finch II Display may be faulty, and you may need to replace the unit.
H
hurleymatthewAug 25, 2025
What causes loss of power in Titan Logix Corp TD100?
H
hlesterAug 26, 2025
If you experience a loss of power and no system operation with a blank display on your Titan Logix Corp Measuring Instruments, check the fuses, cable connections, wiring, and power switches. Ensure the power supply provides adequate operating voltage. Use a DMM to test points for battery voltage. If fuses keep blowing, verify that the fuse type and rating are appropriate for the application.
M
Michael MuellerSep 23, 2025
What to do if Titan Logix Corp Measuring Instruments input voltage is too high?
M
Michael KirbySep 23, 2025
If the Titan Logix Corp Measuring Instruments indicates that the input voltage is too high, check the power supply for adequate operating voltage.
P
pcastroSep 12, 2025
How to fix 'No strapping table' error on Titan Logix Corp TD100?
J
John FisherSep 12, 2025
If the Titan Logix Corp Measuring Instruments displays 'Internal strapping table error, Alarms set, No strapping table', program the transmitter with a strapping table. The transmitter might be defective.
R
robertslaurenSep 16, 2025
How to fix failure during Finch II system initialization on Titan Logix Corp Measuring Instruments?
P
patricia13Sep 17, 2025
If you experience a failure during Finch II system initialization with Titan Logix Corp Measuring Instruments, restart the display. If the problem persists, replace the display board or the entire display.
J
Jasmine MillerSep 5, 2025
How to reduce turbulence affecting sample readings on Titan Logix Corp TD100?
J
John SmithSep 5, 2025
To address the issue of too many samples being rejected due to turbulence in your Titan Logix Corp Measuring Instruments, move the probe to a less turbulent area of the tank.
S
Sharon DavidsonSep 6, 2025
Why Titan Logix Corp TD100 could not measure level?
E
edward32Sep 6, 2025
If you are unable to measure the level with your Titan Logix Corp Measuring Instruments, it could be due to a bent or damaged probe. Try moving the probe location to a less turbulent area of the tank. Alternatively, the transmitter might be defective and need replacement.
J
Justin ButlerSep 18, 2025
What does 'Unknown fault condition has occurred' mean on Titan Logix Corp TD100 Measuring Instruments?
S
shepardvickieSep 18, 2025
If the Titan Logix Corp Measuring Instruments displays an 'Unknown fault condition has occurred', replace the display.
C
Cynthia NashAug 30, 2025
What does '2 LO' during calibration mean on Titan Logix Corp TD100?
M
Michael BushAug 30, 2025
If the Titan Logix Corp Measuring Instruments display shows '2 LO' during calibration, power down the system, add more liquid to the tank, and recalibrate.