TTL758CHN
17
EN
Getting
started...
Before you start
2). Place the product on a suitable at surface with the front handle
(1) facing upward.
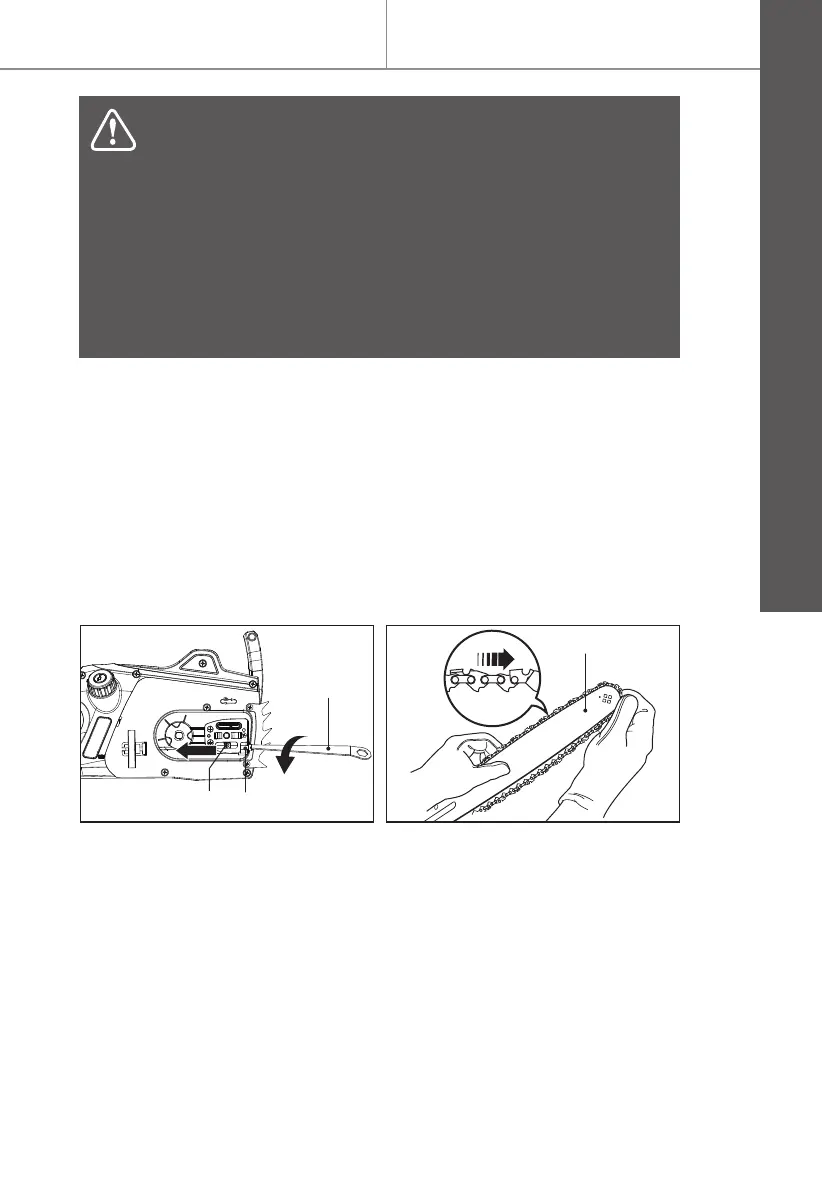
3). Loosen the retaining nut (6) with the spanner (23) and remove it
together with the cover (7).
4). Ensure the tension pin (9b) is positioned to the left side, adjust it
turning the tension screw (9a) anticlockwise with the multitool (23)
if required (Fig. 1a).
5). Spread the saw chain (3) out with the cutting edges of the chain
pointing in the rotational direction and slide the chain into the
groove around the guide bar (4) (Fig. 1b).
WARNING! Always use a saw chain designed as “low-
kickback” or a saw chain which meets the low-kickback
requirements! A standard saw chain (a chain which does not
have the kickback reducing guard links) should only be used
by an experienced professional operator!
Nevertheless, a low-kickback saw chain does not completely
eliminated kickback! A low-kickback or “safety” chain
should never be regarded as complete protection against
injury! Therefore always use a low-kickback saw chain in
conjunction with other kickback protection devices such as
the front hand guard!
Fig. 1a
9a
23
9b
Fig. 1b
4
6). Align the guide bar (4) and saw chain (3) assembly with the drive
sprocket (12) and bolt (10). Lay the saw chain around the drive
sprocket (12) and then lower the guide bar (4) to install it to the
bolt (Figs. 1c, 1d).
 Loading...