Page 10 @)1&/2:(+.:4=&A02'/.)+'B&6=24'2&:4==&CD###DE#FDFEC#, Item 57863 57864
GH@<IJ KHLMI<MHMN<OHGLN&P<QRLMS P<QRLMS&ILTGG<IUT
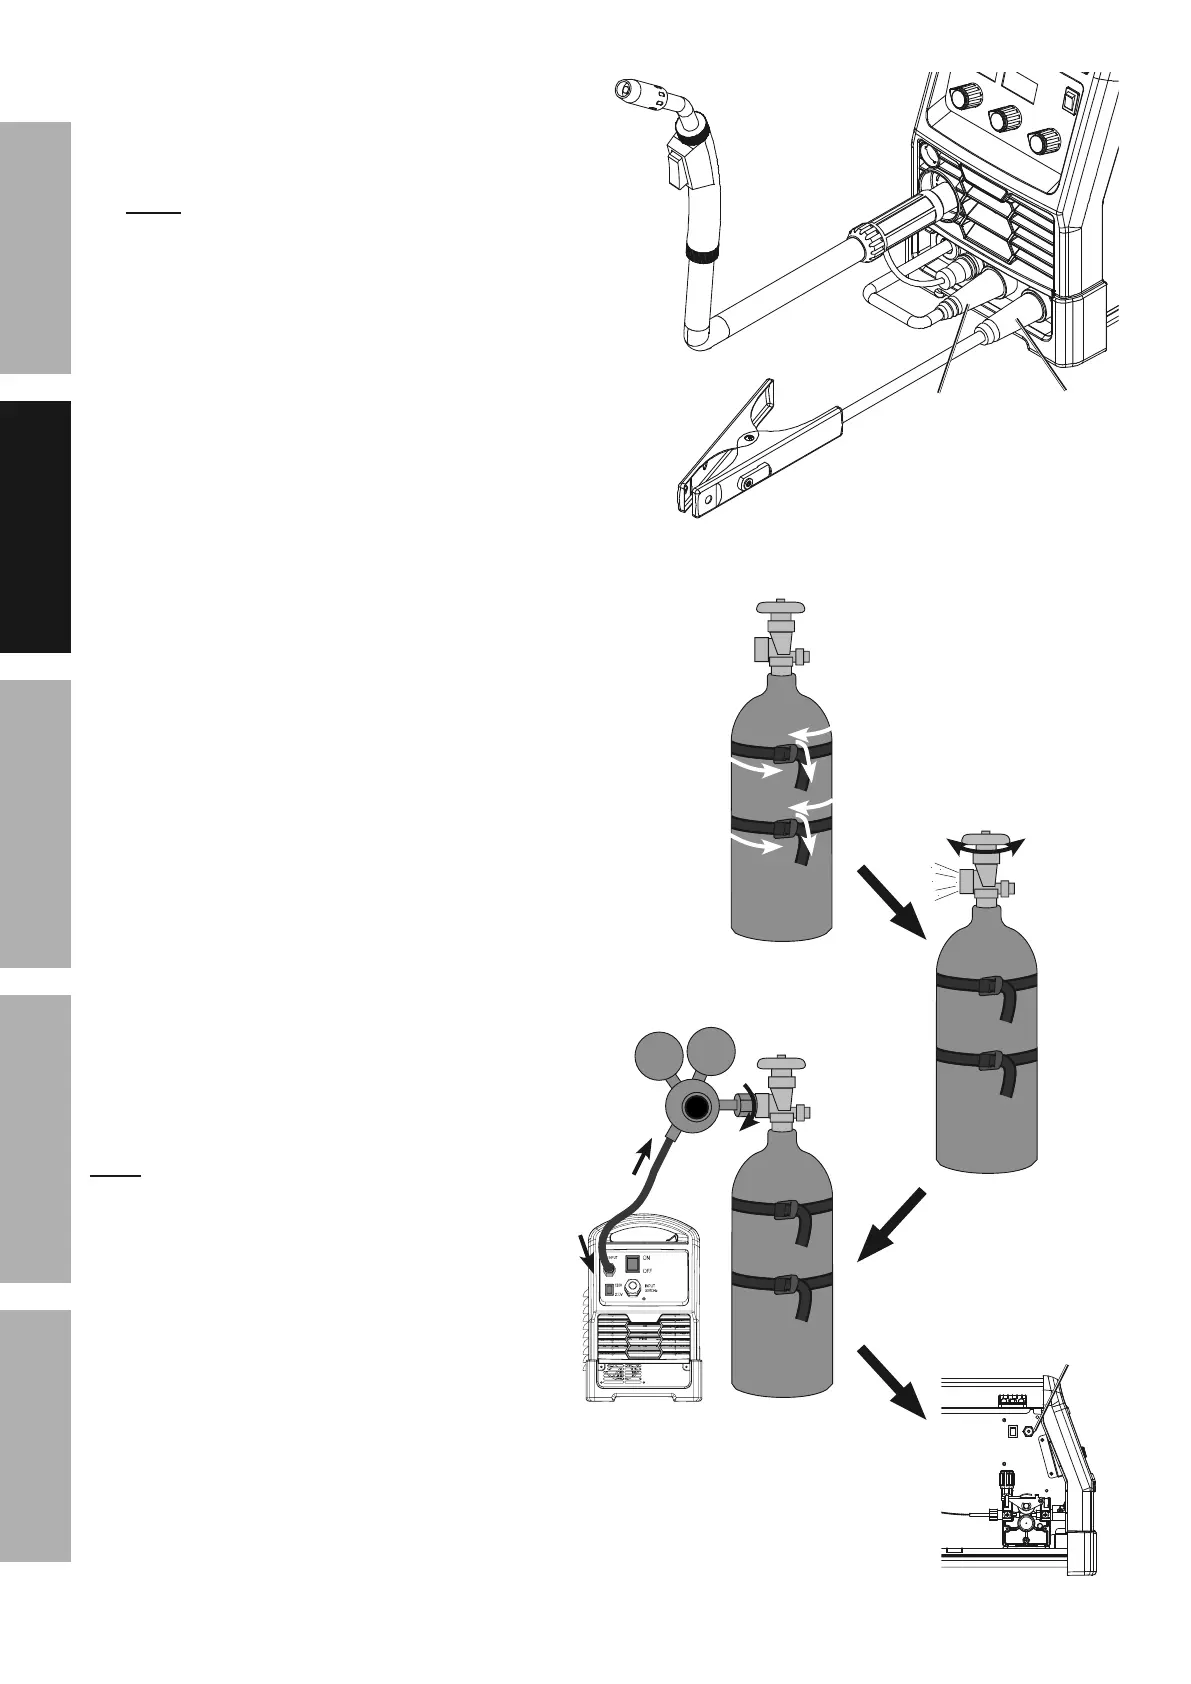
12. RN<T&R.12:/&N0112+/&<=2:/1)>2&T)'./.Y2&P.12&
Setup for Solid Core (gas shielded) welding:
a. Connect the Wire Feed Connector to the
Positive Terminal on the front of the Welder.
Connect the Ground Cable to the
Negative Terminal on the front of the Welder.
b. Determine which type of shielding gas
would be appropriate for the welding
you will do. Refer to the Settings Chart
on the inside of the Welder door.
c. With assistance, set the cylinder (not included)
onto a cabinet or cart near the Welder
and secure the cylinder in place with two
straps (not included) to prevent tipping.
d. Remove the cylinder’s cap. Stand to the
side of the valve opening, then open the
valve briefly to blow dust and dirt from the
valve opening. Close the cylinder valve.
e. Locate the Regulator (included) and close its
valve until it is loose, then thread Regulator
onto cylinder and wrench tighten connection.
M)/25 When using C100 shielding gas, connect a CGA
580/320 adapter (not included) to the inlet connection
of the Regulator and wrench tighten. Thread the
adapter onto the gas cylinder and wrench tighten.
f. Attach the Gas Hose (included) to the
Regulator’s outlet and the Welder’s gas inlet.
Wrench-tighten both connections.
g. Connect the Wire Feed Gas Hose within
the Welder to the Gas Quick Connector.
The collar on the Gas Quick Connector must
click into place after attaching any hose to it.
S4'&d0.:]&
N)++2:/)1
9
8
2
:
O1.28=X&)62+&Y4=Y2&
/)&:=24+B&&
/(2+&:=)'2&&
Y4=Y2,
>
RN<T&&
Solid Core (Gas Shielded) Polarity Setup
:)++2:/&
S1)0+>&/)&
+294/.Y2
:)++2:/&
P.12&@22>&
/)&6)'./.Y2