Page 25@)1&/2:(+.:4=&A02'/.)+'B&6=24'2&:4==&CD###DE#FDFEC#,Item 57863 57864
GH@<IJKHLMI<MHMN< OHGLN&P<QRLMSP<QRLMS&ILTG G<IUT
<jN<GG&T<M<IVHILWM&WV&
OUVMDI^VWUS^
P2=>&>1))6'&)+&/)6&4+>&
0+>21+24/(B&)1&84=='&/(1)09(&
2+/.12=XB&;4].+9&4&()=2,
TVWT<V&T<M<IVHILWM
P2=>&.'&Y.'.3=2&0+>21+24/(&4+>&
30=92'&'=.9(/=X&)+&/)6,
LMHR<dUHI<&T<M<IVHILWM
P2=>&>)2'&+)/&62+2/14/2&/(2&
_).+/&80==XB&_0'/&)+&/(2&'0184:2,
TWGGLOQ<&NHUG<G&HMR&GWQUILWMG
1. P)1]6.2:2&)Y21(24/.+95&
Reduce wire feed speed.
Decrease weld current.
2. I14Y2=&'622>&/))&'=)*5
Increase travel speed and ensure
that travel speed is kept steady.
3. <\:2''.Y2&;4/21.4=&4/&*2=>5&
Reduce wire feed speed.
TWGGLOQ<&NHUG<G&HMR&GWQUILWMG
1. L+:)112:/&*2=>.+9&/2:(+.A025
Maintain 1/2" or less CTWD.
Keep arc on leading edge of weld puddle.
Hold MIG Gun at proper angles.
2. L+'088.:.2+/&*2=>&(24/5&
Reduce travel speed.
Increase weld current.
3. P)1]6.2:2'&/))&/(.:]7:=)'25
Bevel thick workpieces, allow slight
gap, and weld in several passes.
4. L+'088.:.2+/&*2=>&;4/21.4=5&
Increase wire feed speed.
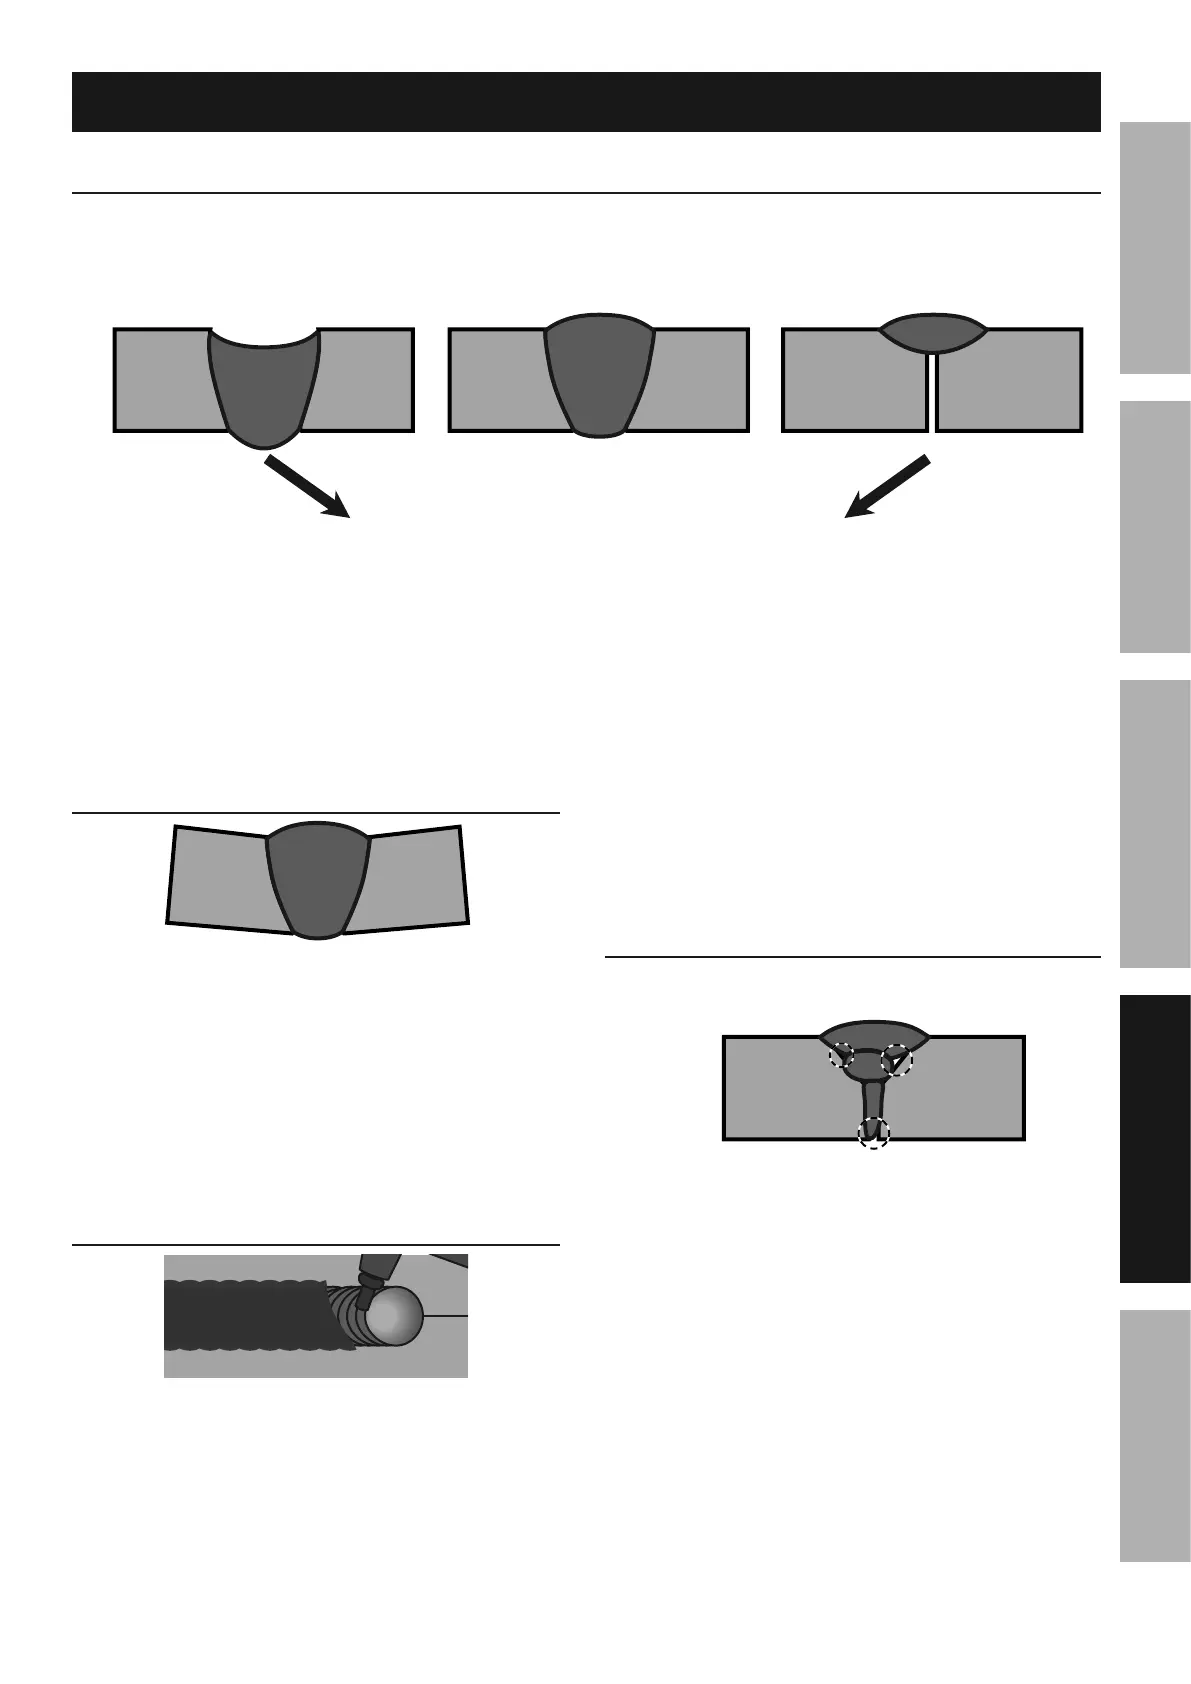
PROFILE VIEWS
P2=>&T1)3=2;'
Penetration (Workpiece Heat Control)
P2=>&M)/&H>(21.+9&T1)621=X
S46'&612'2+/&32/*22+&*2=>&4+>&612Y.)0'&324>&)1&
32/*22+&*2=>&4+>&*)1]6.2:2,&&G22&4124'&32=)*,
TWGGLOQ<&NHUG<G&HMR&GWQUILWMG
1. L+:)112:/&*2=>.+9&/2:(+.A025
Place stringer bead at correct place in joint.
Adjust workpiece position or weld angle to permit
proper welding to bottom of piece.
Pause briefly at sides during weave bead.
Keep arc on leading edge of weld puddle.
Hold MIG Gun at proper angles.
2. L+'088.:.2+/&*2=>&(24/5&
Increase current.
Increase wire feed speed.
3. R.1/X&*)1]6.2:25
Clean workpiece down to bare metal.
4. L+'088.:.2+/&*2=>&;4/21.4=5&
Increase wire feed speed.
5. P)1]6.2:2&946&/))&+411)*5&
Widen groove or increase bevel.
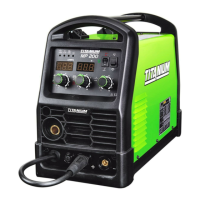
PROFILE
VIEW
O2+>&4/&c).+/
TWGGLOQ<&NHUG<G&HMR&GWQUILWMG
1. L;61)621&:=4;6.+95
Clamp workpieces securely.
Make tack welds to hold workpieces.
2. <\:2''.Y2&(24/5
Weld a small portion and allow to cool before
proceeding.
Increase travel speed.
Reduce wire feed speed.
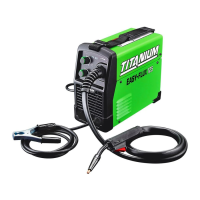
PROFILE
VIEW
N)4/&)8&G=49&WY21&P2=>
G=49&.'&4&+2:2''41X&641/&)8&4&8=0\D:)12>&*.12&
*2=>,&&L/&'(.2=>'&/(2&*2=>&81);&.;601./.2',&&
N=24+&)88&/(2&'=49&*./(&4&N(.66.+9&^4;;21&
4+>&P.12&O10'(&48/21&*2=>.+9,
S4'D'(.2=>2>&KLS&*2=>'&412&61)/2:/2>&3X&/(2&
'(.2=>.+9&94'&4+>&>)&+)/&+22>&'=49&/)&61)/2:/&/(2;,
TOP
VIEW
PARTIALLY CHIPPED AWAY TO SHOW WELD