Creation: 1.31 – 2014 2-7-4
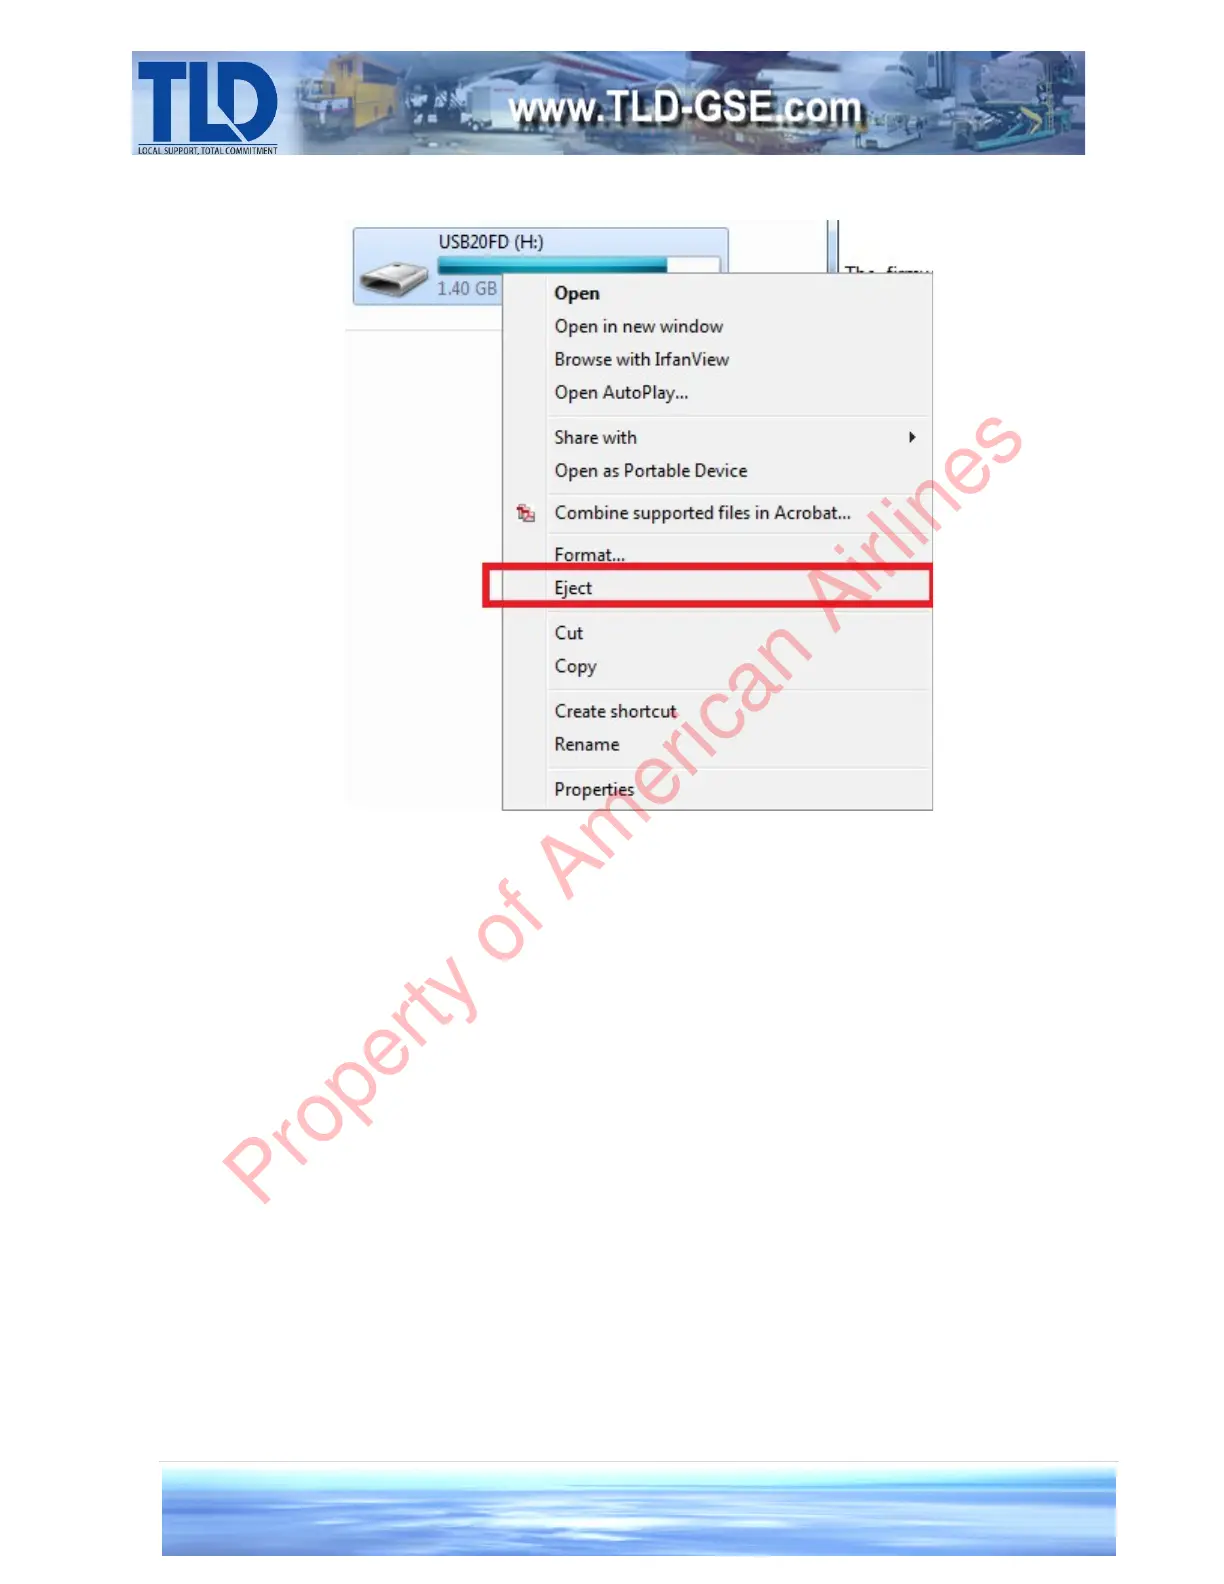
Figure 6: Safely Removing the Flash Drive
5. Turn on the GCM2. This is accomplished by connecting it to battery power with the GPU battery
disconnect switch. When the battery switch is turned from its off position to its on position, the GCM2 will
turn on automatically. Otherwise, the GCM2 can be turned on with any of the buttons on the front panel if
the battery is already connected while the GCM2 is in its off state.
6. The GCM2 will display the TLD logo and firmware version for 5 seconds before transitioning to the
blue start up screen. At this point, insert the USB flash drive with the update file into the USB port on the
right side of the GCM2. The GCM2 will automatically detect the flash drive, and a series of message will be
displayed. When the GCM2 arrives at the message “Press RED Key to Load”, the firmware version to be
loaded will be displayed. Ensure that the name of this file is the same as the one obtained in step 5. If this
is not true, it is likely that there are older versions of the GCM2 update file that need to be deleted from the
flash drive .
Note that the GCM2 will not re-load the update file if the file name already matches the firmware version
currently installed in the GCM2, in that case it will show a message “Vx.xx Firmware Installed” followed by
“Remove USB Memory”.
Property of American Airlines