8
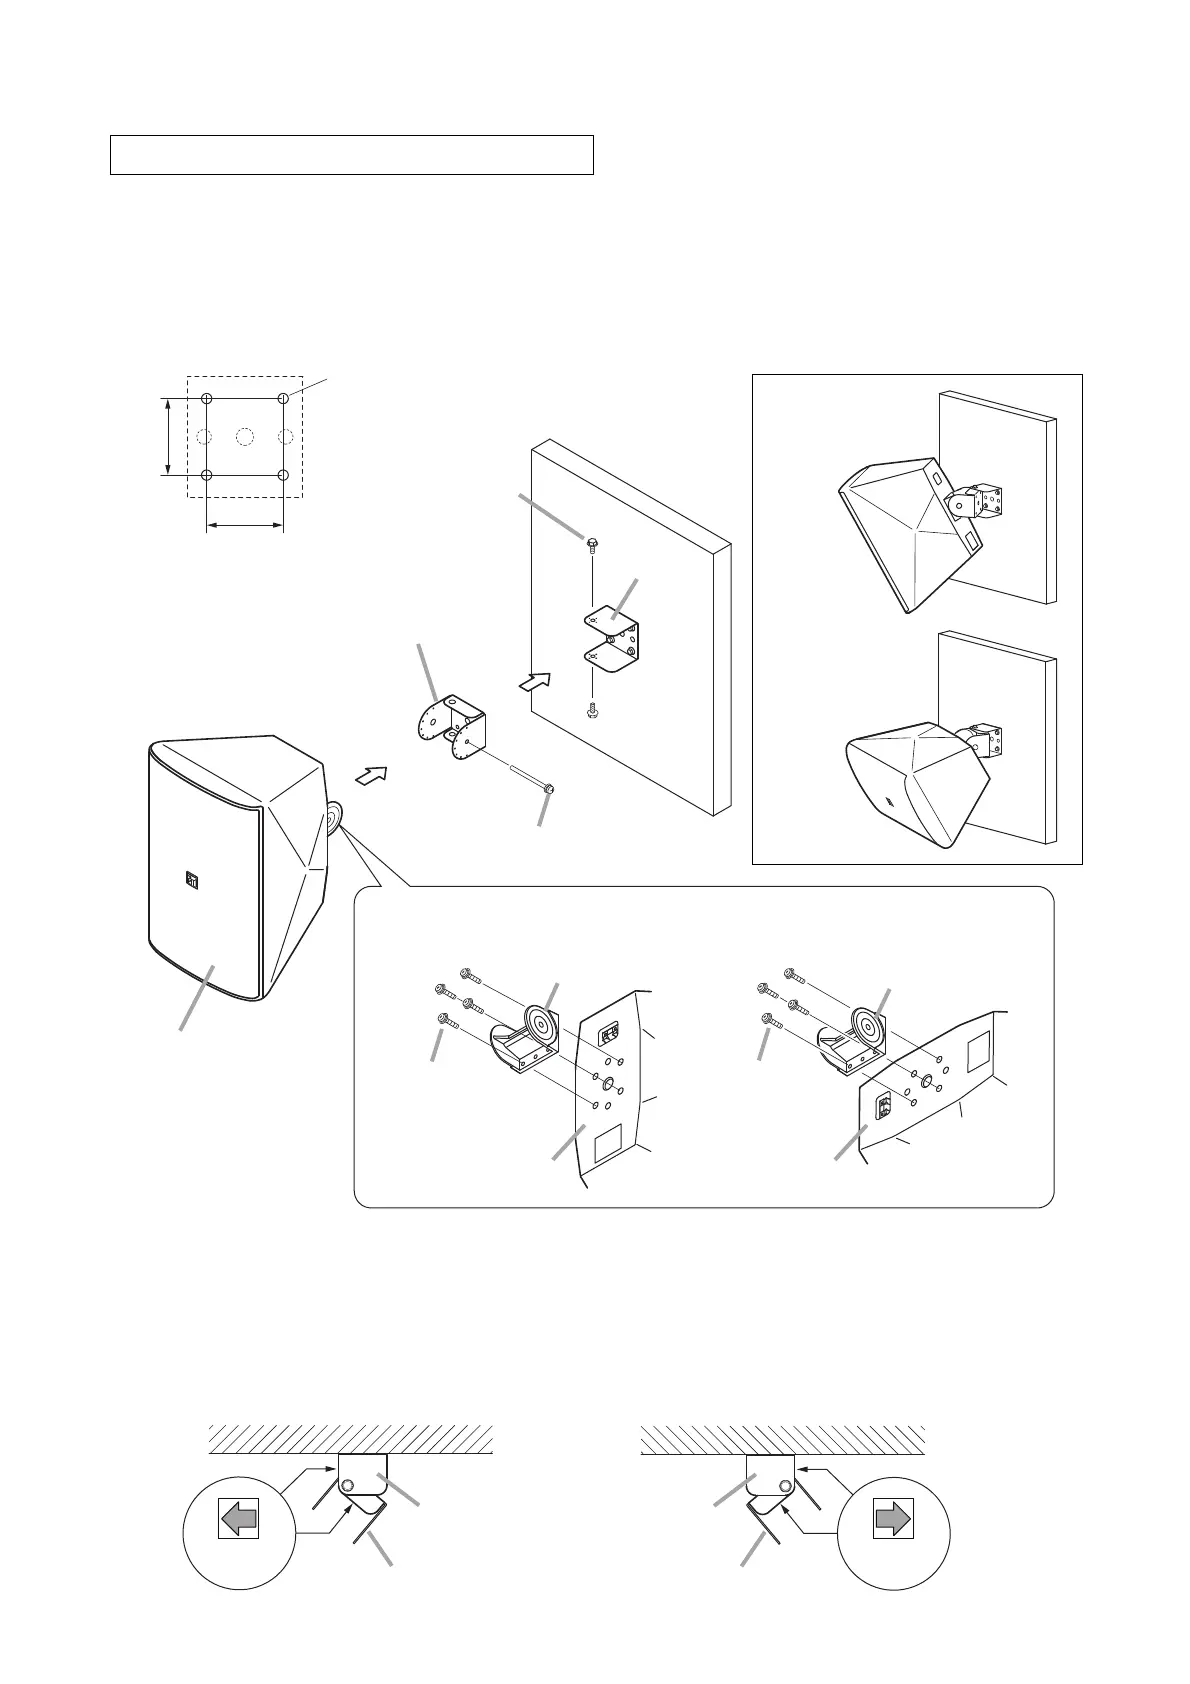
8.3. Wall Mounting
Use the supplied wall bracket, joint bracket, and speaker bracket to permit adjustment of the horizontal and
vertical* speaker coverage angles.
* Vertical installation. Horizontal: Max. 70º, Vertical: Max. 45º downward
Horizontal installation. Horizontal: Max. 45º, Vertical: Max. 45º downward
When adjusting horizontal and vertical angles:
45 mm
45 mm
4-ø6 mm
[Wall bracket mounting dimensions]
Vertical speaker
mounting
Horizontal speaker
mounting (indoor
installation only)
Speaker unit
Speaker unit (rear)
Joint bracket
Fixing bolt M6 x 85
Wall bracket
Speaker bracket
1
3
2
4
6
Machine screw
M5 x 20 (with plain
washer and spring
washer)
Machine screw
M5 x 20 (with plain
washer and spring
washer)
[Vertical speaker installation] [Horizontal speaker installation]
Speaker unit (rear)
Speaker bracket
Hexagon bolt M6 x 12
(with plain washer
and spring washer)
Step 1. Mount the wall bracket to the wall surface.
Match the orientation of the arrow label with the horizontal direction (left or right) the speaker faces.
Note: Hardware used for mounting the wall bracket to the wall is not supplied.
Joint bracket
Wall bracket
• Arrow label orientation (Viewed from top of brackets)
[Left-facing orientation]
[Right-facing orientation]
Arrow label
Joint bracket
Wall bracket
Arrow label