14
❏ ❏ 4. Re-mount the nacelle cover to the wing.
If you’ve mounted retracts, read the Hot Tip that
follows. Then, cycle the gear a few times to make
sure everything works. (If necessary, use a sanding
drum to enlarge the half-round notch at the front of
the opening in the nacelle cover.)
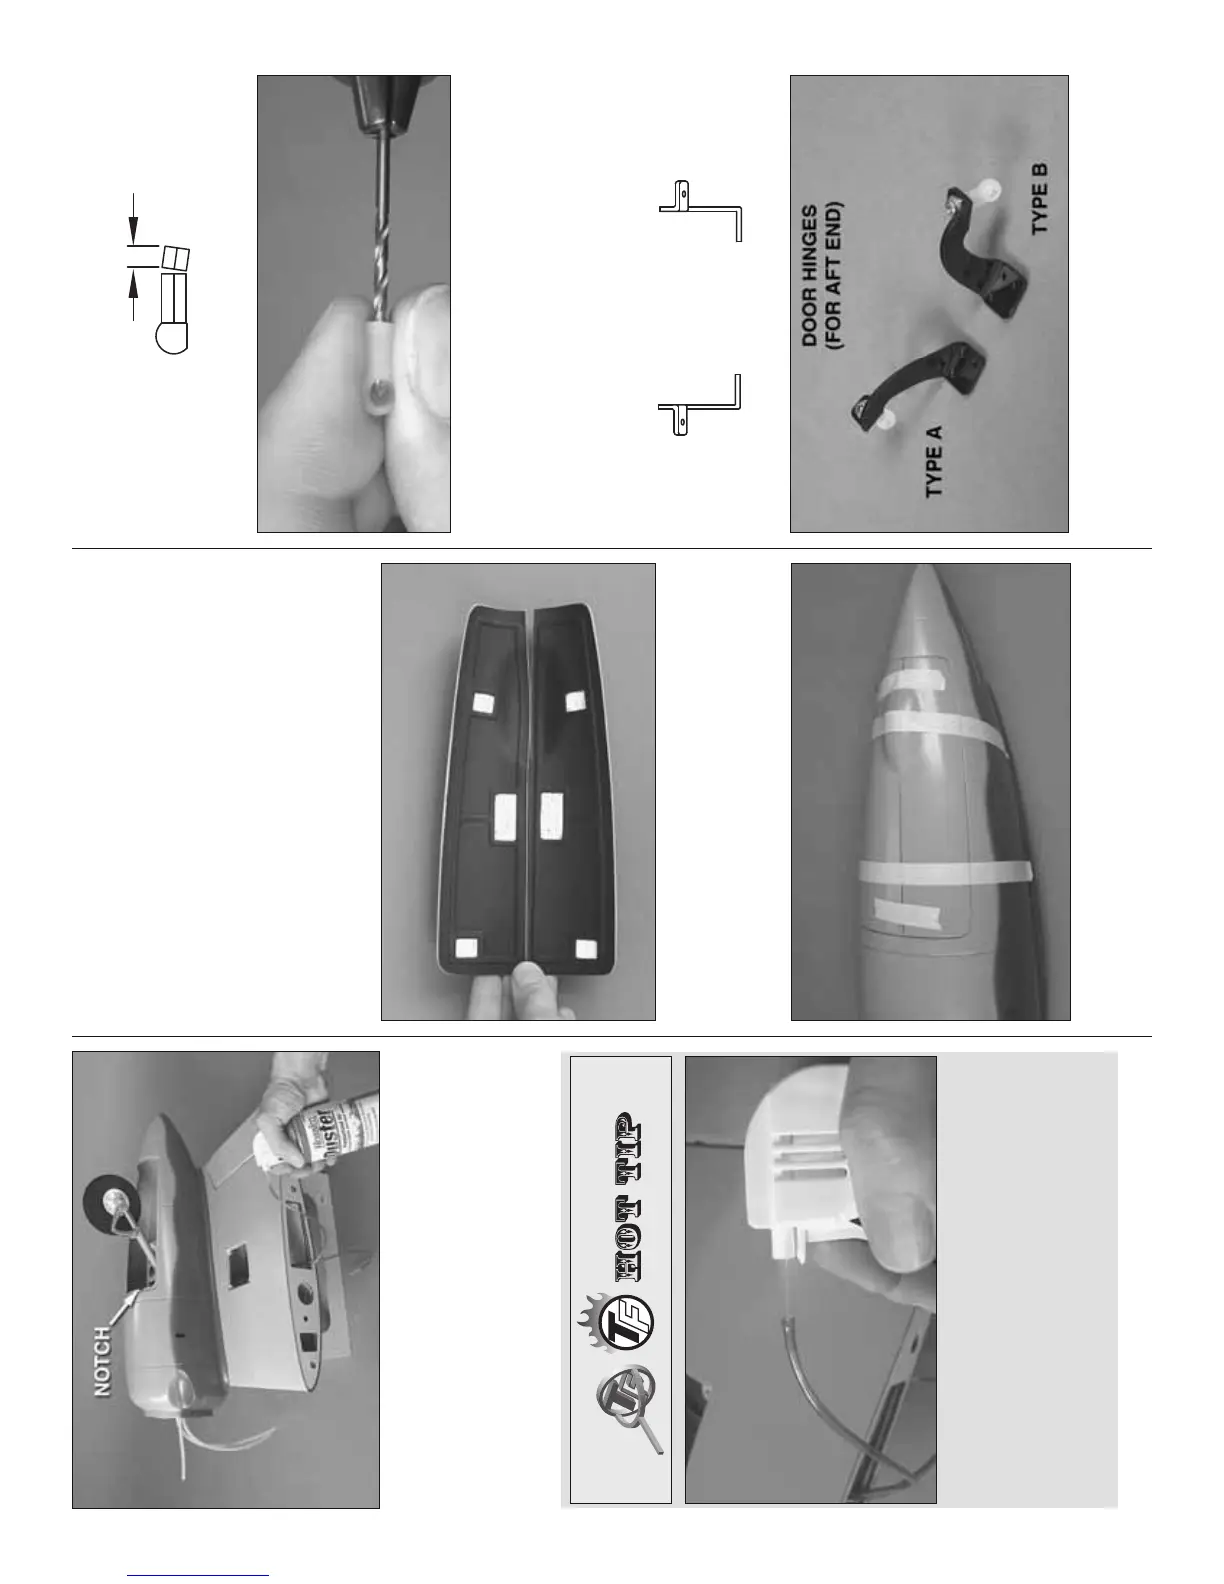
The landing gear can be easily cycled with a can
of compressed air such as a Hobbico Duster. Cut
two 1" [25mm] pieces from the tube that comes with
the can. Fit the tubes into the ends of both air lines
coming from the wing that are connected to the
gear. Connect one tube to the Duster to extend the
gear and connect the other tube to retract the gear.
❏ 5. Mount the right nacelle cover the same way.
MOUNT THE MAIN LANDING GEAR DOORS
(FOR RETRACTS ONLY)
If using fi xed landing gear, skip to “Mount the
Cowl” on page 19.
❏ ❏ 1. Remove the nacelle covers from the wing panels.
❏ ❏ 2. Look at the photos on page 15 to see where
the door hinges are mounted. Use coarse sandpaper
to roughen the inside of the left nacelle cover where
the landing gear door hinges will go.
❏ ❏ 3. Use a hobby knife to scrape away the black
paint from the recesses inside one set of fi berglass
main landing gear doors so the glue will adhere for
the door hinges.
❏ ❏ 4. Place the doors on the left nacelle cover. Use
masking tape to tape the doors together, and then
tape them to the nacelle cover.
1/8"
[3mm]
BALL LINKS FOR REAR DOOR HINGES
❏ ❏ 5. Use a single-edge razor blade to cut 1/8" [3mm]
off two nylon ball links—do your best to cut the ends
square. Drill the holes for the screw in the ball links the
rest of the way through with a 5/64" [2mm] drill bit.
(These are the hinges that are glued onto the gear doors.)
DOOR HINGES
TYPE A TYPE B
❏ ❏ 6. Mount one of the ball links you just cut off
to a “TYPE A” door hinge and mount the other ball
link you just cut off to a “TYPE B” door hinge with a