16
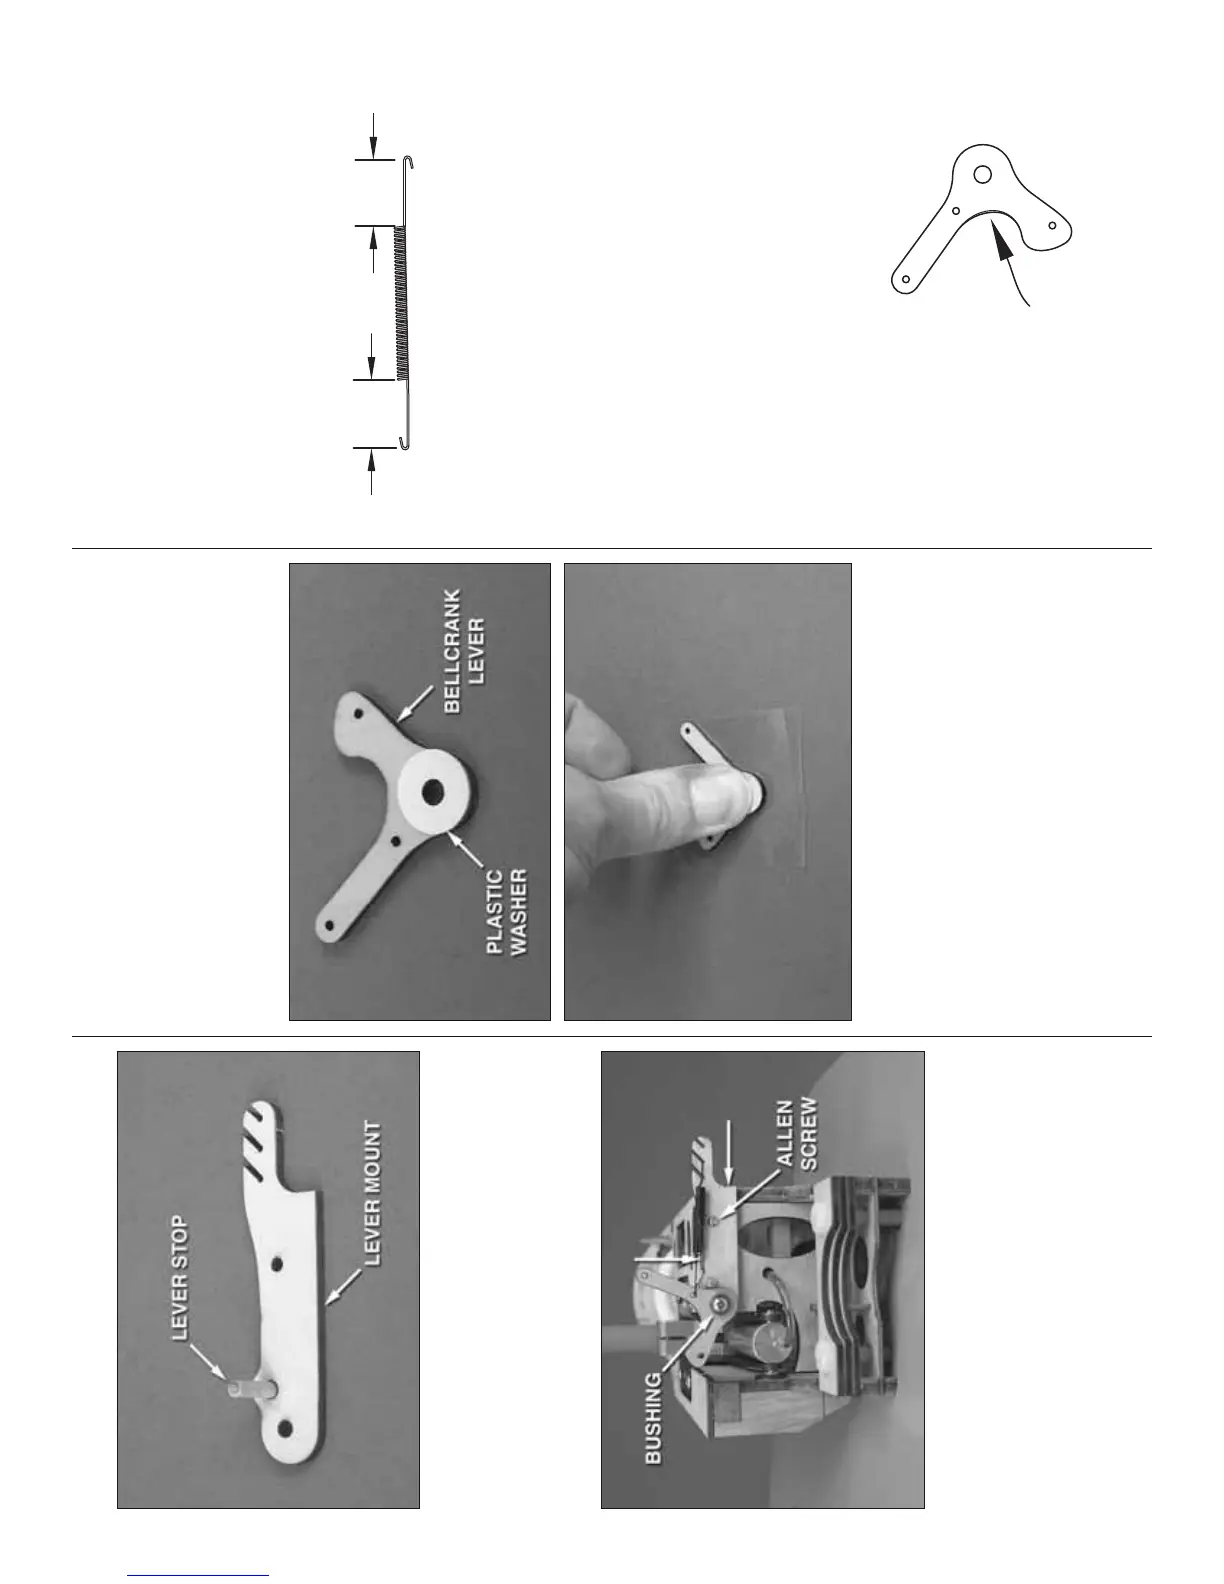
HOOK UP THE MAIN LANDING GEAR DOORS
❏ ❏ 1. Glue a 1/8" x 1/2" [3 x 15mm] hardwood
dowel lever stop into one of the lever mounts as
shown. The end of the stop should be fl ush with the
other side of the mount.
Use this photo for the next 8 steps.
❏ ❏ 2. Hold the lever mount on the back of the
nacelle as shown—the outer edge of the mount
should be even with the side of the nacelle and the
top of the mount should be even with the bottom edge
of the nacelle (where indicated by the arrows). Using
the small hole in the right side of the lever mount as
a guide, drill a 1/16" [1.6mm] hole into the nacelle.
Mount the lever mount to the nacelle with a #2 x 3/8"
[9.5mm] button-head Allen screw.
❏ ❏ 3. Use the other hole in the lever mount as a
guide to drill a 3/32" [2.4mm] hole into the nacelle for
the #4 screw that will hold in the bellcrank.
❏ ❏ 4. Remove the lever mount. Temporarily thread
a #4 x 5/8" [16mm] Phillips screw into the larger hole
you drilled. Remove the screw. Add a few drops of
thin CA to both screw holes and allow to harden.
❏ ❏ 5. Use medium CA to glue a 5mm I.D. x 12mm
O.D. thin, plastic washer to the front surface of the
plywood bellcrank lever. (Six washers are included in
the kit—two are for the levers on the main landing
gear doors, one is for the lever on the nose landing
gear and three are left over for spares.) The easiest
way to glue on the washer is to pick it up with a hobby
knife, apply a thin fi lm of thin CA to it and place it
on the lever centered over the hole. Then turn the
lever over and press down over a piece of plastic fi lm
(from a sandwich bag or leftover MonoKote backing)
or wax paper.
❏ ❏ 6. Remount the lever mount to the nacelle with
the #2 x 3/8" [9.5mm] button-head screw. Fit a brass
bushing into the plywood bellcrank lever as shown.
Mount the bellcrank lever to the lever mount and the
nacelle with the #4 x 5/8" [16mm] screw. Tighten the
screw as much as possible without causing the lever
to bind.
3/8"
[10mm]
3/8"
[10mm]
❏ ❏ 7. Bend a hook on each end of the spring where
shown and cut off the excess wire. Connect the spring
to the bellcrank lever and the lever mount as shown—
there should be just enough tension in the spring to
pull the lever to the lever stop. Later, if necessary,
the spring tension can be adjusted by using another
notch in the lever mount. Move the bellcrank up and
down to make sure it moves smoothly with a small
amount of resistance from the spring. Make any
adjustments necessary.
❏ ❏ 8. Mount the nacelle cover with the doors
attached to the wing panel. Note: If the doors ever
require removal for repairs/servicing, do not pop off
the ball links. Instead, unscrew the 2-56 screws from
the ball links.
If necessary, trim
the lever here.
❏ ❏ 9. Test the “action” of the landing gear and
the lever mechanism by operating the system with